Deploying website files to multiple folders with exclusions

When automating deployments it is sometimes needed to create copy of your website/folder in different locations with some excluded files e.g. configuration files or temp folders.

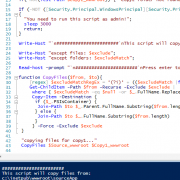
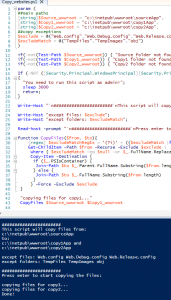
The script below will help you to achieve that. It can be triggered automatically on your post-deployment action (possibly in your CI server) or executed manually. Script just copies all files from source folder into multiple locations, except for the files and sub-folders you specify. Files with the same names will be overridden in target locations.

Copy_websites

param (
##main paths
[string]$Source_wwwroot = "c:\inetpub\wwwroot\sourceApp",
[string]$Copy1_wwwroot = "c:\inetpub\wwwroot\copy1App",
[string]$Copy2_wwwroot = "c:\inetpub\wwwroot\copy2App",
##copy exceptions
$exclude = @("Web.config","Web.Debug.config","Web.Release.config"),
$excludeMatch = @("TempFiles","TempImages","obj")
)

if(-not(Test-Path $Source_wwwroot)) { "Source folder not found!"; return;}
if(-not(Test-Path $Copy1_wwwroot)) { "Copy1 folder not found!"; return;}
if(-not(Test-Path $Copy2_wwwroot)) { "Copy2 folder not found!"; return;}

If (-NOT ([Security.Principal.WindowsPrincipal][Security.Principal.WindowsIdentity]::GetCurrent()).IsInRole([Security.Principal.WindowsBuiltInRole] "Administrator"))
{ 
  "You need to run this script as admin!";
  sleep 3000
  return;
}

Write-Host "`n#######################`nThis script will copy files from: `n$Source_wwwroot `nto: `n$Copy1_wwwroot and`n$Copy2_wwwroot `n";

Write-Host "except files: $exclude";
Write-Host "except folders: $excludeMatch";

Read-host -prompt "`n#######################`nPress enter to start copying the files"

function CopyFiles($from, $to){
    [regex] $excludeMatchRegEx = ‘(?i)‘ + (($excludeMatch |foreach {[regex]::escape($_)}) –join “|”) + ‘’
    Get-ChildItem -Path $from -Recurse -Exclude $exclude | 
     where { $excludeMatch -eq $null -or $_.FullName.Replace($from, "") -notmatch $excludeMatchRegEx} |
     Copy-Item -Destination {
      if ($_.PSIsContainer) {
       Join-Path $to $_.Parent.FullName.Substring($from.length)
      } else {
       Join-Path $to $_.FullName.Substring($from.length)
      }
     } -Force -Exclude $exclude
 }

 "copying files for copy1..."
 CopyFiles $Source_wwwroot $Copy1_wwwroot

 "copying files for copy2..."
 CopyFiles $Source_wwwroot $Copy2_wwwroot

"Done!";
sleep 10000

Enjoy!
Copy_websites

1 Star2 Stars3 Stars4 Stars5 Stars (No Ratings Yet)
Loading...Loading...

Adding links and styled text to Power-Point presentation

Formatting paragraphs in OpenXML documents is playing crucial part in proper implementation as the very common requirement is to change PowerPoint files programmatically during the business workflow processes.
I have recently received lot of queries about how to insert formatted text and links into the presentation. Hence, in this article I will show you how to do it.

In the past I have written article about auto generating Power-Point documents from the template file, in this part I will extend the functionality I have implemented before.

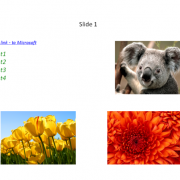
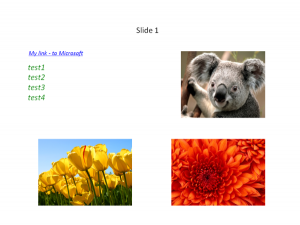
power-point-links

Let’s start with defining placeholder paragraphs we will use to insert our formatted texts and links:

 var templ = new PowerPointTemplate();
 templ.PowerPointParameters.Add(new PowerPointParameter() { Name = "[#Paragraph1#]", Text = "Slide 1" });
 templ.PowerPointParameters.Add(new PowerPointParameter() { Name = "[#Paragraph2#]", Text = "Slide 2" });
 templ.PowerPointParameters.Add(new PowerPointParameter() { Name = "[#List1(string[])#]", Text = "test1 n test2 n test3 n test4" });
 templ.PowerPointParameters.Add(new PowerPointParameter() { Name = "[#List2(string[])#]", Text = "test1 n test2 n test3 n test4" });

 templ.PowerPointParameters.Add(new PowerPointParameter() { Name = "[#Link1(#link#)#]", Text = "My link - to Microsoft; https://microsoft.com" });
 templ.PowerPointParameters.Add(new PowerPointParameter() { Name = "[#Link2(#link#)#]", Text = "My link - to Google; https://google.com" });

As you can see, we will handle text lists and single links defined in our template. Of course the names and params will depend on your requirements.

I will skip describing how the process works as this can be read in my previous article. I will go straight to the styled paragraph creation.

Function below returns new paragraph with the styles we have defined in parameters. The RunProperties class is created, then we are assigning the styles – please note that the color needs to be converted to HEX before adding it to run properties. Next we need to define the text-box object containing paragraph’s text. At the end we simply need to append run properties and text to the run and finally append run to the paragraph object.

If you need multiple colors within one paragraph, simply create multiple texts, runs and run properties and configure it separately before assigning it to the paragraph object.

 public Paragraph CreateStyledParagraph(string text, System.Drawing.Color color, bool isBold, bool isItalic, int fontSize = 2000)
 {
    var runProperties = new RunProperties(); //set basic styles for paragraph
    runProperties.Bold = isBold;
    runProperties.Italic = isItalic;
    runProperties.FontSize = fontSize;
    runProperties.Dirty = false;

    var hexColor = color.R.ToString("X2") + color.G.ToString("X2") + color.B.ToString("X2");//convert color to hex
    var solidFill = new SolidFill();
    var rgbColorModelHex = new RgbColorModelHex() { Val = hexColor };

    solidFill.Append(rgbColorModelHex);
    runProperties.Append(solidFill);

    //use this to assign the font family
    runProperties.Append(new LatinFont() { Typeface = "Arial Black" });

    var textBody = new Drawing.Text();
    textBody.Text = text; //assign text

    var run = new Drawing.Run();
    var newParagraph = new Paragraph();

    run.Append(runProperties);//append styles
    run.Append(textBody);//append text
    newParagraph.Append(run);//append run to paragraph

    return newParagraph;
}

Creating links is a little bit different. In order to do it we first need to create HyperlinkRelationship in the slide, the HyperlinkOnClick class contained within the run will then map to it on user click event. Please note that link color is not supported.

 public Paragraph CreateStyledLinkParagraph(SlidePart slidePart, string url, string text, bool isBold, bool isItalic, int fontSize = 2000)
 {
    //note: HyperlinkOnClick does not support link color

    var relationshipId = "rIdlink" + Guid.NewGuid().ToString();//create unique id
    slidePart.AddHyperlinkRelationship(new System.Uri(url, System.UriKind.Absolute), true, relationshipId);//assign hyperlink to the current slide we process

    var runProperties = new RunProperties(
         new LatinFont() { Typeface = "Bodoni MT Black"},
         new HyperlinkOnClick() { Id = relationshipId }); //set basic styles and assign relationshipId
    runProperties.Bold = isBold;
    runProperties.Italic = isItalic;
    runProperties.FontSize = fontSize;
    runProperties.Dirty = false;

    var textBody = new Drawing.Text();
    textBody.Text = text; //assign text

    var run = new Drawing.Run();
    var newParagraph = new Paragraph();

    run.Append(runProperties);//append styles
    run.Append(textBody);//append text
    newParagraph.Append(run);//append run to paragraph

    return newParagraph;
 }

The final replacement is being done in ReplaceText function. See in-line comments:

 void ReplaceText(Paragraph paragraph, SlidePart currentSlide)
 {
    var parent = paragraph.Parent; //get parent element - to be used when removing placeholder
    var dataParam = new PowerPointParameter();

    if (ContainsParam(paragraph, ref dataParam)) //check if paragraph is on our parameter list
    {
        //insert text list
        if (dataParam.Name.Contains("string[]")) //check if param is a list
        {
            var arrayText = dataParam.Text.Split(Environment.NewLine.ToCharArray()); //in our case we split it into lines

            if (arrayText is IEnumerable) //enumerate if we can
            {
                foreach (var itemData in arrayText)
                {
                    //var newParagraph = CloneParaGraphWithStyles(paragraph, dataParam.Name, itemData);// create new param - preserve styles
                    var newParagraph = CreateStyledParagraph(itemData.Trim(), System.Drawing.Color.Green, false, true, 2000);

                    parent.InsertBefore(newParagraph, paragraph); //insert new element
                }
            }
            paragraph.Remove();//delete placeholder
        }
        else if (dataParam.Name.Contains("#link#")) //check if param is a link
        {
            var linkText = dataParam.Text.Split(';')[0].Trim();
            var linkUrl = dataParam.Text.Split(';')[1].Trim();

            var newParagraph = CreateStyledLinkParagraph(currentSlide, linkUrl, linkText, false, true, 1500);
            parent.InsertBefore(newParagraph, paragraph); //insert new element

            paragraph.Remove();//delete placeholder
        }
        else
        {
            //insert text line
            var param = CloneParaGraphWithStyles(paragraph, dataParam.Name, dataParam.Text); // create new param - preserve styles
            parent.InsertBefore(param, paragraph);//insert new element

            paragraph.Remove();//delete placeholder
        }
    }
 }

I have included fully working solution below so you can easily convert it to your needs. I hope this information was useful for you 🙂

PowerPoint-styled-TextLinks

1 Star2 Stars3 Stars4 Stars5 Stars (No Ratings Yet)
Loading...Loading...

PowerShell unattended execution with auto-retry and SMS alerts

Running automated processes seems to be an very easy task. However, this may become a little bit more complicated for running critical unattended operations. Imagine the situation when you have to run critical, automated process at night while your business relies on successful completion of it.

For example, if you are running ETL process at night that loads the data to be available for the users next morning. You want to be warned if something is wrong as you won’t have enough time to load it next morning say before 9am. During the process, you may get either data or the infrastructure related error – one of the servers may be down for a few seconds causing entire operation to fail.
Automated-execution
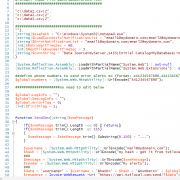
The script below resolves some of the potential problems that may occur in similar scenario by auto-retrying processes on error and sending SMS alerts directly to your mobile, so you will probably be alerted much earlier unless you read emails at night 🙂


In the script, you can define multiple input files to be run by the process you define. For example you may define multiple dtx packages to be run one by one. Whatever the process will run, you need to make sure that it will return 0 on successful completion or return non zero integer on error. If the exe process will not close itself returning the exit code, then it will hang forever.

Except for input files and exe process, you also need to define execution wait times, email recipient list, smtp server and database connection if you need to log audit information. If you want to send SMS alerts, you will also need to create account on txtlocal.co.uk.

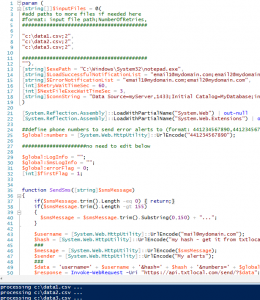
For this example I have defined three csv files (data1.csv, data2.csv, data2.csv) to be run in notepad (with auto retry twice for each of them), closing notepad manually will simulate successful completion. Of course you need to adjust it to your requirements.


 param (
[string[]]$inputFiles = @(
#add paths to more files if needed here
#format: input file path;NumberOfRetries,
#########################################

"c:\data1.csv;2",
"c:\data2.csv;2",
"c:\data3.csv;2",

#########################################
""),
[string]$exePath = "C:\Windows\System32\notepad.exe",
[string]$LoadSuccessfulNotificationList = "email1@mydomain.com;email2@mydomain.com",
[string]$ErrorNotificationList = "email1@mydomain.com;email2@mydomain.com",
[int]$RetryWaitTimeSec = 60,
[int]$NextFileExecWaitTimeSec = 3,
[string]$connString = "Data Source=myServer,1433;Initial Catalog=MyDatabase;integrated security=SSPI;persist security info=False;Trusted_Connection=Yes"
)

[System.Reflection.Assembly]::LoadWithPartialName("System.Web") | out-null
[System.Reflection.Assembly]::LoadWithPartialName("System.Web.Extensions") | out-null

##define phone numbers to send error alerts to (format: 441234567890,441234567892)
$global:numbers = [System.Web.HttpUtility]::UrlEncode("441234567890");

#####################no need to edit below

$global:LogInfo = "";
$global:SmsLogInfo = "";
$global:errorFlag = 0;
[int]$firstFlag = 1;


function SendSms([string]$smsMessage)
{
    if($smsMessage.trim().Length -eq 0) { return;}
    if($smsMessage.trim().Length -gt 155) 
    {
      $smsMessage = $smsMessage.trim().Substring(0,150) + "...";
    }

    $username = [System.Web.HttpUtility]::UrlEncode("mail@mydomain.com");
    $hash = [System.Web.HttpUtility]::UrlEncode("my hash - get it from txtlocal.co.uk");##if not working please check credentials at https://control.txtlocal.co.uk/docs/
    ###
    $message = [System.Web.HttpUtility]::UrlEncode($smsMessage);
    $sender = [System.Web.HttpUtility]::UrlEncode("My alerts");
    ###
    $data = 'username=' + $username + '&hash=' + $hash + '&numbers=' + $global:numbers + "&sender=" + $sender + "&message=" + $message;
    $response = Invoke-WebRequest -Uri "https://api.txtlocal.com/send/?$data";
    ###
    $ser = New-Object System.Web.Script.Serialization.JavaScriptSerializer;
    $result = $ser.DeserializeObject($response.Content);

    return $result;
}

Function LogToDatabase($exitCode,$inputFilePath,$duration,$cpu,$description)
{
    $inputFileName = [System.IO.Path]::GetFileName($inputFilePath);

    $SqlConnection = new-object System.Data.SqlClient.SqlConnection;
    $SqlConnection.ConnectionString = $connString;
    $SqlCommand = $SqlConnection.CreateCommand();
    $SqlCommand.CommandType = [System.Data.CommandType]::StoredProcedure;
    $SqlCommand.CommandText = "MonitorAudit_Save";

    $SqlCommand.Parameters.AddWithValue("@PCName", [Environment]::MachineName + " - " + [Environment]::UserDomainName + "/" + [Environment]::UserName) 
    $SqlCommand.Parameters.AddWithValue("@ExePath", $exePath) | Out-Null

    $SqlCommand.Parameters.AddWithValue("@ExitCode", $exitCode) | Out-Null
    $SqlCommand.Parameters.AddWithValue("@InputFilePath", $inputFilePath) | Out-Null
    $SqlCommand.Parameters.AddWithValue("@InputFileName", $inputFileName) | Out-Null

    $SqlCommand.Parameters.AddWithValue("@Duration", $duration) | Out-Null

    $SqlCommand.Parameters.AddWithValue("@CPU", $cpu) | Out-Null
    $SqlCommand.Parameters.AddWithValue("@Description", $description) | Out-Null

    $SqlConnection.Open()
    $SqlCommand.ExecuteNonQuery()
    $SqlConnection.Close()
}

 Function SendEmail($SendEmailsTo_, $EmailSubject_, $changes_)
 {
   $emailFrom = "errors@mydomain.com" 
   $smtpserver="mysmtp_server" 
   $smtp=new-object Net.Mail.SmtpClient($smtpServer) 
 
   foreach ($email in $SendEmailsTo_.split(';'))
   {   
      if($email.Length -gt 0)
      {
        $smtp.Send($emailFrom, $email, $EmailSubject_, $changes_);
      }
   }
 }
 
$inputFiles | Foreach-Object {
   
  if($_.trim().Length -gt 0)  {

      [int]$numOfRetries = 1;
      if($_.split(';').Length -gt 1) {
        $numOfRetries = $_.split(';')[1]; if($numOfRetries -lt 1) { $numOfRetries = 1 }
      }

      if($firstFlag -eq 0 -and $NextFileExecWaitTimeSec -gt 0){
        $global:LogInfo += "Waiting $NextFileExecWaitTimeSec seconds to execute next input file...`r`n`r`n";
        Start-Sleep -s $NextFileExecWaitTimeSec
      }
      if($firstFlag -ne 0) { $firstFlag = 0;}

      for ($i = 0; $i -le $numOfRetries -1; $i++) {
       try
        {
           [string]$inputFilePath = $_.split(';')[0]; "processing $inputFilePath ..."; $dateStart = (Get-Date).ToString(); [DateTime]$dateStartObj = (Get-Date);

           if(-not(Test-Path $inputFilePath))
           {
              throw New-Object System.Exception ("Input file not found: $inputFilePath");
           }

           if(-not(Test-Path $exePath))
           {
              $global:errorFlag =1;
              throw New-Object System.Exception ("Process exe not found: $exePath");
           }

           #add -windowstyle Hidden when in production
           $exeProcess= Start-Process $exePath -Wait -PassThru -ErrorAction SilentlyContinue  -WarningAction SilentlyContinue -ArgumentList " `"$inputFilePath`"" 
           

           #log info
           $cpu = $exeProcess.CPU.ToString("##.#"); $dateEnd = (Get-Date).ToString(); $global:LogInfo += " $inputFilePath `r`nAverage CPU: $cpu | Start time $dateStart | End time $dateEnd`r`n`r`n";

           if(-not $exeProcess.ExitCode -eq 0)
           {
              throw New-Object System.Exception ("execution error");
           }
           
           #uncomment below line to log to database
           #LogToDatabase $exeProcess.ExitCode $inputFilePath (Get-Date).Subtract($dateStartObj).TotalSeconds $exeProcess.CPU.ToString("##.#") "OK" | Out-Null

           break;
        } 
        catch { 
           $global:errorFlag =1;
          try
           {
           $inputFileName = [System.IO.Path]::GetFileName($inputFilePath);
           } catch { $inputFileName = ""; }

           $msg = "$LogInfo Unexpected Error when processing $inputFileName. Error: $_";  Write-Host $msg -foreground Red;
           $global:LogInfo += "###########`r`nUnexpected Error when processing $inputFileName`r`n" + "Error: $_ `r`n##########`r`n`r`n";
 
           $global:SmsLogInfo += "Error processing: " + $inputFileName + " |"; 

           $cpu = "0";
           if ($exeProcess -ne $null) { $cpu = $exeProcess.CPU.ToString("##.#"); }

           #uncomment below line to log to database
           #LogToDatabase 1 $inputFilePath (Get-Date).Subtract($dateStartObj).TotalSeconds $cpu "Error: $_" | Out-Null

           #SendEmail $ErrorNotificationList "loading error" $msg
           if($i -gt $numOfRetries - 1 -or $i -eq $numOfRetries -1) { break;};

           #retry it
           $global:LogInfo += "Waiting $RetryWaitTimeSec seconds to retry...`r`n`r`n";
           Start-Sleep -s $RetryWaitTimeSec 
        } 
      }
   }
} 

if($errorFlag -eq 0) {
   SendEmail $LoadSuccessfulNotificationList "Loading process successful" "Processing has been successful for following input files: `r`n-------------------------`r`n$LogInfo Have a nice day :)";
}
else
{
   SendEmail $ErrorNotificationList "Loading process finished with errors" "Processing has NOT been successful for some of the input files: `r`n-------------------------`r`n$LogInfo";
   SendSms $global:SmsLogInfo;
}

Enjoy!
Automated-execution

1 Star2 Stars3 Stars4 Stars5 Stars (1 votes, average: 5.00 out of 5)
Loading...Loading...

Using Windows Azure Service Management REST API in automated tasks

Windows Azure platform gives us a lot of new possibilities starting from the ability to auto scale instances of the deployed application to performing an on demand automated changes. When handling multiple applications deployed to the cloud there is a need to automate daily processes in order to save the development time.

In this article I will show you how to automate process of creating new cloud service using Windows Azure REST API. In our example we will create custom Api helper to instantiate our request object that will be then used to invoke the Azure RestFul API procedure.

In order to access WA Api the Azure subscription password and user name is not required, all you need is the subscription ID and the management certificate. This creates the possibility to give some administrative tasks to other people in the company not necessarily having access to the subscription account.

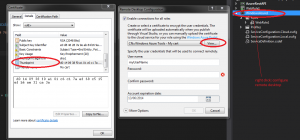
First thing to do is to create and upload management certificate into WA Management Portal. One of the ways to create certificate is to do it from within Visual Studio. In order to do that, we need to right click on our cloud project and open remote desktop configuration wizard. Next we need to select “create new” from the menu. After our certificate is created we can view it and export it to the .cer file. At this stage we also need to read the certificate’s thumb-print that will be used to find it in the local store.

The image below shows the process of configuring new RDP connection and creating new certificate
cert-config-azure

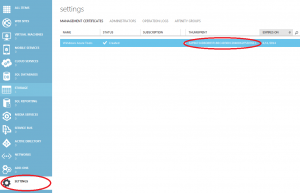
After we have created and exported certificate to the file, we can upload it to the WA Management Portal as shown below
azure-management-certificate

Please note that certificate thumb-print is the same as our local one.

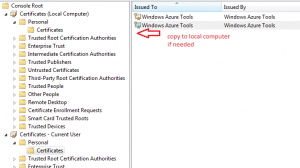
We also need to make sure that our Api helper will find the certificate in our local store. In order to check it’s location, please open Windows Management Console (mmc) and add snap-in for the current user and local computer certificates. Next you need to copy it as depicted below
certificates

At this stage we can start implementing our Api request helper. Let’s create custom PayLoadSettings class first that we will use to hold the basic request settings.

 public class PayLoadSettings
 {
    public string CloudServiceUrlFormat { get; set; }
    public string SubscriptionId { get; set; }
    public string Thumbprint { get; set; }
    public string ServiceName { get; set; }
    public string Label { get; set; }
    public string Description { get; set; }
    public string Location { get; set; }
    public string AffinityGroup { get; set; }
    public string VersionId { get; set; }
 }

Next let’s create function that retrieves our newly created (and uploaded to the WAM portal) certificate from the local machine store

/// <summary>
/// Get certificate from the local machine by thumbprint
/// </summary>
/// <returns></returns>
private X509Certificate2 GetX509Certificate()
{
    X509Certificate2 x509Certificate = null;
    var certStore = new X509Store(StoreName.My, StoreLocation.LocalMachine);
    try
    {
        certStore.Open(OpenFlags.ReadOnly);

        var x509CertificateCollection = certStore.Certificates.Find(X509FindType.FindByThumbprint, this.PayLoadSettings.Thumbprint, false);

        x509Certificate = x509CertificateCollection[0];
    }
    finally
    {
        certStore.Close();
    }

    return x509Certificate;
 }

Next, we want to create function that inserts our cert into new request object to be sent to execute remote action. We also need to set the requested Api version (not required though).

/// <summary>
/// Create http request object with the certificate added
/// </summary>
/// <param name="uri"></param>
/// <param name="httpWebRequestMethod"></param>
/// <returns></returns>
private HttpWebRequest CreateHttpWebRequest(Uri uri, string httpWebRequestMethod)
{
    var x509Certificate = GetX509Certificate();
    var httpWebRequest = (HttpWebRequest)HttpWebRequest.Create(uri);

    httpWebRequest.Method = httpWebRequestMethod;
    httpWebRequest.Headers.Add("x-ms-version", this.PayLoadSettings.VersionId);

    httpWebRequest.ClientCertificates.Add(x509Certificate);
    httpWebRequest.ContentType = "application/xml";

    return httpWebRequest;
}

Next step is to create payload document object containing the operation parameters that we want to execute. The names are self-explanatory.

/// <summary>
/// Create payload document
/// </summary>
/// <returns></returns>
private XDocument CreatePayload()
{
    var base64LabelName = Convert.ToBase64String(Encoding.UTF8.GetBytes(this.PayLoadSettings.Label));

    var xServiceName = new XElement(azureNamespace + "ServiceName", this.PayLoadSettings.ServiceName);
    var xLabel = new XElement(azureNamespace + "Label", base64LabelName);
    var xDescription = new XElement(azureNamespace + "Description", this.PayLoadSettings.Description);
    var xLocation = new XElement(azureNamespace + "Location", this.PayLoadSettings.Location);
    var xAffinityGroup = new XElement(azureNamespace + "AffinityGroup", this.PayLoadSettings.AffinityGroup);
    var createHostedService = new XElement(azureNamespace + "CreateHostedService");

    createHostedService.Add(xServiceName);
    createHostedService.Add(xLabel);
    createHostedService.Add(xDescription);
    createHostedService.Add(xLocation);
    createHostedService.Add(xAffinityGroup);

    var payload = new XDocument();
    payload.Add(createHostedService);

    payload.Declaration = new XDeclaration("1.0", "UTF-8", "no");

    return payload;
}

Having payload document created, we can send our request and retrieve request id if operation is successful.

/// <summary>
/// Invoke Api operation by sending payload object
/// </summary>
/// <param name="uri"></param>
/// <param name="payload"></param>
/// <returns></returns>
private string InvokeAPICreateRequest(string uri, XDocument payload)
{
    string requestId;
    var operationUri = new Uri(uri);

    var httpWebRequest = CreateHttpWebRequest(operationUri, "POST");

    using (var requestStream = httpWebRequest.GetRequestStream())
    {
        using (var streamWriter = new StreamWriter(requestStream, UTF8Encoding.UTF8))
        {
            payload.Save(streamWriter, SaveOptions.DisableFormatting);
        }
    }

    using (var response = (HttpWebResponse)httpWebRequest.GetResponse())
    {
        requestId = response.Headers["x-ms-request-id"];
    }

    return requestId;
}

The final function just puts it all together as follows

/// <summary>
/// Execute create cloud service request
/// </summary>
/// <returns></returns>
public string CreateCloudService()
{
    var cloudServiceUrl = string.Format(this.PayLoadSettings.CloudServiceUrlFormat, this.PayLoadSettings.SubscriptionId);
    
    var payload = CreatePayload();

    var requestId = InvokeAPICreateRequest(cloudServiceUrl, payload);

    return requestId;
}

If we will invoke the code from the console, the code should look as below

 static void Main(string[] args)
 {
    //load this from your configuration file
    var payLoadSettings = new PayLoadSettings()
    {
        CloudServiceUrlFormat = "https://management.core.windows.net/{0}/services/hostedservices",
        SubscriptionId = "92533879-88c9-41fe-b24e-5251bcf49a8f",//fake subscription id - please provide yours
        Thumbprint = "3a f6 67 24 d8 d8 b3 71 b0 c4 d3 00 c2 04 0d 62 e5 30 76 1c", //fake cert thumbprint - please provide yours
        ServiceName = "newService1234567",//name your new service
        Label = "newService1234567", //give it a tracking label
        Description = "My new cloud service", //service description
        Location = "North Europe",//select centre
        AffinityGroup = "", //not created yet
        VersionId = "2011-10-01"//api version
    };

    var api = new RestAPIHelper(payLoadSettings);

    try
    {
        var requestId = api.CreateCloudService();

        Console.WriteLine("Cloud service has been created successfully :)" + Environment.NewLine + "Request id: " + requestId);
        Console.ReadLine();
    }
    catch (Exception ex)
    {
        Console.WriteLine(ex.Message);
        Console.ReadLine();
    }
}

Let’s run the console application now
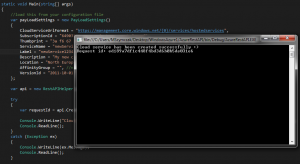
cloud-service-created

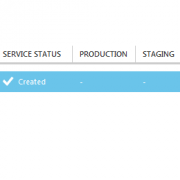
After executing above we can check in WA Management Portal if the cloud service is created. This should look like image below

newcloudservice

I have attached project files for your tests. Please note that you need to set your own configuration settings for it to be working. You can also use above example to create your own automated tasks for Windows Azure – simply implement other operations in similar way. You can then use for example TeamCity to run it automatically when needed. This gives you a lot of possibilities and simply saves your precious development time.

AzureRestAPI

1 Star2 Stars3 Stars4 Stars5 Stars (No Ratings Yet)
Loading...Loading...