Using Power-Shell in automated tasks (batch script alternative)

Power Shell it’s the Microsoft’s Automation framework sitting on top of .Net (System.Management.Automation) that lets us perform advanced automated tasks. It can help not only the administrators but also the programmers to save a lot of time by automating repeatable processes. The script’s syntax is quite intuitive and easy to learn so it allows users already writing e.g. batch scripts to grasp it very fast.

If we have for example an old batch file that executes sql scripts stored in the folder as follows:

 @ECHO OFF
 echo script folder: %1
 echo server: %2
 echo database: %3
 echo database user: %4
 echo ----------------

setlocal enabledelayedexpansion
cd /d %1

for %%d in (*.sql) do (
   set filecontent=
   for /f "delims=" %%a in (%%d) do (set "filecontent=!filecontent!%%a")
   set "temp=!filecontent!"
   set "filecontent=!temp:#PARAM#=%4!"
   echo executing %%d
   echo ----------
   sqlcmd -S%2 -E -Q"!filecontent!" -d%3 
)
pause

then the above script can be easily replaced with Power-Shell. Using PS gives us the same flexibility of scripting languages and at the same time allows us to interact with .Net framework when required.

Before we can start executing PS scripts on our computer, we need to enable execution which is disabled by default. We can do it using following cmdlets:

 //enable executing 
 Set-ExecutionPolicy RemoteSigned

 //get back to default settings
 Set-ExecutionPolicy Default

After we’ve created test.ps1 file, we can start implementation. In order to make testing easier we can define default params inside the script using param(…) constructor. Please note that by using [string] keyword we actually creating strongly typed objects. Defined parameters will be overwritten by the user’s passed-in params.

ps-script

The first command (dir $ScriptFolder) just lists all files within the directory, then ForEach-Object function iterates through all files getting their content into $query variable. Next the $query text is being replaced with our parameter if we have any. The final task is just to execute SQLCMD command passing in query and database connection settings.

param (
[string]$ScriptFolder = "Database\Procedures",
[string]$Server = ".\SQL2008R2",
[string]$Database = "MyDb",
[string]$DatabaseUser = "user"
)


(dir $ScriptFolder) | 
  ForEach-Object { 
    $query = get-content $_.FullName -Raw
    $query = $query.Replace("#PARAM#","user");
    SQLCMD -S $Server -E -Q $query -d $Database
   }

In order to run our Power-Shell script we need just execute following line:

 //command line
 powershell -noexit C:\test.ps1 -ScriptFolder "C:\Database\Procedures" -Server ".\SQL2008R2" -Database "MyDB" -DatabaseUser "user"

Good luck with your Power-Shell scripting 🙂

1 Star2 Stars3 Stars4 Stars5 Stars (No Ratings Yet)
Loading...Loading...

Displaying interactive MS Chart objects in ASP.NET MVC

Displaying charts using MS Chart is usually simple in asp.net webform. The problem exists if we want to use it in Asp.net MVC application without putting it on .aspx page. In this article I will show you how to display interactive chart using purely MVC view.

mschart_mvc

Lets start with creating ChartHelper class that will contain basic logic for creating chart objects. In the function CreateDummyChart() we will just create standard MS Chart object with some dummy data.

 public static Chart CreateDummyChart()
 {
    var chart = new Chart() { Width = 600, Height = 400 };
    chart.Palette = ChartColorPalette.Excel;
    chart.Legends.Add(new Legend("legend1") { Docking = Docking.Bottom });

    var title = new Title("Test chart", Docking.Top, new Font("Arial", 15, FontStyle.Bold), Color.Brown);
    chart.Titles.Add(title);
    chart.ChartAreas.Add("Area 1");

    chart.Series.Add("Series 1");
    chart.Series.Add("Series 2");

    chart.BackColor = Color.Azure;
    var random = new Random();
    
    //add random data: series 1
    foreach (int value in new List<int>() { random.Next(100), random.Next(100), random.Next(100), random.Next(100) })
    {
        chart.Series["Series 1"].Points.AddY(value);

        //attach JavaScript events - it can also be ajax call
        chart.Series["Series 1"].Points.Last().MapAreaAttributes = "onclick=\"alert('value: #VAL, series: #SER');\"";
    }

    //add random data: series 2
    foreach (int value in new List<int>() { random.Next(100), random.Next(100), random.Next(100), random.Next(100) })
    {
        chart.Series["Series 2"].Points.AddY(value);

        //attach JavaScript events - it can also be ajax call
        chart.Series["Series 2"].Points.Last().MapAreaAttributes = "onclick=\"alert('value: #VAL, series: #SER');\"";
    }

    return chart;
 }

Next, we need to create function that takes our newly created chart object and saves it to memory stream. After that we only need to convert the stream to byte array and to base64 string afterwards.

Having image string created, we simply construct html “img” tag to be rendered by our view. Please note that “data:image/png;base64” attributes are necessary to tell the browser to render it as image.

 public static string GetChartImageHtml(Chart chart)
 {
    using (var stream = new MemoryStream())
    {
        var img = "<img src='data:image/png;base64,{0}' alt='' usemap='#" + ImageMap + "'>";

        chart.SaveImage(stream, ChartImageFormat.Png);

        var encoded = Convert.ToBase64String(stream.ToArray());

        return string.Format(img, encoded);
    }
 }

The final thing is to create DisplayChart() method in the view to be used by Html.RenderAction. Apart from chart’s image string, we also need to display chart’s image map in order to enable chart JavaScript events when needed.

public ActionResult DisplayChart()
{  
    var chart = ChartHelper.CreateDummyChart();
   
    var result = new StringBuilder();
    result.Append(ChartHelper.GetChartImageHtml(chart));
    result.Append(chart.GetHtmlImageMap(ChartHelper.ImageMap));

    return Content(result.ToString());
}

And finally this is our view

@{
    ViewBag.Title = "Home Page";
}

<h2>@ViewBag.Message</h2>

@{ Html.RenderAction("DisplayChart"); }

I have attached project files to save your time 🙂

mschart-mvc

1 Star2 Stars3 Stars4 Stars5 Stars (No Ratings Yet)
Loading...Loading...

Using WCF REST service in server and client side calls

When using WCF services sometimes there is a need to use REST architecture, especially for web applications. Using REST, brings a lot of benefits such as: broad caching possibilities, interoperability, simplicity etc. Also using REST with JSON instead of soap/xml based protocol decreases network bandwidth and makes it easier to utilize by JavaScript Ajax calls.

In this article I will show you how to retrieve and update data from WCF restful service using JSON protocol. In order to do that we will build request helper to wrap-up our requests sent from MVC application. We will also use JSONP data format to make cross-domain ajax calls to WCF service.

wcf_rest_json_calls

Let’s create MVC application and IIS hosted WCF service. In order to apply custom routing to our service, we will have to change following settings:
– set aspNetCompatibilityEnabled=”true” in WCF web.config file,
– set [AspNetCompatibilityRequirements(RequirementsMode = AspNetCompatibilityRequirementsMode.Allowed)] – to our service class,

We also need to set crossDomainScriptAccessEnabled=”true” in WCF web.config for our ajax calls from different domain (different localhost port).

Please see WCF web.config settings:

 <?xml version="1.0"?>
<configuration>
  <system.web>
    <compilation debug="true" targetFramework="4.0" />
    <authentication mode="None"/>
  </system.web>
  <system.serviceModel>
     <bindings>
        <webHttpBinding>
          <binding name="webHttpBindingWithJsonP" crossDomainScriptAccessEnabled="true" />
        </webHttpBinding>
      </bindings>
    <services>
      <service name="WCFRestfulService.MyService" behaviorConfiguration="RESTBehavior">
        <endpoint address=""  binding="webHttpBinding" contract="WCFRestfulService.IRestService"
                  behaviorConfiguration="MyEndpointBehavior"  bindingConfiguration="webHttpBindingWithJsonP">
        </endpoint>
      </service>
    </services>
    <behaviors>
      <serviceBehaviors>
        <behavior name="RESTBehavior">
          <serviceMetadata httpGetEnabled="true" />
          <serviceDebug includeExceptionDetailInFaults="true"/>
        </behavior>
      </serviceBehaviors>
      <endpointBehaviors>
        <behavior name="MyEndpointBehavior">
          <webHttp/>
        </behavior>
      </endpointBehaviors>
    </behaviors>
    <serviceHostingEnvironment aspNetCompatibilityEnabled="true"
       multipleSiteBindingsEnabled="true">
    </serviceHostingEnvironment>
  </system.serviceModel>
</configuration>

Next let’s create our ServiceContract and DataContract. Please note that we are defining UriTemplate to specified url contract routing, we will also use WebMessageFormat.Json attribute to declare the request format.

 [ServiceContract(Namespace = "https://mysite.com/2013/06/08", Name = "WCFRestService")]
 public interface IRestService
 {
    [OperationContract]
    [WebGet(ResponseFormat = WebMessageFormat.Json, RequestFormat = WebMessageFormat.Json,
    UriTemplate = "Products?skip={skip}&top={top}")]
    [Description("Returns a list of all products")]
    List<Product> GetAllProducts(int skip, int top);

    [OperationContract]
    [WebInvoke(Method = "DELETE", ResponseFormat = WebMessageFormat.Json, RequestFormat = WebMessageFormat.Json,
    UriTemplate = "DeleteProduct?productID={productID}")]
    [Description("Deletes a product")]
    string DeleteProduct(string productID);

    [OperationContract]
    [WebInvoke(Method = "POST", ResponseFormat = WebMessageFormat.Json, RequestFormat = WebMessageFormat.Json,
    UriTemplate = "/UpdateProduct")]
    [Description("Updates the product")]
    string UpdateProduct(Product productDto);
 }

 [DataContract]
 public class Product
 {
    [DataMember]
    public string ProductID { get; set; }

    [DataMember]
    public string Name { get; set; }

    [DataMember]
    public string Category { get; set; }

    [DataMember]
    public double Price { get; set; }
 }

Also, in the service global file we need to define following routing rule.

 protected void Application_Start(object sender, EventArgs e)
  {
      RouteTable.Routes.Add(new ServiceRoute("", new WebServiceHostFactory(), typeof(MyService)));
  }

Our .svc file should contain following (Factory=”System.ServiceModel.Activation.WebScriptServiceHostFactory” added)

 <%@ ServiceHost Language="C#" Debug="true" Service="WCFRestfulService.MyService" CodeBehind="MyService.svc.cs" Factory="System.ServiceModel.Activation.WebScriptServiceHostFactory" %>

Inside our service class we will add following test methods:

 [AspNetCompatibilityRequirements(RequirementsMode = AspNetCompatibilityRequirementsMode.Allowed)]
 public class MyService : IRestService
 {
    List<Product> IRestService.GetAllProducts(int skip, int top)
    {
        var productList = new List<Product>();
        var random = new Random();

        #region simulate database
        for (var i = 0; i < 100; i++)
        {
            productList.Add(new Product()
            {
                ProductID = i.ToString(),
                Category = "Category " + i % 2,
                Name = "Product " + i.ToString(),
                Price = random.Next(10, 100)
            });
        } 
        #endregion

        //////////////////////

        var productSet = (from product in productList
                          orderby product.Name
                          select product).Skip(skip).Take(top).ToList();

        return productSet;
    }

    string IRestService.DeleteProduct(string productID)
    {
        //delete from database here


        return "OK";//return status or error
    }

    string IRestService.UpdateProduct(Product productDto)
    {
        //update the product here


        return "OK";//return status or error
    }

}

Next, in MVC application let’s create request helper that we will use to wrap-up our requests executed from C# controllers. Helper functions simply convert our data to JSON format when sending REST requests. We will also de-serialize objects from JSON to C# when retrieving the data.

 public class RequestHelper
 {
    /// <summary>
    /// Get object using GET
    /// </summary>
    /// <typeparam name="T"></typeparam>
    /// <param name="url"></param>
    /// <returns></returns>
    public static T GetObjectRest<T>(string url)
    {
        var request = HttpWebRequest.Create(url);
        request.Method = "GET";

        var response = request.GetResponse() as HttpWebResponse;
        using (var resStream = response.GetResponseStream())
        {
            using (var reader = new StreamReader(resStream))
            {
                var jsonResponse = reader.ReadToEnd();

                return FromJSON<T>(jsonResponse);
            }
        }
    }

    /// <summary>
    /// Updates object
    /// </summary>
    /// <param name="url"></param>
    /// <returns></returns>
    public static string UpdateObjectRest<T>(string url, T objectDto)
    {
        var request = (HttpWebRequest)WebRequest.Create(url); 
        request.Method = "POST";
        request.ContentType = "application/json";

        //send the data.
        using (var requestWriter = new StreamWriter(request.GetRequestStream()))
        {
            requestWriter.Write(ToJSON<T>(objectDto));
        }

        //read response
        var response = (HttpWebResponse)request.GetResponse();
        using (var resStream = response.GetResponseStream())
        {
            using (StreamReader reader = new StreamReader(resStream))
            {
                return reader.ReadToEnd();
            }
        }
    }

    /// <summary>
    /// Send DELETE request
    /// </summary>
    /// <param name="url"></param>
    /// <returns></returns>
    public static string DeleteObjectRest(string url)
    {
        var request = (HttpWebRequest)WebRequest.Create(url);
        request.Method = "DELETE";

        //read response
        var response = (HttpWebResponse)request.GetResponse();
        using (var resStream = response.GetResponseStream())
        {
            using (StreamReader reader = new StreamReader(resStream))
            {
                return reader.ReadToEnd();
            }
        }
    }

    /// <summary>
    /// Deserialize json to custom object
    /// </summary>
    /// <typeparam name="T"></typeparam>
    /// <param name="json"></param>
    /// <returns></returns>
    public static T FromJSON<T>(string json)
    {
        var jss = new JavaScriptSerializer();

        return jss.Deserialize<T>(json);
    }

    /// <summary>
    /// Serializes object to json
    /// </summary>
    /// <typeparam name="T"></typeparam>
    /// <param name="objectDto"></param>
    /// <returns></returns>
    public static string ToJSON<T>(T objectDto)
    {
        var jss = new JavaScriptSerializer();

        return jss.Serialize(objectDto);
    }
}

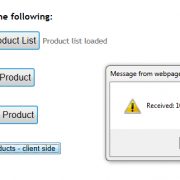
Calling Rest service will look as follows:

  //get list of products
  var productList = RequestHelper.GetObjectRest<List<Product>>("https://localhost:9582/Products?skip=0&top=10");

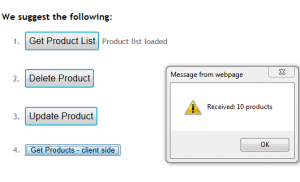
Retrieving data using client side Ajax request is quite difficult because of the cross-domain policy (CORS) disabling web script access by default. The way around that is to use JSONP data format so the server is treating our request as a script call allowing us to return data back inside the call-back function. The limitation of that is that we can only use GET method to retrieve the data. If you need full access to the WCF restful service, it is recommended to make your Ajax requests from the same domain.

 <script type="text/javascript">
    function GetProducts() {
        $.ajax({
            type: "GET", //only 'get' is supported with 'jasonp' datatype
            url: "https://localhost:9582/Products?skip=0&top=10",
            dataType: "jsonp",
            data: '',
            success: function (result) {
                alert('Received: ' + result.length + ' products');
            },
            error: function (xhr, ajaxOptions, thrownError) {
                // alert(xhr.status);
                // alert(thrownError);
            }
        });
    }
</script>

Please find the project files included below.

WCFRestfulService

1 Star2 Stars3 Stars4 Stars5 Stars (No Ratings Yet)
Loading...Loading...

Custom RetryPolicy class for Windows Azure transient error handling

According to definition, the Cloud it’s “A set of interconnected servers located in one or more data centres”. As per definition this kind of environment is naturally prone to network latency and other related environmental issues. This is especially true if we are communicating with on premises applications to synchronize and load the data over public network.

In order to ensure that our systems are reliable and functioning correctly within such a environment, we should use RetryPolicy to retry error prone operation when an transient error occurs.

In this article I will show you how to use default RetryPolicy with configuration stored in web.config file. You will also learn how to create custom retry policy class to be used throughout your application for the specific error types you define.

Using retry policy objects simply allows us to retry an operation multiple times at the intervals we configure. Image below shows debugging information when retrying operations that cause the errors:

custom_retry_policy

In our example we will user Microsoft Enterprise Library 5.0 (updated version). To create instances we will use RetryPolicyFactory that can create retry policy objects of following types: AzureCachingRetryPolicy, AzureServiceBusRetryPolicy, AzureStorageRetryPolicy, SqlCommandRetryPolicy, SqlConnectionRetryPolicy. Each type handles specific error types.

The configuration also includes ErrorDetectionStrategy object that is being configured in web.config file:

   <configSections>
    <section name="RetryPolicyConfiguration" type="Microsoft.Practices.EnterpriseLibrary.WindowsAzure.TransientFaultHandling.Configuration.RetryPolicyConfigurationSettings, Microsoft.Practices.EnterpriseLibrary.WindowsAzure.TransientFaultHandling" requirePermission="true"/>
    <section name="typeRegistrationProvidersConfiguration" type="Microsoft.Practices.EnterpriseLibrary.Common.Configuration.TypeRegistrationProvidersConfigurationSection, Microsoft.Practices.EnterpriseLibrary.Common"/>
  </configSections>
  <RetryPolicyConfiguration defaultRetryStrategy="Fixed Interval Retry Strategy" defaultSqlConnectionRetryStrategy="Incremental Retry Strategy">
    <incremental name="Incremental Retry Strategy" retryIncrement="00:00:01" initialInterval="00:00:01" maxRetryCount="10"/>
    <fixedInterval name="Fixed Interval Retry Strategy" retryInterval="00:00:01" maxRetryCount="10"/>
    <exponentialBackoff name="Backoff Retry Strategy" minBackoff="00:00:01" maxBackoff="00:00:30" deltaBackoff="00:00:10" maxRetryCount="10" firstFastRetry="false"/>
  </RetryPolicyConfiguration>
  <typeRegistrationProvidersConfiguration>
    <clear/>
    <add name="Caching" sectionName="cachingConfiguration"/>
    <add name="Cryptography" sectionName="securityCryptographyConfiguration"/>
    <add name="Exception Handling" sectionName="exceptionHandling"/>
    <add name="Instrumentation" sectionName="instrumentationConfiguration"/>
    <add name="Logging" sectionName="loggingConfiguration"/>
    <add name="Policy Injection" sectionName="policyInjection"/>
    <add name="Security" sectionName="securityConfiguration"/>
    <add name="Data Access" providerType="Microsoft.Practices.EnterpriseLibrary.Data.Configuration.DatabaseSyntheticConfigSettings, Microsoft.Practices.EnterpriseLibrary.Data"/>
    <add name="Validation" providerType="Microsoft.Practices.EnterpriseLibrary.Validation.Configuration.ValidationTypeRegistrationProvider, Microsoft.Practices.EnterpriseLibrary.Validation"/>
    <add sectionName="RetryPolicyConfiguration" name="RetryPolicyConfiguration"/>
  </typeRegistrationProvidersConfiguration>

Let’s create helper class to handle creation of retry policy objects. The first method retrieves the default policy with the configuration stored in web.config file.
We will also attach an Retrying event to log the retry operations.

 public static RetryPolicy GetDefaultPolicy(string name)
 {
    RetryPolicy retryPolicy;

    try
    {
        retryPolicy = RetryPolicyFactory.GetRetryPolicy<StorageTransientErrorDetectionStrategy>(name);
        retryPolicy.Retrying += retryPolicy_Retrying;
    }
    catch (NullReferenceException)
    {
        throw new Exception("Unable to read transient fault handling behaviour from web.config file - section for TransientFaultHandling could be missing.");
    }

    return retryPolicy;
}

 static void retryPolicy_Retrying(object sender, RetryingEventArgs e)
 {
    var message = string.Format(
        "Retry - Count: {0}, Delay: {1}, Exception: {2}",
         e.CurrentRetryCount,
         e.Delay,
         e.LastException.Message);

    Trace.TraceEvent(TraceEventType.Information, 0, message);// write to log
  }

Our next helper function will create custom retry policy. In the constructor we will pass in error types we want to be included in retry operations. Ideally this could be stored in config file.

 public static RetryPolicy GetCustomRetryPolicy()
 {
    var retryPolicy = new RetryPolicy(
        new CustomTransientErrorDetectionStrategy(
            new List<Type>() {
                typeof(DivideByZeroException),
                typeof(IndexOutOfRangeException),
            }),
        new CustomRetryStrategy());

    retryPolicy.Retrying += retryPolicy_Retrying;

    return retryPolicy;
}

Now let’s create custom retry policy class. The most important part of it is ShouldRetry method which simply returns the delegate allowing to evaluate whether to continue retrying operation or not. You can also apply your own logic in this place based on your requirements.

 public class CustomRetryStrategy : RetryStrategy
 {
  private readonly int retryCount = 3;
  private readonly TimeSpan retryInterval = TimeSpan.FromMilliseconds(1000);

  public CustomRetryStrategy()
    : base("customRetryStrategy", true)
  {
    //default values
  }

  public CustomRetryStrategy(int retryCount, TimeSpan retryInterval)
    : base("customRetryStrategy", true)
  {
    this.retryCount = retryCount;
    this.retryInterval = retryInterval;
  }

  public override ShouldRetry GetShouldRetry()
  {
    if (this.retryCount == 0)
    {
        return delegate(int currentRetryCount, Exception lastException, out TimeSpan interval)
        {
            interval = TimeSpan.Zero;

            return false;
        };
    }

    return delegate(int currentRetryCount, Exception lastException, out TimeSpan interval)
    {
        if (currentRetryCount < this.retryCount)
        {
            var random = new Random();
            //set random interval within the threshold
            interval = TimeSpan.FromMilliseconds(random.Next((int)(this.retryInterval.TotalMilliseconds * 0.8), (int)(this.retryInterval.TotalMilliseconds * 1.2)));


			//use your logic here
			//....

            return true;
        }

        interval = TimeSpan.Zero;

        return false;
     };
   }
 }

When creating custom retry policy we also need to create CustomTransientErrorDetectionStrategy class inheriting from ITransientErrorDetectionStrategy interface. In this class we simply evaluate the error type that is currently occurring and need to decide whether retry policy object will attempt to handle it. In order to do that we will pass in our error types to the class constructor. Next, we will check the error type within the IsTransient method to return true if error must cause the retry operation or false otherwise.

 public class CustomTransientErrorDetectionStrategy : ITransientErrorDetectionStrategy
 {
    List<Type> exceptionTypesToRetry;

    public CustomTransientErrorDetectionStrategy(List<Type> exceptionType)
    {
        exceptionTypesToRetry = exceptionType;
    }

    public bool IsTransient(Exception ex)
    {
        if (exceptionTypesToRetry.Contains(ex.GetType()))
        {
            return true;
        }
        return false;
    }
 }

Finally in our controller we can test it as follows:

 RetryPolicyHelper.GetDefaultPolicy("Incremental Retry Strategy").ExecuteAction(() =>
 {
     //index out of range exception - it won't be retried
     //as it defaults to sql connection errors
     var array = new int[] { 1, 2, 3 };
     var a = array[5];
 });

 RetryPolicyHelper.GetCustomRetryPolicy().ExecuteAction(() =>
 {
     //divide by zero exception - will be retried
     //as we defined exception types to:
     //DivideByZeroException, IndexOutOfRangeException
     var a = 0;
     var b = 10 / a;
 });

I have included project files below for your tests 🙂

Azure_RetryPolicy

1 Star2 Stars3 Stars4 Stars5 Stars (No Ratings Yet)
Loading...Loading...