Posts

OpenXml Power Point templates processing

Handling Power Point templates is quite similar to handling Words templates as they both are based on OpenXML standard (see my previous article to learn how to process Word templates). In this article I will show you how to replace Power Point template with text and images using C# based application.

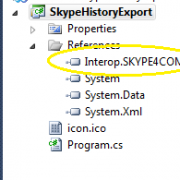
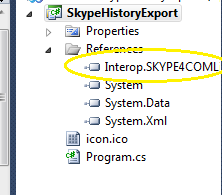
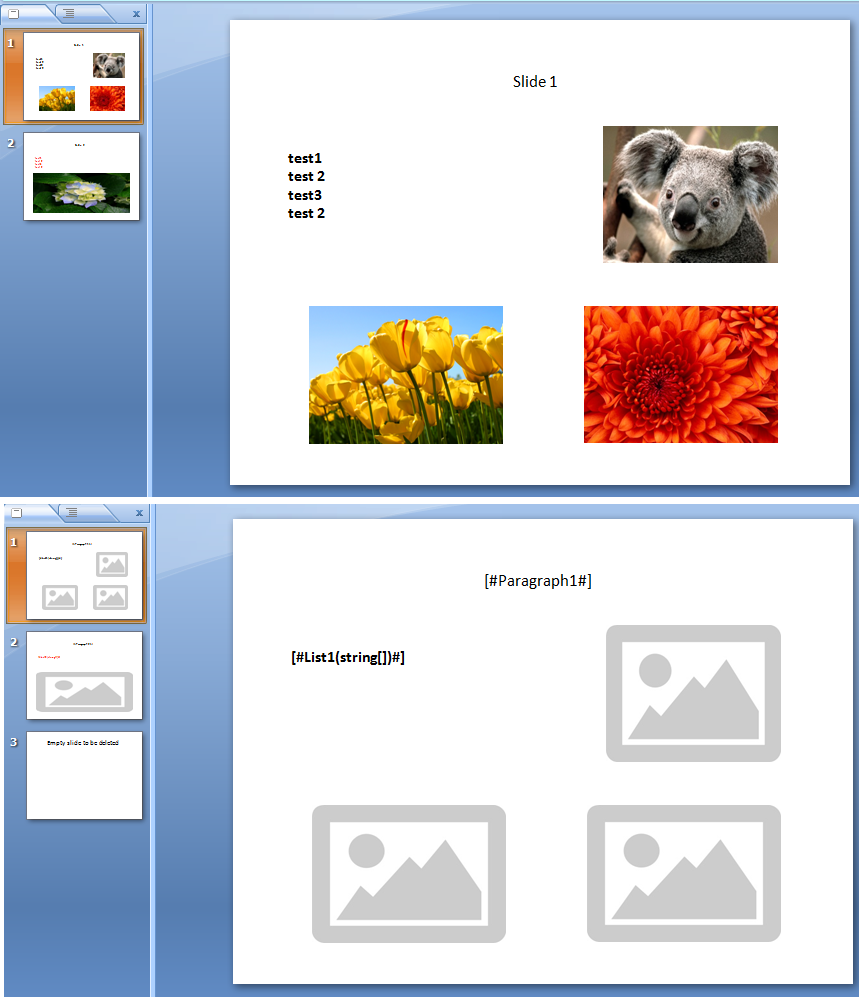
After creating new project we need to add two main references: DocumentFormat.OpenXml from DocumentFormat.OpenXml.dll and WindowsBase (.Net reference). Next, we need to prepare template with placeholders that our application will replace. For texts we will insert placeholder values in the the unique format that we can find parsing the document e.g. [#Paragraph1#].

For the images we need to insert image placeholders (other images) and set their names to match our parameters (e.g. myPicture1). This names needs to be provided in the parameter objects so we can find the placeholders by image name when parsing document.

powerpoint-templates

The next step is to create parameters structure that we will use when processing the document. You may want to set your own parameters depending on your project requirements.

 public class PowerPointParameter
 {
    public string Name { get; set; }
    public string Text { get; set; }
    public FileInfo Image { get; set; }
 }

We will use them as follows when initiating the objects

   var templ = new PowerPointTemplate();
    templ.PowerPointParameters.Add(new PowerPointParameter() { Name = "[#Paragraph1#]", Text = "Slide 1" });
    templ.PowerPointParameters.Add(new PowerPointParameter() { Name = "[#Paragraph2#]", Text = "Slide 2" });
    templ.PowerPointParameters.Add(new PowerPointParameter() { Name = "[#List1(string[])#]", Text = "test1 \n test 2 \n test3 \n test 2" });
    templ.PowerPointParameters.Add(new PowerPointParameter() { Name = "[#List2(string[])#]", Text = "test1 \n test 2 \n test3 \n test 2" });

    templ.PowerPointParameters.Add(new PowerPointParameter() { Name = "1", Image = new FileInfo(GetRootPath() + @"\Images\1.jpg") });
    templ.PowerPointParameters.Add(new PowerPointParameter() { Name = "2", Image = new FileInfo(GetRootPath() + @"\Images\2.jpg") });
    templ.PowerPointParameters.Add(new PowerPointParameter() { Name = "3", Image = new FileInfo(GetRootPath() + @"\Images\3.jpg") });
    templ.PowerPointParameters.Add(new PowerPointParameter() { Name = "4", Image = new FileInfo(GetRootPath() + @"\Images\4.jpg") });
    templ.PowerPointParameters.Add(new PowerPointParameter() { Name = "5", Image = new FileInfo(GetRootPath() + @"\Images\5.jpg") });

    var templatePath = GetRootPath() + @"\Templates\Template.pptx";
    var outputPath = GetRootPath() + @"\Output\Document.pptx";

    templ.ParseTemplate(templatePath, outputPath);

Having done that we can create our main function that parses the template and fills our placeholders with texts and images. We may also want to delete an slide from presentation, we can do that by getting the slideID from the SlideIdList property and use RemoveChild function. Please see the inline comments within the function below.

 public void ParseTemplate(string templatePath, string templateOutputPath)
 {
    using (var templateFile = File.Open(templatePath, FileMode.Open, FileAccess.Read)) //read our template
    {
        using (var stream = new MemoryStream())
        {
            templateFile.CopyTo(stream); //copy template

            using (var presentationDocument = PresentationDocument.Open(stream, true)) //open presentation document
            {
                // Get the presentation part from the presentation document.
                var presentationPart = presentationDocument.PresentationPart;

                // Get the presentation from the presentation part.
                var presentation = presentationPart.Presentation;

                var slideList = new List<SlidePart>();

                //get available slide list
                foreach (SlideId slideID in presentation.SlideIdList)
                {
                    var slide = (SlidePart)presentationPart.GetPartById(slideID.RelationshipId);
                    slideList.Add(slide);
                    SlideDictionary.Add(slide, slideID);//add to dictionary to be used when needed
                }

                //loop all slides and replace images and texts
                foreach (var slide in slideList)
                {
                    ReplaceImages(presentationDocument, slide); //replace images by name

                    var paragraphs = slide.Slide.Descendants<Paragraph>().ToList(); //get all paragraphs in the slide

                    foreach (var paragraph in paragraphs)
                    {
                        ReplaceText(paragraph); //replace text by placeholder name
                    }
                }

                var slideCount = presentation.SlideIdList.ToList().Count; //count slides
                DeleteSlide(presentation, slideList[slideCount - 1]); //delete last slide

                presentation.Save(); //save document changes we've made
            }
            stream.Seek(0, SeekOrigin.Begin);//scroll to stream start point

            //save output file
            using (var fileStream = File.Create(templateOutputPath))
            {
                stream.CopyTo(fileStream);
            }
        }
    }
}

Function that replaces the images. It gets all Blip objects from the slide and changes it’s embed ID that points to the image.

Similar to Word templates, we can give our own styles and transformation to the image template and it will be preserved and applied to the new image 🙂

When replacing the images we search for all image parts in a slide and then check it’s names using NonVisualDrawingProperties of the Picture elements. Please see the inline comments.

 void ReplaceImages(PresentationDocument presentationDocument, SlidePart slidePart)
 {
    // get all images in the slide
    var imagesToReplace = slidePart.Slide.Descendants<Blip>().ToList();

    if (imagesToReplace.Any())
    {
        var index = 0;//image index within the slide

        //find all image names in the slide
        var slidePartImageNames = slidePart.Slide.Descendants<DocumentFormat.OpenXml.Presentation.Picture>()
                                .Where(a => a.NonVisualPictureProperties.NonVisualDrawingProperties.Name.HasValue)
                                .Select(a => a.NonVisualPictureProperties.NonVisualDrawingProperties.Name.Value).Distinct().ToList();

        //check all images in the slide and replace them if it matches our parameter
        foreach (var imagePlaceHolder in slidePartImageNames)
        {
            //check if we have image parameter that matches slide part image
            foreach (var param in PowerPointParameters)
            {
                //replace it if found by image name
                if (param.Image != null && param.Name.ToLower() == imagePlaceHolder.ToLower())
                {
                    var imagePart = slidePart.AddImagePart(ImagePartType.Jpeg); //add image to document

                    using (FileStream imgStream = new FileStream(param.Image.FullName, FileMode.Open))
                    {
                        imagePart.FeedData(imgStream); //feed it with data
                    }

                    var relID = slidePart.GetIdOfPart(imagePart); // get relationship ID

                    imagesToReplace.Skip(index).First().Embed = relID; //assign new relID, skip if this is another image in one slide part

                    //to change picture size dynamically you can use this code
                    //int width = 150; int height = 100;
                    //int imageWidthEMU = (int)Math.Round((decimal)width * 9525);
                    //int imageHeightEMU = (int)Math.Round((decimal)height * 9525);

                    //var picture = (DocumentFormat.OpenXml.Presentation.Picture)imagesToReplace.Skip(index).First().Parent.Parent;
                    //picture.ShapeProperties.Transform2D.Extents.Cx = imageWidthEMU;
                    //picture.ShapeProperties.Transform2D.Extents.Cy = imageHeightEMU;
                    ///////
                }
            }
            index += 1;
        }
    }
}

When replacing the texts we check if paragraph contains the text that matches our parameter. If yes, then we check if to include one or multiple lines of text.
Next we create new parameter by copying the old parameter’s OuterXML (this preserves the styles). We also need to replace text that is stored in our parameter.

 void ReplaceText(Paragraph paragraph)
 {
    var parent = paragraph.Parent; //get parent element - to be used when removing placeholder
    var dataParam = new PowerPointParameter();

    if (ContainsParam(paragraph, ref dataParam)) //check if paragraph is on our parameter list
    {
        //insert text list
        if (dataParam.Name.Contains("string[]")) //check if param is a list
        {
            var arrayText = dataParam.Text.Split(Environment.NewLine.ToCharArray()); //in our case we split it into lines

            if (arrayText is IEnumerable) //enumerate if we can
            {
                foreach (var itemData in arrayText)
                {
                    Paragraph bullet = CloneParaGraphWithStyles(paragraph, dataParam.Name, itemData);// create new param - preserve styles
                    parent.InsertBefore(bullet, paragraph); //insert new element
                }
            }
            paragraph.Remove();//delete placeholder
        }
        else
        {
            //insert text line
            var param = CloneParaGraphWithStyles(paragraph, dataParam.Name, dataParam.Text); // create new param - preserve styles
            parent.InsertBefore(param, paragraph);//insert new element

            paragraph.Remove();//delete placeholder
        }
    }
}

Creating the new paragraph object preserving the styles

 public static Paragraph CloneParaGraphWithStyles(Paragraph sourceParagraph, string paramKey, string text)
 {
    var xmlSource = sourceParagraph.OuterXml;

    xmlSource = xmlSource.Replace(paramKey.Trim(), text.Trim());

    return new Paragraph(xmlSource);
}

Please note that when replacing images, the image placeholder names must be found in the document. Images that don’t match the parameter name, wont be replaced.

Having done that we can finally test our application. I have included complete working application for your tests.

PowerPointTemplates

1 Star2 Stars3 Stars4 Stars5 Stars (No Ratings Yet)
Loading...Loading...

Custom code validator using RichTextBox

Knowing how to format text using RichTextBox control lets you build wide range of tools such as code comparers, validators, chat applications etc. In this article I will show you how to build simple code checker/ validator.

code-checker

We start with creating new win form application and class library that we will read our test methods from. We will then compare these functions to our pattern methods.

Lets create some dummy methods now.

 public class TestClass
 {
        /// <summary>
        /// Test summary1
        /// this is dummy method
        /// </summary>
        public static void Test1()
        {
            throw new NotImplementedException();
        }

        /// <summary>
        /// Test summary2
        /// this is dummy method
        /// </summary>
        public static void Test2()
        {
            var test = new List<string>();
            test.Add("test1");
            test.Clear();
        }

        /// <summary>
        /// Test summary3
        /// this is dummy method
        /// </summary>
        public static void Test3()
        {
            var test = new List<string>();
            test.Add("test1");
            test.Add("test2");
            test.Add("test3");
            test.Add("test4 123456789");
            test.Add("test5");
            test.Add("test6");
            test.Clear();
        }
    }

Next, we will read this methods using reflection and then we bind it to the listbox control.

  var testTypes = typeof(TestClass).Assembly.GetTypes()
                   .Where(t => t.Name.StartsWith("Test")).OrderBy(t => t.Name).ToList();

  var testMethods = testTypes.First().GetMethods().Where(m => m.IsPublic && m.IsStatic).ToArray();

   lstTests.Items.AddRange(testMethods.ToArray());
   lstTests.SelectedIndex = 0;

When reading the summary tags we will use function that will parse text in .cs file in a search of summary tags.

  internal static string GetComment(string file, string methodName)
   {
            var commentContent = string.Empty;
            var buffer = string.Empty;

            foreach (var line in File.ReadAllLines(file))
            {
                buffer += line;

                if (line.ToLower().Contains(methodName.ToLower()))
                {
                    var summaryPositionStart = buffer.LastIndexOf("<summary>", StringComparison.OrdinalIgnoreCase);
                    var summaryPositionEnd = buffer.LastIndexOf("</summary>", StringComparison.OrdinalIgnoreCase);
                    if (buffer.Length <= summaryPositionStart || summaryPositionEnd - summaryPositionStart <= 0) { return ""; }

                    return PrepareSummaryString(buffer.Substring(summaryPositionStart, summaryPositionEnd - summaryPositionStart));
                }
            }

      return "";
   }

The final step is to format RichTextBox line by line giving it appropriate color depending on our requirements.

  public static void InsertColorText(string inString, RichTextBox textbox, Color methodColor)
   {
            textbox.Text = "";
            inString = inString.TrimEnd(' ', '\r', '\n');

            var lines = inString.Split('\n');
            var font = new Font("Courier New", 8f, FontStyle.Regular);

            for (var i = 0; i < lines.Length; i++)
            {
                textbox.SelectionFont = font;
                textbox.SelectionColor = methodColor;

                if (i < 2 || i + 1 >= lines.Length)
                {
                    textbox.SelectionColor = Color.Gray;
                    textbox.SelectedText = TrimLeft(lines[i], 2);
                    continue;
                }

                if (lines[i].Contains("throw new NotImplementedException();"))
                {
                    textbox.SelectionColor = Color.Red;
                    textbox.SelectedText = TrimLeft(lines[i], 4);
                    continue;
                }

                //calculate color for the current line
                if (lines[i].Trim().Length > 20)
                {
                    textbox.SelectionColor = Color.Blue;
                    textbox.SelectedText = TrimLeft(lines[i], 4);
                    continue;
                }

                textbox.SelectedText = TrimLeft(lines[i], 4);
            }
            textbox.SelectedText = "\n";
        }
    }

Whatever you want to build, this example shows you basic RichTextBox formatting implementation you can use in your solution. I have included working example below for your testing.
RichTextBox-Formatting

1 Star2 Stars3 Stars4 Stars5 Stars (No Ratings Yet)
Loading...Loading...

Skype Chat History Export using C# and Interop

Ever wanted to export Skype chat history to text or xml files? There is an solution for that as it seems that there is no such a option in new Skype version.

It is possible thanks to Skype Interop object which allows us to interact and extend the application functionality. In order to start we need to install that object on our machine (installation file is included at the bottom of this article) and add reference to it in our visual studio project.

skype-refence2


Next we need to instantiate the interop object and get the current logged in user. We also need to ensure that the Skype application is running, if not we need to start it up.

SKYPE4COMLib.Skype oSkype = new SKYPE4COMLib.Skype();
if (!oSkype.Client.IsRunning) oSkype.Client.Start(true, true);

var owner = oSkype.CurrentUser.FullName + " (" + oSkype.CurrentUser.Handle + ")";</pre>
Next we need to simply loop through all chats
1
foreach (SKYPE4COMLib.Chat oChat in oSkype.Chats)
{

and all chat messages for each member on our contact list

foreach (SKYPE4COMLib.ChatMessage oMessage in oChat.Messages)
{

In this place you can customize it; save it to database, xml files, do an action depending on the chat content etc.

foreach (SKYPE4COMLib.Chat oChat in oSkype.Chats)
{
    try
    {
        var name = oChat.Name;
        var description = oChat.Description;
        var members = new SortedList();
        foreach (SKYPE4COMLib.User oUser in oChat.Members)
        {
            members.Add(oUser.FullName + " (" + oUser.Handle + ")", null);
        }

        var filename = "\\chat";
        foreach (var m in members.Keys)
        {
            filename += " " + m;
        }
        filename = filename.Replace(owner, "").Replace("  ", " ");
        if (filename.Length > 100) filename = filename.Substring(0, 100);
        filename = filename.Trim() + ".txt";

        Console.WriteLine();
        Console.WriteLine("Chat File = " + filename);
        Console.WriteLine("With " + oChat.Messages.Count.ToString() + " Message(s)");

        filename = basePath + filename;

        var iMessageCount = oChat.Messages.Count;
        iCounter = 0;
        var messages = new StringBuilder(21000);
        foreach (SKYPE4COMLib.ChatMessage oMessage in oChat.Messages)
        {
            iCounter++;
            messages.Append(oMessage.Timestamp + "\t" + oMessage.FromDisplayName + "\t" + oMessage.Body + "\r\n");
            if (iCounter % 25 == 0) Console.Write(".");
            if (messages.Length > 20000)
            {
                System.IO.File.AppendAllText(filename, messages.ToString());
                messages = new StringBuilder(21000);
                GC.Collect();
            }
            if (iMessageCount - iCounter > 1000)
                if ((iMessageCount - iCounter) % 1000 == 0)
                {
                    Console.WriteLine("");
                    Console.Write((iMessageCount - iCounter).ToString() + " ");
                }
        }
        System.IO.File.AppendAllText(filename, messages.ToString());
        Console.WriteLine(" OK");
    }
    catch (Exception ex)
    {
        Console.WriteLine();
        Console.WriteLine("Error " + ex.Message);
        Console.WriteLine();
    }
}

The first time your application contacts Skype using Interop object, an Skype security message is displayed allowing to reject or access the Skype data.

skype-message


POST UPDATE!
If you are running x64 bit PC then you need to do following:

1. Register Skype interop using below command
C:\Windows\System32\regasm.exe "C:\Program Files (x86)\Common Files\Skype\Skype4COM.dll"

2. In Visual Studio you need to change target platform to x86

skype_x64

This works for me when running Skype version: 6.11.0.102

Enjoy!
SkypeChatHistoryExport

1 Star2 Stars3 Stars4 Stars5 Stars (No Ratings Yet)
Loading...Loading...