Posts

WebApi requests compression using Ext.js and asp.net Mvc4

One of the easiest ways to maximize performance of ajax requests being sent over the network is to use gzip compression. There is already a built in mechanism for compressing requests but it depends on IIS settings of our hosting provider. In our case we will apply custom Delegate Handler using asp.net mvc4 ApiController that is not dependent on any environment specific settings.

If you are wondering if it’s worth to implement this solution, have a look on my test results below:

compression

Depending on the content being sent, we can reduce the request size by an average 50% or more. On the above image, the first request have been compressed while the second one was not.

In order to test our solution we will simply invoke ajax request from Ext.js application running along with self-hosted asp.net mvc4 webapi.

  Ext.Ajax.request({
            method: 'GET',
            url: 'api/ExtMvcTest/',

            success: function (response) {
                var text = response.responseText;
                alert('Request completed data length: ' + text.length);
            },
            failure: function (response) {
                alert('An error occured!');
            }
        });

On the server site we need to create our handler that derives from DelegatingHandler class. By doing that we override http SendAsync function and implement our custom CompressedContent class.

 public class APICompressionDelegateHandler : DelegatingHandler
 {
    protected override Task<HttpResponseMessage> SendAsync(HttpRequestMessage request, CancellationToken cancellationToken)
    {
        return base.SendAsync(request, cancellationToken).ContinueWith<HttpResponseMessage>((responseToCompleteTask) =>
        {
            HttpResponseMessage response = responseToCompleteTask.Result;

            if (response.RequestMessage.Headers.AcceptEncoding != null &&
                response.RequestMessage.Headers.AcceptEncoding.Count > 0)
            {
                string encodingType = response.RequestMessage.Headers.AcceptEncoding.First().Value;

                if (response.Content != null)
                {
                    response.Content = new CompressedContent(response.Content, encodingType);
                }
            }

            return response;
        },
        TaskContinuationOptions.OnlyOnRanToCompletion);
    }
}

Next, we need to override SerializeToStreamAsync function in our CompressedContent object that inherits from HttpContent class to implement actual compression and send it back to the calling delegate.

 protected override Task SerializeToStreamAsync(Stream stream, TransportContext context)
  {
        Stream compressedStream = null;

        if (encodingType == "gzip")
        {
            compressedStream = new GZipStream(stream, CompressionMode.Compress, leaveOpen: true);
        }
        else if (encodingType == "deflate")
        {
            compressedStream = new DeflateStream(stream, CompressionMode.Compress, leaveOpen: true);
        }

        return originalContent.CopyToAsync(compressedStream).ContinueWith(tsk =>
        {
            if (compressedStream != null)
            {
                compressedStream.Dispose();
            }
        });
   }

Last thing do to is to register our delegate at application start-up and to define our target controller we get our data from.

 public static class WebApiConfig
  {
        public static void Register(HttpConfiguration config)
        {
            config.Routes.MapHttpRoute(
                          name: "ExtTest",
                          routeTemplate: "api/ExtMvcTest/",
                          defaults: new { controller = "ExtMvcTest", action = "GetTestData" });

            config.Routes.MapHttpRoute(
                name: "DefaultApi",
                routeTemplate: "Controllers/{controller}/{id}",
                defaults: new { id = RouteParameter.Optional }
            );
 
           config.MessageHandlers.Add(new APICompressionDelegateHandler()); //enable API requests compression
        }
    }

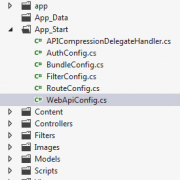
This is how our solution files look like:
mvc4_compr_solution

I have added fully working project example below. Please be aware that using compression may overload your server if used improperly. It is advisable to use it mainly for dashboards where the response time is the highest priority.
ExtMvc

1 Star2 Stars3 Stars4 Stars5 Stars (No Ratings Yet)
Loading...Loading...

Handling DataGrid row events

When creating user interface the common situation is to handle datagrid row event in response to user action. Example of that is changing dropdown list value and refreshing row information without reloading the whole datagrid.
For instance if we have a datagrid with the products containing dropdown list with the clients in each row, we can allow the user to change datagrid row data separately without resetting other datagrid rows.

In our example we will build the simple datagrid with the products that will allow us to select and send voucher codes to the clients with total purchase exceeding certain level in product category.

grid-row-event

Lets start with creating basic class structures:

 public class Client
 {
    public Client(){}
    public int ID { get; set; }
    public string Name { get; set; }
    public IList<Product> Products { get; set; }
 }
  
 public class Product
 {
    public Product() { }
    public int ID { get; set; }
    public int CatID { get; set; }
    public string Name { get; set; }
    public double Price { get; set; }
 }

After creating new asp.net website project with default.aspx page, we need to add some dummy data in page load event (to be replaced with the database data). We cerate product list and assign product categories to it. And finally create client list and assign products they bought.

We use LINQ to quickly load products to client objects “p => p.Price > 10” – this will load products with the price greater than 10.

  protected void Page_Load(object sender, EventArgs e)
   {
        if (!IsPostBack)
        {
            #region mock data
            productList.Clear();
            clientList.Clear();

            productList.Add(new Product() { ID = 1, CatID = 1, Name = "product1", Price = 22 });
            productList.Add(new Product() { ID = 2, CatID = 3, Name = "product2", Price = 32 });
            productList.Add(new Product() { ID = 3, CatID = 1, Name = "product3", Price = 42 });
            productList.Add(new Product() { ID = 4, CatID = 3, Name = "product4", Price = 62 });
            productList.Add(new Product() { ID = 5, CatID = 2, Name = "product5", Price = 12 });
            productList.Add(new Product() { ID = 6, CatID = 2, Name = "product6", Price = 62 });
            productList.Add(new Product() { ID = 7, CatID = 4, Name = "product7", Price = 82 });
            productList.Add(new Product() { ID = 8, CatID = 4, Name = "product8", Price = 22 });

            clientList.Add(new Client() { ID = 1, Name = "client1",
                           Products = productList.Where(p => p.Price > 10).ToList() });
            clientList.Add(new Client() { ID = 2, Name = "client2",
                            Products = productList.Where(p => p.Price > 30).ToList() });
            clientList.Add(new Client() { ID = 3, Name = "client3",
                            Products = productList.Where(p => p.Price > 60).ToList() });
            clientList.Add(new Client() { ID = 4, Name = "client4",
                           Products = productList.Where(p => p.Price > 80).ToList() });
            clientList.Add(new Client() { ID = 5, Name = "client5",
                           Products = productList.Where(p => p.Price > 40).ToList() });
            #endregion

            ///////////////
            gridList.DataSource = productList;
            gridList.DataBind();
        }
    }

Once we have data loaded into our datagrid, we need to create client lists in each row. We will do it in gridList_RowDataBound event. What we do is simply finding the dropdown list in each row and bind the client list to it.
When binding dropdown lists we use custom object created on the fly using LINQ – see my previous articles to get description of that process.

  protected void gridList_RowDataBound(object sender, System.Web.UI.WebControls.GridViewRowEventArgs e)
   {
        if (e.Row.RowType == System.Web.UI.WebControls.DataControlRowType.DataRow)
        {
            var ddlClients = e.Row.FindControl("ddlClients") as DropDownList;

            ddlClients.DataSource = (from obj in clientList
                                     select new
                                     {
                                         ID = obj.ID,
                                         Name = string.Format("{0} [prod. {1}]", obj.Name, obj.Products.Count())
                                     }).ToList().OrderByDescending(a => a.Name).ThenBy(a => a.ID);

            ddlClients.DataTextField = "Name";
            ddlClients.DataValueField = "ID";
            ddlClients.DataBind();

            RenderGridRow(e.Row);
        }
   }

Our next step is to create selected index changed event for the client lists in the datagrid. Every time someone will change the client, the corresponding datagrid row will be updated.

   protected void dropdownlist_SelectedIndexChanged(object sender, EventArgs e)
    {
        GridViewRow gridRow = (GridViewRow)(((System.Web.UI.Control)sender).NamingContainer);
        gridList.SelectedIndex = gridRow.RowIndex;// highlight the current the row

        RenderGridRow(gridRow);
    }

In our case we will render datagrid row as follows:

  void RenderGridRow(GridViewRow row)
    {
        var catID = (row.FindControl("ctrlCatID") as HiddenField).Value;
        var ddlClients = row.FindControl("ddlClients") as DropDownList;
        var ltrTotal = row.FindControl("ltrTotal") as Literal;
        var btnSendVoucher = row.FindControl("btnSendVoucher") as Button;
        ///////////////////
        btnSendVoucher.CommandArgument = ddlClients.SelectedItem.Value.ToString();// we use it as alternative

        var items = clientList.Find(e => e.ID.ToString() == ddlClients.SelectedItem.Value.ToString())
            .Products.Where(p => p.CatID.ToString() == catID.ToString());

        var total = items.Any() ? items.Sum(p => p.Price) : 0;

        ltrTotal.Text = total > 0 ? total.ToString("C") : "no products bought in this category";
    }

The final step is to handle send voucher button event:

  protected void btnSendVoucher_OnClick(object sender, EventArgs e)
   {
        GridViewRow gridRow = (GridViewRow)(((System.Web.UI.Control)sender).NamingContainer);
        //or use
        //var clientID = ((Button)sender).CommandArgument;

        var txtVoucher = gridRow.FindControl("txtVoucher") as TextBox;
        var ddlClients = gridRow.FindControl("ddlClients") as DropDownList;

        var clientID = ddlClients.SelectedItem.Value.ToString();
        var voucher = txtVoucher.Text;

        //send voucher to client here
    }

That’s it. I have attached working example below. Feel free to play with it 🙂
gridViewEvent

1 Star2 Stars3 Stars4 Stars5 Stars (No Ratings Yet)
Loading...Loading...

Finding the distance between two addresses using Google API

There are number of cases when you will need to calculate the distance between two addresses in your application. For example when building an social website or CRM solution. Calculating the distance between the addresses has never been so easy thanks to Google geolocation API. The API is available for free but it has the limit of 2500 requests per day, you can always buy the business version if your service gets more popular.

geolocation

Lets start with building the empty asp.net website. After creating basic UI controls we can implement the back end of our application. We will use Json serialization when getting response from API so we need to prepare serialization function and geolocation response class.

 public static T FromJSON<T>(string json)
 {
     JavaScriptSerializer jss = new JavaScriptSerializer();

     return jss.Deserialize<T>(json);
  }

We will use data contracts to deserialize Json response to our class

 [DataContract(Namespace = "")]
 public class GeocodeResponse
 {
    [DataMember(Name = "status", Order = 1)]
    public string Status { get; set; }

    [DataMember(Name = "result", Order = 2)]
    public List<Result> Results { get; set; }

    [DataContract(Name = "result", Namespace = "")]
    public class Result
    {
        [DataMember(Name = "geometry")]
        public CGeometry Geometry { get; set; }

        [DataContract(Name = "geometry", Namespace = "")]
        public class CGeometry
        {
            [DataMember(Name = "location")]
            public CLocation Location { get; set; }

            [DataContract(Name = "location", Namespace = "")]
            public class CLocation
            {
                [DataMember(Name = "lat", Order = 1)]
                public double Lat { get; set; }
                [DataMember(Name = "lng", Order = 2)]
                public double Lng { get; set; }
            }
        }
    }
 }

To get Json object from API we need to send request and read response from it.

 public static string WebRequestJson(string url)
 {
    var response = string.Empty;

    StreamWriter requestWriter;

    var webRequest = System.Net.WebRequest.Create(url) as HttpWebRequest;
    if (webRequest != null)
    {
        webRequest.Method = "POST";
        webRequest.ServicePoint.Expect100Continue = false;
        webRequest.Timeout = 99000;

        webRequest.ContentType = "application/json";
        //POST the data.
        using (requestWriter = new StreamWriter(webRequest.GetRequestStream()))
        {
            requestWriter.Write("");
        }
    }

    HttpWebResponse resp = (HttpWebResponse)webRequest.GetResponse();
    using (Stream resStream = resp.GetResponseStream())
    {
        using (StreamReader reader = new StreamReader(resStream))
        {
            response = reader.ReadToEnd();
        }
    }

    return response;
 }

In our main function we are getting Json objects from API by making request to Google and passing address in request URL. Having Json objects for each address we deserialize it to our GeocodeResponse class. In this step we can check response if it is valid or contains only one location for one provided address.

 public static double GetDistance(string address1, string address2, DistanceUnit unit)
 {
    //make jason requests to google api
    string json1 = WebRequestJson(
        string.Format("https://maps.googleapis.com/maps/api/geocode/json?address={0}&sensor=false", address1)
        );
    string json2 = WebRequestJson(
        string.Format("https://maps.googleapis.com/maps/api/geocode/json?address={0}&sensor=false", address2)
        );

    //deserialize json to GeocodeResponse object
    var loc1 = FromJSON<GeocodeResponse>(json1);
    var loc2 = FromJSON<GeocodeResponse>(json2);

    //check is response is ok
    if (loc1.Status != "OK" || loc2.Status != "OK") { return -1; }

    //check if only one location found for each address
    //if (loc1.Results.Count > 1 || loc2.Results.Count > 1) { return -2; }

    //copy coordinate values
    var pos1 = new Coordinate()
    {
        Latitude = loc1.Results.First().Geometry.Location.Lat,
        Longitude = loc1.Results.First().Geometry.Location.Lng
    };
    var pos2 = new Coordinate()
    {
        Latitude = loc2.Results.First().Geometry.Location.Lat,
        Longitude = loc2.Results.First().Geometry.Location.Lng
    };

    //return distance in unit
    return CalculateDistance(pos1, pos2, unit);
}

When we have the final coordinates (latitude and longitude) for each address, we can now calculate the distance in the specified unit. We take the earth’s radius into account- the rest it’s just the pure mathematics.

  public static double CalculateDistance(Coordinate pos1, Coordinate pos2, DistanceUnit unit)
    {
        var R = 6371;//default in km

        switch (unit)
        {
            case DistanceUnit.Miles:
                R = 3960; break;
            case DistanceUnit.Kilometers:
                R = 6371; break;
            case DistanceUnit.Meters:
                R = 6371000; break;
        }

        //get location difference and convert to radians
        var dLat = DegreeToRadian(pos2.Latitude - pos1.Latitude);
        var dLon = DegreeToRadian(pos2.Longitude - pos1.Longitude);

        //calculate distance
        var a = Math.Sin(dLat / 2) * Math.Sin(dLat / 2) +
            Math.Cos(DegreeToRadian(pos1.Latitude)) *
            Math.Cos(DegreeToRadian(pos2.Latitude)) *
            Math.Sin(dLon / 2) * Math.Sin(dLon / 2);

        var c = 2 * Math.Asin(Math.Min(1, Math.Sqrt(a)));

        var d = R * c;//convert to unit

        return d;
    }

When we have all implementation done, we can finally test our application. I have included complete working application for your tests.

Geolocation

1 Star2 Stars3 Stars4 Stars5 Stars (No Ratings Yet)
Loading...Loading...

Adaptive Payments with PayPal

When building B2C systems the common scenario is to share the profits among the portal and the business users eg. when renting a house through you website the user pays total amount for the house, lets say 100 USD to the property owner. From that amount the owner will pay share commission to the portal’s website usually a small %.

In order to automate this process we can use PayPal Adaptive payments (chained transaction). The main difference between PayPal chain transaction and parallel transaction is that with the chained transaction the user sees only the total amount that he owns to the house owner. With the parallel transactions the user pays total amount but he sees the list of 2 receivers; the house owner and the portal owner share details.

Although there is a good documentation available on the Paypal website I found it very hard to get a working example of the payment implementation. That’s why I decided to post it here.

Lets start with downloading PayPal SDK. It contains all classes we need to make payment request. I have also included project and SDK at the bottom of this article.

When making a payment request we basically need to create paykey and redirect user to the payment page by passing that key as a parameter.
This simply creates initial payment record on PayPal account. The payment then may be finished or cancelled by the user. We get the paykey after getting response from PayPal with the status “CREATED”.

  if (ap.isSuccess.ToUpper() != "FAILURE")
  {
      if (PResponse.paymentExecStatus == "CREATED")
      {
          return PResponse.payKey;
      }
   }

In the init request we need to include basic parameters such as portal and property owner PayPal accounts, api credentials (sandbox account for testing)

    var OrderID = Guid.NewGuid().ToString();

    var portalPayPalEmail = ConfigurationManager.AppSettings["PORTAL_PAYPAL_EMAIL"];
    payRequest.ipnNotificationUrl = ConfigurationManager.AppSettings["PAYPAL_NOTIFICATION_URL"] + "?custom=" + OrderID; // to be processed later in PayPal-Call-back.ashx handler

    payRequest.cancelUrl = Request.Url.ToString();
    payRequest.returnUrl = Request.Url.ToString();
    payRequest.memo = OrderID;
    payRequest.trackingId = OrderID;

    payRequest.clientDetails = new ClientDetailsType();
    payRequest.clientDetails = ClientInfoUtil.getMyAppDetails();  //helper - gets values from web.config
    payRequest.actionType = "PAY"; // or CREATE
    payRequest.currencyCode = "USD";//set currency to user settings
    payRequest.requestEnvelope = new RequestEnvelope();
    payRequest.requestEnvelope = ClientInfoUtil.getMyAppRequestEnvelope(); //helper - gets values from web.config

This is how the config file should look like (please fill in with your data)

 <appSettings>
    <!-- PayPal configuration settings START-->
    <add key="deviceId" value="testID123"/>
    <add key="ipAddress" value="127.0.0.1"/>
    <add key="TrustAll" value="true"/>
    <add key="ENDPOINT" value="https://svcs.sandbox.paypal.com/"/>
    <add key="PAYPAL_URL" value="https://www.sandbox.paypal.com/"/>
    <add key="PAYPAL_REDIRECT_URL" value="https://www.sandbox.paypal.com/webscr?cmd=_ap-payment&amp;paykey="/>
    <add key="PAYPAL_NOTIFICATION_URL" value="https://your-website-url/PayPal-Call-back.ashx"/>
    <add key="APPLICATION-ID" value="APP-80W284485P5195333"/>
    <add key="API_REQUESTFORMAT" value="SOAP11"/>
    <add key="API_RESPONSEFORMAT" value="SOAP11"/>
    <add key="API_AUTHENTICATION_MODE" value="3TOKEN"/>
    <add key="PORTAL_PAYPAL_EMAIL" value="portal-paypal-email"/>
    <add key="API_USERNAME" value="api-username"/>
    <add key="API_PASSWORD" value="api-password"/>
    <add key="API_SIGNATURE" value="api-signature eg.AFcWxV21C7fd0v3bYYYRCpSSRl31AI0QDNGia62b0stzcLxkJCYRE9JE"/>
    <!-- PayPal configuration settings END-->
  </appSettings>

Next we need to define who will pay the PayPal commission, it can be one of the receivers or sender or all can be paying equally

 payRequest.feesPayer = "EACHRECEIVER"; //SENDER,PRIMARYRECEIVER,SECONDARYONLY

Next step is to create receiver list. It can include up to 6 accounts. In our case we have only portal user and the property owner. The total amount of 100 USD will be split to 80 USD for the property owner and 20 USD for portal (minus PayPal commission taken from both receivers)

    payRequest.receiverList = new Receiver[2];
    //pay the user
    payRequest.receiverList[0] = new Receiver();
    payRequest.receiverList[0].amount = 100;
    payRequest.receiverList[0].primary = IsChainedTransaction;// set to true to switch to chained transaction
    payRequest.receiverList[0].primarySpecified = IsChainedTransaction;// set to true to switch to chained transaction
    payRequest.receiverList[0].paymentType = "SERVICE";
    payRequest.receiverList[0].email = "portal-user-paypal-email";//set user paypal email

    //pay portal share
    payRequest.receiverList[1] = new Receiver();
    payRequest.receiverList[1].amount = 20;
    payRequest.receiverList[1].primary = false;
    payRequest.receiverList[1].primarySpecified = false;
    payRequest.receiverList[1].paymentType = "SERVICE";
    payRequest.receiverList[1].email = portalPayPalEmail;

At the end we need to supply credentials and send payment request.

 AdapativePayments ap = new AdapativePayments();
 ap.APIProfile = ClientInfoUtil.CreateProfile(); //helper - gets values from web.config

 PayResponse PResponse = ap.pay(payRequest);

The last step is to check if payment was successful and process the order in our application. In the web.config we defined PAYPAL_NOTIFICATION_URL as handler page PayPal-Call-back.ashx. So in the handler when we receive an callback we simply validate it by sending back request to PayPal. When the request is validated we can proceed with our order.

 public void ProcessRequest(HttpContext context)
 {
    Request = context.Request;

	//Request["custom"] contains our orderID
    if (IsRequestFromPaypal() && Request["custom"] != null)
    {
        var orderID = Request["custom"];
            
        //check the payment_status is Completed
        //check that orderID has not been previously processed
        //check that receiver_email is your Primary PayPal email
        //check that payment_amount/payment_currency are correct
        //process payment
    }
  }

   //validate request by sending it back to PayPal
   bool IsRequestFromPaypal()
   {
        var validationRequestContent = Request.Form + "&cmd=_notify-validate";
        var validationUrl = System.Configuration.ConfigurationManager.AppSettings["PAYPAL_URL"].TrimEnd('/') + "/cgi-bin/webscr";

        // Create a Web Request:
        var validationRequest = (System.Net.HttpWebRequest)System.Net.WebRequest.Create(validationUrl);
        validationRequest.ContentLength = validationRequestContent.Length;
        validationRequest.ContentType = "application/x-www-form-urlencoded";
        validationRequest.Method = "POST";

        using (var writer = new StreamWriter(validationRequest.GetRequestStream(), System.Text.Encoding.ASCII))
        {
            writer.Write(validationRequestContent);
        }

        // Now send the request and get the response:
        using (var response = validationRequest.GetResponse())
        {
            using (var reader = new StreamReader(response.GetResponseStream()))
            {
                var paypalResponse = reader.ReadToEnd();
                return paypalResponse == "VERIFIED";
            }
        }
    }

I have included working example below so you can use it in your testing. Just fill it in with your data. You also need to be logged in to your sandbox account when testing it.
AdaptivePayments

1 Star2 Stars3 Stars4 Stars5 Stars (No Ratings Yet)
Loading...Loading...

Custom Tree View Control

When using default asp.net Tree View control there is always been a problem to get the proper styling at the node level. Example of that is trying to set an node font weight to bold.

The simplest solution is to create custom tree view node that inherits from default TreeNode class.

  public class CustomTreeNode : TreeNode
  {
  }

When overriding RenderPreText method in that class we can change default rendering of the tree node text the way we want. We do it by adding text attributes using htmltextwriter. Below is example of that.

 protected override void RenderPreText(HtmlTextWriter writer)
 {
      writer.AddAttribute(HtmlTextWriterAttribute.Class, CssClass);
      writer.RenderBeginTag(HtmlTextWriterTag.Span);
      base.RenderPreText(writer);
  }

Here is complete working example of the custom tree view node.

 public class CustomTreeNode : TreeNode
    {
        public CustomTreeNode() : base() { }
        public CustomTreeNode(TreeView owner, bool isRoot) : base(owner, isRoot) { }

        private string _cssClass;
        public string CssClass
        {
            get { return _cssClass; }
            set { _cssClass = value; }
        }

        protected override void RenderPreText(HtmlTextWriter writer)
        {
            writer.AddAttribute(HtmlTextWriterAttribute.Class, CssClass);
            writer.RenderBeginTag(HtmlTextWriterTag.Span);
            base.RenderPreText(writer);
        }

        protected override void RenderPostText(HtmlTextWriter writer)
        {
            writer.RenderEndTag();
            base.RenderPostText(writer);
        }
    }

    public class CustomTreeView : TreeView
    {
        protected override TreeNode CreateNode()
        {
            return new CustomTreeNode(this, false);
        }
    }

Example of use:

      var tn = new CustomTreeNode();
      tn.Text = "test";
      tn.Value = "1";
      tn.CssClass = "normalNode/boldNode";          
      treeView.Nodes.Add(tn);

    //and the css
    .normalNode
    {
	font-weight:normal;
    }
    
    .boldNode
    {
	font-weight:bold;
    }

I hope this article helped you to understand how we can change default control rendering.

custom-tree-node

1 Star2 Stars3 Stars4 Stars5 Stars (No Ratings Yet)
Loading...Loading...

Remote Post utility

If you want to do an http post from code behind eg. to redirect to payment page it is sometimes useful to have an helper to be used throughout your application. Below is the simple class that does it’s job.

 public class RemotePost
{
    private NameValueCollection Inputs = new NameValueCollection();
    public string Url = "";
    public string Method = "post";
    public string FormName = "form1";

    public void Add(string name, string value)
    {
        Inputs.Add(name, value);
    }

    public void Post()
    {
        HttpContext.Current.Response.Clear();
        HttpContext.Current.Response.Write(@"<html><head><meta http-equiv=""Content-Type"" content=""text/html; charset=iso-8859-1"">");
        HttpContext.Current.Response.Write(String.Format(@"</head><body onload=""document.{0}.submit()"">", FormName));
        HttpContext.Current.Response.Write(String.Format(@"<form name=""{0}"" method=""{1}"" action=""{2}"" >", FormName, Method, Url));
        int i = 0;
        while (i < Inputs.Keys.Count)
        {
            HttpContext.Current.Response.Write(String.Format(@"<input name=""{0}"" type=""hidden"" value=""{1}"">", Inputs.Keys[i], Inputs[Inputs.Keys[i]]));
            i += 1;
        }
        HttpContext.Current.Response.Write("</form>");
        HttpContext.Current.Response.Write("</body></html>");
        HttpContext.Current.Response.End();
    }
}

When using it you simply add your parameters in the button click event before doing post request.


public void btnPay_OnClick(object sender, EventArgs e)
 {
        RemotePost myremotepost = new RemotePost();
        myremotepost.FormName = "form1";
        myremotepost.Method = "post";
        myremotepost.Url = "https://.......";
        myremotepost.Add("id", "123");
        //.....
        //----
        /////////////////////////
        myremotepost.Post();
}

An alternative way to that is sample below. You may also want to set PostBackUrl of the clicked button to avoid user to see response page.

 public void Post()
    {
        string url = "post url";

        using (StringBuilder postData = new StringBuilder())
        {
            postData.Append("first_name=" + HttpUtility.UrlEncode(txtFirstName.Text) + "&");
            postData.Append("last_name=" + HttpUtility.UrlEncode(txtLastName.Text));

            //TO DO - do it for all Form Elements

            //////////////////////////////
            StreamWriter writer = null;

            using (HttpWebRequest request = (HttpWebRequest)WebRequest.Create(url))
            {
                request.Method = "POST";
                request.ContentType = "application/x-www-form-urlencoded";
                request.ContentLength = postData.ToString().Length;
                try
                {
                    writer = new StreamWriter(request.GetRequestStream());
                    writer.Write(postData.ToString());
                }
                finally
                {
                    if (writer != null)
                        writer.Close();
                }
            }
        }

        Response.Redirect("RedirectPage");

    }
1 Star2 Stars3 Stars4 Stars5 Stars (No Ratings Yet)
Loading...Loading...

Format DataTextField of the DropDownList

Some times there is a need to format DataTextField value of the DropDownList without changing the data source structure.
One of the ways to achieve this is to use LINQ by changing the property value “on the fly”. We just need to create the new structure that is being bound to the DropDownList.

   var userList = GetUsers();

   ddlUsers.DataSource = (from obj in userList
	       select new
		{
		  ID = obj.ID,
		  Name = string.Format("{0} {1} - £{2}", obj.Name, obj.SurName, obj.Balance)
		}).ToList();
                    
   ddlUsers.DataTextField = "Name";
   ddlUsers.DataValueField = "ID";
   ddlUsers.DataBind();              
 

This is quite handy when you are unsure if the text formatting will change in the future. Hope I helped you with this quick example 🙂

1 Star2 Stars3 Stars4 Stars5 Stars (No Ratings Yet)
Loading...Loading...

LINQ – filtering data structures

Using Language-Integrated Query (LINQ) has become very common in recent years as it is an easy way to retrieve data from various data structures eg. arrays. The code itself is also very clean and much shorter comparing to non LINQ implementations.

In this article I will show you how easy filtering data can be using LINQ.

Lets create client class first.

public class Client
    {
        public int ID { get; set; }
        public string Name { get; set; }
        public IEnumerable
Addresses { get; set; } } public class Address { public string Street { get; set; } public string City { get; set; } public string Country { get; set; } }

Next we create Client data source with some dummy data

 public IEnumerable ClientDB
{
    get
    {
        var clients = new List();

        #region load dummy data
        clients.Add(new Client()
        {
            ID = 1,
            Name = "Client1",
            Addresses = new List
() { new Address() { Street = “street1”, City = “city1”, Country = “UK” }, new Address() { Street = “street2”, City = “city2”, Country = “US” } } }); clients.Add(new Client() { ID = 2, Name = “Client2”, Addresses = new List
() { new Address() { Street = “street1”, City = “city1”, Country = “IT” }, new Address() { Street = “street2”, City = “city2”, Country = “US” } } }); clients.Add(new Client() { ID = 3, Name = “Client3”, Addresses = new List
() { new Address() { Street = “street1”, City = “city1”, Country = “ES” }, new Address() { Street = “street2”, City = “city2”, Country = “US” } } }); #endregion return clients; } }

Now we can filter data from our structure before we can display it on the gridview. We only want to display clients with the UK address.

   
protected void Page_Load(object sender, EventArgs e)
    {
        var clients_With_UK_AddressOnly = ClientDB;

        //lets filter data
        clients_With_UK_AddressOnly = from client in ClientDB
                                        where client.Addresses.Count(a =&gt; a.Country == "UK") &gt; 0
                                        select client;

        //or you can do it shorter using "Any" function
        clients_With_UK_AddressOnly = ClientDB.Where(c =&gt; c.Addresses.Any(a =&gt; a.Country == "UK"));

        GridView1.DataSource = clients_With_UK_AddressOnly;
        GridView1.DataBind();
    }

As you can see when using LINQ, we can do a lot with the data in just one line of code. The code itself if less prone to errors and more elegant.

LINQ-data-filtering

1 Star2 Stars3 Stars4 Stars5 Stars (No Ratings Yet)
Loading...Loading...

ASP.NET View state manager

In this article I will show you how to reduce view state of your asp.net pages by saving it into server session. This solution is perfect for dashboards but is not advisable if you have a lot of users as this can consume a huge amount of server resources.

Basically It can reduce page view state for up to 80%. In my case the total page size was reduced to 200Kb from about 1Mb 🙂

How it works

It saves and loads view state by overriding the page LoadPageStateFromPersistenceMedium and SavePageStateToPersistenceMedium methods. You can configure it to save to other “Persistent Mediums” as well.

    protected override object LoadPageStateFromPersistenceMedium()
    {
        //If server side enabled use it, otherwise use original base class implementation
        if (true == viewStateSvrMgr.GetViewStateSvrMgr().ServerSideEnabled)
        {
            return LoadViewState();
        }
        else
        {
            return base.LoadPageStateFromPersistenceMedium();
        }
    }
    protected override void SavePageStateToPersistenceMedium(object viewState)
    {
        if (true == viewStateSvrMgr.GetViewStateSvrMgr().ServerSideEnabled)
        {
            SaveViewState(viewState);
        }
        else
        {
            base.SavePageStateToPersistenceMedium(viewState);
        }
    }

When using it you only need to implement from “BasePage” in you pages, the rest is done automatically.

 public partial class _Default : BasePage
 {
 }

You can download complete solution below.
ViewStateHelper

1 Star2 Stars3 Stars4 Stars5 Stars (No Ratings Yet)
Loading...Loading...