Posts

Custom code validator using RichTextBox

Knowing how to format text using RichTextBox control lets you build wide range of tools such as code comparers, validators, chat applications etc. In this article I will show you how to build simple code checker/ validator.

code-checker

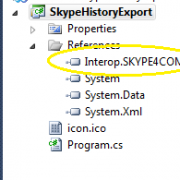
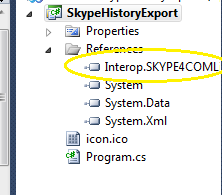
We start with creating new win form application and class library that we will read our test methods from. We will then compare these functions to our pattern methods.

Lets create some dummy methods now.

 public class TestClass
 {
        /// <summary>
        /// Test summary1
        /// this is dummy method
        /// </summary>
        public static void Test1()
        {
            throw new NotImplementedException();
        }

        /// <summary>
        /// Test summary2
        /// this is dummy method
        /// </summary>
        public static void Test2()
        {
            var test = new List<string>();
            test.Add("test1");
            test.Clear();
        }

        /// <summary>
        /// Test summary3
        /// this is dummy method
        /// </summary>
        public static void Test3()
        {
            var test = new List<string>();
            test.Add("test1");
            test.Add("test2");
            test.Add("test3");
            test.Add("test4 123456789");
            test.Add("test5");
            test.Add("test6");
            test.Clear();
        }
    }

Next, we will read this methods using reflection and then we bind it to the listbox control.

  var testTypes = typeof(TestClass).Assembly.GetTypes()
                   .Where(t => t.Name.StartsWith("Test")).OrderBy(t => t.Name).ToList();

  var testMethods = testTypes.First().GetMethods().Where(m => m.IsPublic && m.IsStatic).ToArray();

   lstTests.Items.AddRange(testMethods.ToArray());
   lstTests.SelectedIndex = 0;

When reading the summary tags we will use function that will parse text in .cs file in a search of summary tags.

  internal static string GetComment(string file, string methodName)
   {
            var commentContent = string.Empty;
            var buffer = string.Empty;

            foreach (var line in File.ReadAllLines(file))
            {
                buffer += line;

                if (line.ToLower().Contains(methodName.ToLower()))
                {
                    var summaryPositionStart = buffer.LastIndexOf("<summary>", StringComparison.OrdinalIgnoreCase);
                    var summaryPositionEnd = buffer.LastIndexOf("</summary>", StringComparison.OrdinalIgnoreCase);
                    if (buffer.Length <= summaryPositionStart || summaryPositionEnd - summaryPositionStart <= 0) { return ""; }

                    return PrepareSummaryString(buffer.Substring(summaryPositionStart, summaryPositionEnd - summaryPositionStart));
                }
            }

      return "";
   }

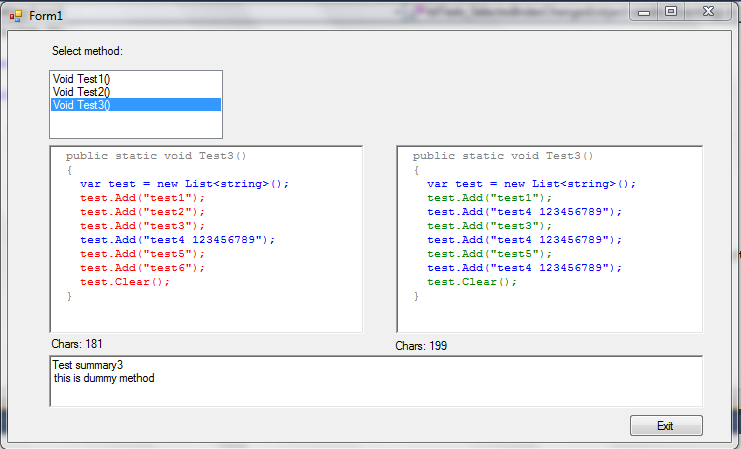
The final step is to format RichTextBox line by line giving it appropriate color depending on our requirements.

  public static void InsertColorText(string inString, RichTextBox textbox, Color methodColor)
   {
            textbox.Text = "";
            inString = inString.TrimEnd(' ', '\r', '\n');

            var lines = inString.Split('\n');
            var font = new Font("Courier New", 8f, FontStyle.Regular);

            for (var i = 0; i < lines.Length; i++)
            {
                textbox.SelectionFont = font;
                textbox.SelectionColor = methodColor;

                if (i < 2 || i + 1 >= lines.Length)
                {
                    textbox.SelectionColor = Color.Gray;
                    textbox.SelectedText = TrimLeft(lines[i], 2);
                    continue;
                }

                if (lines[i].Contains("throw new NotImplementedException();"))
                {
                    textbox.SelectionColor = Color.Red;
                    textbox.SelectedText = TrimLeft(lines[i], 4);
                    continue;
                }

                //calculate color for the current line
                if (lines[i].Trim().Length > 20)
                {
                    textbox.SelectionColor = Color.Blue;
                    textbox.SelectedText = TrimLeft(lines[i], 4);
                    continue;
                }

                textbox.SelectedText = TrimLeft(lines[i], 4);
            }
            textbox.SelectedText = "\n";
        }
    }

Whatever you want to build, this example shows you basic RichTextBox formatting implementation you can use in your solution. I have included working example below for your testing.
RichTextBox-Formatting

1 Star2 Stars3 Stars4 Stars5 Stars (No Ratings Yet)
Loading...Loading...

LINQ basic string and digit operations

Hi, today I want to show you how we can do the basic string and digit operations with the LINQ. If you are not using Linq in your current projects, you may find it very tempting to start with it. Once you learn it you will probably be using it all the time 🙂

Lets start with the function that sums the numbers that contains a given digit. We can do it in just one line of code 🙂

 public static int SumNumbers(int[] numbers, int digit)
 {
     return numbers.Where(i => i.ToString().Contains(digit.ToString())).Sum();
 }

If you want to sum number of words that contain minimum number of letters, this will be useful.

 public static int CountWords(string text, int minNumberOfLetters)
 {
     return text.Split(' ').Count(i => i.Length >= minNumberOfLetters);
 }

If you ever wanted to find the longest word in a text, here is example.

 public static string FindLongestWord(string text)
 {
     return text.Split(' ').OrderByDescending(i => i.Length).ThenBy(i => i).First();
 }

And if you want to count number of distinct words longer than given number, check this

 public static int CountWordsLongerThan(string text, int minimumLetters)
 {
     return text.Split(' ').Where(i => i.Length >= minimumLetters).Distinct().Count();
 }

This function gets list of non unique words in the string (separated by the space) and longer than 5 letters

 public static IEnumerable<string> FindNonUniqueWords(string inputText)
 {
     return inputText.ToLower().Split(' ')
       .OrderBy(i => i).GroupBy(i => i).Where(i => i.Count() > 1)
       .Select(i => i.Key).Where(i => i.Length > 5);
 }

And finally something more sophisticated, similarity calculation between two texts (for words having more than 4 letters)

 public static int CalculateSimilarity(string text1, string text2)
 {
    var words1 = text1.Split(' ').Where(i => i.Length > 4).Distinct();
    var words2 = text2.Split(' ').Where(i => i.Length > 4).Distinct();

     return words1.Intersect(words2).Count();
  }

Don’t forget to use “using System.Linq;” namespace in your project before using this. And of course parameters validation must be added to every function to be fully functional.

That’s it for now.

1 Star2 Stars3 Stars4 Stars5 Stars (No Ratings Yet)
Loading...Loading...

Implementing MVC3 Custom Model Binders

MVC model binders simply map Http browser requests to model objects. Normally if action invoker is unable to find the proper binder of the provided type, it uses built-in binder class: DefaultModelBinder. Default model binder is using following sources to bind to model object: Request.Form, RouteData.Values, Request.QueryString, Request.Files. The search for values is also done in same order.

We can include and exclude bindings for some object properties in action method or in class attribute.

 public ActionResult Create([Bind(Include="FirstName, LastName")] Client client) {

 //or in our class
 [Bind(Exclude="IsApproved")]
 public class Client {

In our example we will bind the model manually. This gives us more controls on how the model objects are instantiated and helps if we are using dependency resolver.

 [HttpPost]
  public ActionResult Edit(int id, FormCollection collection)
  {
        try
        {
            // TODO: Add update logic here
            //client client = (client)DependencyResolver.Current.GetService(typeof(client));
            var client = new Client();

            UpdateModel(client, collection);

            return RedirectToAction("Index");
        }
        catch
        {
            return View();
        }
    }

Below is our custom model binder implementation. Please note that the binder class needs to inherit from IModelBinder interface. In the example, we simple check if model exists or use dependency resolver to provide one. Next we are getting prefixes and values from BindingContext.ValueProvider property, that gives us all consolidates value providers we can read from. Please note that we didn’t include any validation logic.

  public class ClientModelBinder : IModelBinder
  {

   public object BindModel(ControllerContext controllerContext, ModelBindingContext bindingContext)
    {
        // check if model to update exists and create one if not
        Client model = (Client)bindingContext.Model ?? (Client)DependencyResolver.Current.GetService(typeof(Client));

        // check if the value provider has the required prefix
        bool hasPrefix = bindingContext.ValueProvider.ContainsPrefix(bindingContext.ModelName);

        string searchPrefix = (hasPrefix && !string.IsNullOrEmpty(bindingContext.ModelName)) ? bindingContext.ModelName + "." : "";

        // populate the fields of the model object
        model.ClientId = int.Parse(GetValue(bindingContext, searchPrefix, "ClientId"));
        model.FirstName = GetValue(bindingContext, searchPrefix, "FirstName");
        model.LastName = GetValue(bindingContext, searchPrefix, "LastName");
        model.BirthDate = DateTime.Parse(GetValue(bindingContext, searchPrefix, "BirthDate"));
        model.IsApproved = GetCheckedValue(bindingContext, searchPrefix, "IsApproved");
        model.Role = (Role)Enum.Parse(typeof(Role), GetValue(bindingContext, searchPrefix, "Role"));

        return model;
    }
 }

Next step is to register our custom binder. We can do it either in the global file or by giving attribute to our Client class.

  protected void Application_Start()
  {
        AreaRegistration.RegisterAllAreas();

        ModelBinders.Binders.Add(typeof(Client), new ClientModelBinder());

        RegisterGlobalFilters(GlobalFilters.Filters);
        RegisterRoutes(RouteTable.Routes);
    }

  //or
  [ModelBinder(typeof(ClientModelBinder))]
  public class Client
   {

You can also implement your own model binder provider which is very useful when handling multiple custom class binders.

 public class CustomModelBinderProvider : IModelBinderProvider 
 {
   public IModelBinder GetBinder(Type modelType) 
   {
      //return or apply the switch with other model type binders
      return modelType == typeof(Client) ? new ClientModelBinder() : null;
   }
 }

 //you can register provider in global app start method
 ModelBinderProviders.BinderProviders.Add(new CustomModelBinderProvider());

I have included application sample, so you can test how it works by setting the break point in the binding function and see how the model values are being retrieved.
CustomModelBinder

1 Star2 Stars3 Stars4 Stars5 Stars (No Ratings Yet)
Loading...Loading...

Encrypting Url parameters with DES

When reading and validating URL parameters you probably came across the situation that you wanted to hide some values for security reasons. Such a situations happen very often eg. when confirming email address of an user by sending validation link or by validating payment callback etc.

One of the solutions is to encrypt Url parameters using DES algorithm. DES it’s a symmetric algorithm that allows you to encrypt and decrypt values using shared public key. It is advisable to change public key from time to time for security reasons.

Below are two helper methods needed to encrypt and decrypt values:

    /// <summary>
    /// Encrypts an string using provided public key (DES)
    /// </summary>
    /// <param name="stringToEncrypt">String to be encrypted</param>
    /// <param name="sEncryptionKey">Public key</param>
    /// <returns>string</returns>
    public static string DES_encrypt(string stringToEncrypt, string sEncryptionKey)
    {
     if (stringToEncrypt.Length <= 3) { throw new Exception("Invalid input string"); }

     byte[] key = { };
     byte[] IV = { 10, 20, 30, 40, 50, 60, 70, 80 }; //defining vectors
     byte[] inputByteArray;
     key = Encoding.UTF8.GetBytes(sEncryptionKey.Substring(0, 8));
     using (var des = new DESCryptoServiceProvider())
     {
        inputByteArray = Encoding.UTF8.GetBytes(stringToEncrypt);
        using (var ms = new MemoryStream())
        {
            using (var cs = new CryptoStream(ms, des.CreateEncryptor(key, IV), CryptoStreamMode.Write))
            {
                cs.Write(inputByteArray, 0, inputByteArray.Length);
                cs.FlushFinalBlock();
                return Convert.ToBase64String(ms.ToArray());
            }
        }
      }
   }

and

    /// <summary>
    /// Decrypts an string using provided public key (DES)
    /// </summary>
    /// <param name="stringToDecrypt">String to be decrypted</param>
    /// <param name="sEncryptionKey">Public key</param>
    /// <returns>string</returns>
    public static string DES_decrypt(string stringToDecrypt, string sEncryptionKey)
    {
     if (stringToDecrypt.Length <= 3) { throw new Exception("Invalid input string"); }

     byte[] key = { };
     byte[] IV = { 10, 20, 30, 40, 50, 60, 70, 80 };//defining vectors
     byte[] inputByteArray = new byte[stringToDecrypt.Length];
     key = Encoding.UTF8.GetBytes(sEncryptionKey.Substring(0, 8));
     using (var des = new DESCryptoServiceProvider())
     {
        inputByteArray = Convert.FromBase64String(stringToDecrypt.Replace(" ", "+"));
        using (var ms = new MemoryStream())
        {
            using (CryptoStream cs = new CryptoStream(ms, des.CreateDecryptor(key, IV), CryptoStreamMode.Write))
            {
                cs.Write(inputByteArray, 0, inputByteArray.Length);
                cs.FlushFinalBlock();
                var encoding = Encoding.UTF8;
                return encoding.GetString(ms.ToArray());
            }
        }
     }
   }

In real life scenario when sending validation email we are simply encrypting our parametrized string the way shown bellow:

  var urlParam = txtEmail.Text + ";" + userID + ";" + DateTime.Now.ToString();

  var encryptedParam = Encryption.DES_encrypt(urlParam, "12345678");

  //send confirmation email with link: https://www.myadress.com/validate.aspx?sid=encryptedParam

When someone clicks the link and comes to our page we need to decrypt values and read the data.

   var encryptedParam = Request["sid"];

   var decryptedParam = Encryption.DES_decrypt(encryptedParam, "12345678");

   var email = decryptedParam.Split(';')[0];
   var userID = decryptedParam.Split(';')[1];
   var dateSent = DateTime.Parse(decryptedParam.Split(';')[2]);

As you probably have noticed, we use same public key to encrypt and decrypt values. In our situation the public key is safe because it is only stored on our server and is not being sent across the network.

For the above functions to be fully functional you need implement basic validation. It is also a good practice to add timestamp date to encrypted string so we can ensure the data was sent within defined time frame, lets say within last 5 minutes. After that the data will expire and wont be accepted by our application.

DES it’s quite save and efficient algorithm that you can use in your daily programming. It should be suitable in most case scenarios, unless you are building banking system 🙂

1 Star2 Stars3 Stars4 Stars5 Stars (No Ratings Yet)
Loading...Loading...

Creating MVC3 Custom View Engine

MVC it’s so great and flexible framework that even lets you create your own custom view engine if you need to replace Razor’s default rendering. You will probably not need this but we I will show you how to do it.

In our example we simply display all view data that are available during http request. Lets create our debug class that inherits from IView interface. In the Render function we simply use textwriter to display request data. The code looks as follows:

 public class DebugDataView : IView
 {
    public void Render(ViewContext viewContext, TextWriter writer)
    {
        Write(writer, "---Routing Data---");
        foreach (string key in viewContext.RouteData.Values.Keys)
        {
            Write(writer, "Key: {0}, Value: {1}",
            key, viewContext.RouteData.Values[key]);
        }

        Write(writer, "---View Data---");
        foreach (string key in viewContext.ViewData.Keys)
        {
            Write(writer, "Key: {0}, Value: {1}", key,
            viewContext.ViewData[key]);
        }
    }

    private void Write(TextWriter writer, string template, params object[] values)
    {
        writer.Write(string.Format(template, values) + "<p/>");
    }
}

Next we need to create our debug view engine class that inherits from IViewEngine interface. In FindView function, if our view name is found, we simply apply our own view style by passing in the instance of DebugDataView class that we have implemented earlier.

 public class DebugDataViewEngine : IViewEngine
 {
    public ViewEngineResult FindView(ControllerContext controllerContext, string viewName, string masterName, bool useCache)
    {
        if (viewName == "DebugData")
        {
            return new ViewEngineResult(new DebugDataView(), this);
        }
        else
        {
            return new ViewEngineResult(new string[] { "Debug Data View Engine" });
        }
    }

    public ViewEngineResult FindPartialView(ControllerContext controllerContext, string partialViewName, bool useCache)
    {
        return new ViewEngineResult(new string[] { "Debug Data View Engine" });
    }

    public void ReleaseView(ControllerContext controllerContext, IView view)
    {
        // no action here
    }
}

The last step is to register our custom engine in the Application_Start() function.

 protected void Application_Start()
    {
        AreaRegistration.RegisterAllAreas();

        ViewEngines.Engines.Add(new DebugDataViewEngine());

        RegisterGlobalFilters(GlobalFilters.Filters);
        RegisterRoutes(RouteTable.Routes);
    }

Download the sample below to see how it works.
CustomViewEngine

1 Star2 Stars3 Stars4 Stars5 Stars (No Ratings Yet)
Loading...Loading...

Custom Tree View Control

When using default asp.net Tree View control there is always been a problem to get the proper styling at the node level. Example of that is trying to set an node font weight to bold.

The simplest solution is to create custom tree view node that inherits from default TreeNode class.

  public class CustomTreeNode : TreeNode
  {
  }

When overriding RenderPreText method in that class we can change default rendering of the tree node text the way we want. We do it by adding text attributes using htmltextwriter. Below is example of that.

 protected override void RenderPreText(HtmlTextWriter writer)
 {
      writer.AddAttribute(HtmlTextWriterAttribute.Class, CssClass);
      writer.RenderBeginTag(HtmlTextWriterTag.Span);
      base.RenderPreText(writer);
  }

Here is complete working example of the custom tree view node.

 public class CustomTreeNode : TreeNode
    {
        public CustomTreeNode() : base() { }
        public CustomTreeNode(TreeView owner, bool isRoot) : base(owner, isRoot) { }

        private string _cssClass;
        public string CssClass
        {
            get { return _cssClass; }
            set { _cssClass = value; }
        }

        protected override void RenderPreText(HtmlTextWriter writer)
        {
            writer.AddAttribute(HtmlTextWriterAttribute.Class, CssClass);
            writer.RenderBeginTag(HtmlTextWriterTag.Span);
            base.RenderPreText(writer);
        }

        protected override void RenderPostText(HtmlTextWriter writer)
        {
            writer.RenderEndTag();
            base.RenderPostText(writer);
        }
    }

    public class CustomTreeView : TreeView
    {
        protected override TreeNode CreateNode()
        {
            return new CustomTreeNode(this, false);
        }
    }

Example of use:

      var tn = new CustomTreeNode();
      tn.Text = "test";
      tn.Value = "1";
      tn.CssClass = "normalNode/boldNode";          
      treeView.Nodes.Add(tn);

    //and the css
    .normalNode
    {
	font-weight:normal;
    }
    
    .boldNode
    {
	font-weight:bold;
    }

I hope this article helped you to understand how we can change default control rendering.

custom-tree-node

1 Star2 Stars3 Stars4 Stars5 Stars (No Ratings Yet)
Loading...Loading...

Remote Post utility

If you want to do an http post from code behind eg. to redirect to payment page it is sometimes useful to have an helper to be used throughout your application. Below is the simple class that does it’s job.

 public class RemotePost
{
    private NameValueCollection Inputs = new NameValueCollection();
    public string Url = "";
    public string Method = "post";
    public string FormName = "form1";

    public void Add(string name, string value)
    {
        Inputs.Add(name, value);
    }

    public void Post()
    {
        HttpContext.Current.Response.Clear();
        HttpContext.Current.Response.Write(@"<html><head><meta http-equiv=""Content-Type"" content=""text/html; charset=iso-8859-1"">");
        HttpContext.Current.Response.Write(String.Format(@"</head><body onload=""document.{0}.submit()"">", FormName));
        HttpContext.Current.Response.Write(String.Format(@"<form name=""{0}"" method=""{1}"" action=""{2}"" >", FormName, Method, Url));
        int i = 0;
        while (i < Inputs.Keys.Count)
        {
            HttpContext.Current.Response.Write(String.Format(@"<input name=""{0}"" type=""hidden"" value=""{1}"">", Inputs.Keys[i], Inputs[Inputs.Keys[i]]));
            i += 1;
        }
        HttpContext.Current.Response.Write("</form>");
        HttpContext.Current.Response.Write("</body></html>");
        HttpContext.Current.Response.End();
    }
}

When using it you simply add your parameters in the button click event before doing post request.


public void btnPay_OnClick(object sender, EventArgs e)
 {
        RemotePost myremotepost = new RemotePost();
        myremotepost.FormName = "form1";
        myremotepost.Method = "post";
        myremotepost.Url = "https://.......";
        myremotepost.Add("id", "123");
        //.....
        //----
        /////////////////////////
        myremotepost.Post();
}

An alternative way to that is sample below. You may also want to set PostBackUrl of the clicked button to avoid user to see response page.

 public void Post()
    {
        string url = "post url";

        using (StringBuilder postData = new StringBuilder())
        {
            postData.Append("first_name=" + HttpUtility.UrlEncode(txtFirstName.Text) + "&");
            postData.Append("last_name=" + HttpUtility.UrlEncode(txtLastName.Text));

            //TO DO - do it for all Form Elements

            //////////////////////////////
            StreamWriter writer = null;

            using (HttpWebRequest request = (HttpWebRequest)WebRequest.Create(url))
            {
                request.Method = "POST";
                request.ContentType = "application/x-www-form-urlencoded";
                request.ContentLength = postData.ToString().Length;
                try
                {
                    writer = new StreamWriter(request.GetRequestStream());
                    writer.Write(postData.ToString());
                }
                finally
                {
                    if (writer != null)
                        writer.Close();
                }
            }
        }

        Response.Redirect("RedirectPage");

    }
1 Star2 Stars3 Stars4 Stars5 Stars (No Ratings Yet)
Loading...Loading...

Format DataTextField of the DropDownList

Some times there is a need to format DataTextField value of the DropDownList without changing the data source structure.
One of the ways to achieve this is to use LINQ by changing the property value “on the fly”. We just need to create the new structure that is being bound to the DropDownList.

   var userList = GetUsers();

   ddlUsers.DataSource = (from obj in userList
	       select new
		{
		  ID = obj.ID,
		  Name = string.Format("{0} {1} - £{2}", obj.Name, obj.SurName, obj.Balance)
		}).ToList();
                    
   ddlUsers.DataTextField = "Name";
   ddlUsers.DataValueField = "ID";
   ddlUsers.DataBind();              
 

This is quite handy when you are unsure if the text formatting will change in the future. Hope I helped you with this quick example 🙂

1 Star2 Stars3 Stars4 Stars5 Stars (No Ratings Yet)
Loading...Loading...

Polymorphism in practice (C# sample)

One of the main principles of the Object Oriented Programming is the Polymorphism. This term simply means that an class can be used as more than one type through inheritance. It can have it’s own type, the base type or interface type it inherits from. In C# every type is polymorphic as the all types inherit from Object type.

Lets assume we are building an Internet store with the basket functionality. By creating base class and inheriting from it we get all properties from the base class plus the properties of the class that we are creating. By marking class as abstract we specify that this class cannot be instantiated and may serve only as a base class for other classes deeper in the system.

  public abstract class BasketBase
  {

  }

   public class Basket : BasketBase
   {

   }

By marking methods as a virtual in the base class, we can implement our own logic whenever we need it using override keyword in the underlying class.

   public abstract class BasketBase
   {
        public List<ProductItem> ProductList = new List<ProductItem>();
        public double Total = 0;
        public bool IsCheckedOut = false;
        public abstract void Checkout();
    }

    public class Basket : BasketBase
    {
        public override void Checkout()
        {
            if (base.IsCheckedOut) { throw new Exception("Check out has been already done!"); };
            ////////////

            foreach (ProductItem p in base.ProductList)
            {
                base.Total += p.ProductPrice * p.ItemCount;
            }

            base.IsCheckedOut = true;
        }
     }

When building advanced systems, Polymorphism gives you the chance to easily change the logic of existing methods by overriding it. It also makes your application cleaner by reusing amount of code needed to create properties in underlying classes.

I have included sample application of the Internet store with the basket and voucher functionality for you to do some testing.


basket.vouchers
Polymorphism-sample-app

1 Star2 Stars3 Stars4 Stars5 Stars (No Ratings Yet)
Loading...Loading...

Skype Chat History Export using C# and Interop

Ever wanted to export Skype chat history to text or xml files? There is an solution for that as it seems that there is no such a option in new Skype version.

It is possible thanks to Skype Interop object which allows us to interact and extend the application functionality. In order to start we need to install that object on our machine (installation file is included at the bottom of this article) and add reference to it in our visual studio project.

skype-refence2


Next we need to instantiate the interop object and get the current logged in user. We also need to ensure that the Skype application is running, if not we need to start it up.

SKYPE4COMLib.Skype oSkype = new SKYPE4COMLib.Skype();
if (!oSkype.Client.IsRunning) oSkype.Client.Start(true, true);

var owner = oSkype.CurrentUser.FullName + " (" + oSkype.CurrentUser.Handle + ")";</pre>
Next we need to simply loop through all chats
1
foreach (SKYPE4COMLib.Chat oChat in oSkype.Chats)
{

and all chat messages for each member on our contact list

foreach (SKYPE4COMLib.ChatMessage oMessage in oChat.Messages)
{

In this place you can customize it; save it to database, xml files, do an action depending on the chat content etc.

foreach (SKYPE4COMLib.Chat oChat in oSkype.Chats)
{
    try
    {
        var name = oChat.Name;
        var description = oChat.Description;
        var members = new SortedList();
        foreach (SKYPE4COMLib.User oUser in oChat.Members)
        {
            members.Add(oUser.FullName + " (" + oUser.Handle + ")", null);
        }

        var filename = "\\chat";
        foreach (var m in members.Keys)
        {
            filename += " " + m;
        }
        filename = filename.Replace(owner, "").Replace("  ", " ");
        if (filename.Length > 100) filename = filename.Substring(0, 100);
        filename = filename.Trim() + ".txt";

        Console.WriteLine();
        Console.WriteLine("Chat File = " + filename);
        Console.WriteLine("With " + oChat.Messages.Count.ToString() + " Message(s)");

        filename = basePath + filename;

        var iMessageCount = oChat.Messages.Count;
        iCounter = 0;
        var messages = new StringBuilder(21000);
        foreach (SKYPE4COMLib.ChatMessage oMessage in oChat.Messages)
        {
            iCounter++;
            messages.Append(oMessage.Timestamp + "\t" + oMessage.FromDisplayName + "\t" + oMessage.Body + "\r\n");
            if (iCounter % 25 == 0) Console.Write(".");
            if (messages.Length > 20000)
            {
                System.IO.File.AppendAllText(filename, messages.ToString());
                messages = new StringBuilder(21000);
                GC.Collect();
            }
            if (iMessageCount - iCounter > 1000)
                if ((iMessageCount - iCounter) % 1000 == 0)
                {
                    Console.WriteLine("");
                    Console.Write((iMessageCount - iCounter).ToString() + " ");
                }
        }
        System.IO.File.AppendAllText(filename, messages.ToString());
        Console.WriteLine(" OK");
    }
    catch (Exception ex)
    {
        Console.WriteLine();
        Console.WriteLine("Error " + ex.Message);
        Console.WriteLine();
    }
}

The first time your application contacts Skype using Interop object, an Skype security message is displayed allowing to reject or access the Skype data.

skype-message


POST UPDATE!
If you are running x64 bit PC then you need to do following:

1. Register Skype interop using below command
C:\Windows\System32\regasm.exe "C:\Program Files (x86)\Common Files\Skype\Skype4COM.dll"

2. In Visual Studio you need to change target platform to x86

skype_x64

This works for me when running Skype version: 6.11.0.102

Enjoy!
SkypeChatHistoryExport

1 Star2 Stars3 Stars4 Stars5 Stars (No Ratings Yet)
Loading...Loading...