Finding the distance between two addresses using Google API

There are number of cases when you will need to calculate the distance between two addresses in your application. For example when building an social website or CRM solution. Calculating the distance between the addresses has never been so easy thanks to Google geolocation API. The API is available for free but it has the limit of 2500 requests per day, you can always buy the business version if your service gets more popular.

geolocation

Lets start with building the empty asp.net website. After creating basic UI controls we can implement the back end of our application. We will use Json serialization when getting response from API so we need to prepare serialization function and geolocation response class.

 public static T FromJSON<T>(string json)
 {
     JavaScriptSerializer jss = new JavaScriptSerializer();

     return jss.Deserialize<T>(json);
  }

We will use data contracts to deserialize Json response to our class

 [DataContract(Namespace = "")]
 public class GeocodeResponse
 {
    [DataMember(Name = "status", Order = 1)]
    public string Status { get; set; }

    [DataMember(Name = "result", Order = 2)]
    public List<Result> Results { get; set; }

    [DataContract(Name = "result", Namespace = "")]
    public class Result
    {
        [DataMember(Name = "geometry")]
        public CGeometry Geometry { get; set; }

        [DataContract(Name = "geometry", Namespace = "")]
        public class CGeometry
        {
            [DataMember(Name = "location")]
            public CLocation Location { get; set; }

            [DataContract(Name = "location", Namespace = "")]
            public class CLocation
            {
                [DataMember(Name = "lat", Order = 1)]
                public double Lat { get; set; }
                [DataMember(Name = "lng", Order = 2)]
                public double Lng { get; set; }
            }
        }
    }
 }

To get Json object from API we need to send request and read response from it.

 public static string WebRequestJson(string url)
 {
    var response = string.Empty;

    StreamWriter requestWriter;

    var webRequest = System.Net.WebRequest.Create(url) as HttpWebRequest;
    if (webRequest != null)
    {
        webRequest.Method = "POST";
        webRequest.ServicePoint.Expect100Continue = false;
        webRequest.Timeout = 99000;

        webRequest.ContentType = "application/json";
        //POST the data.
        using (requestWriter = new StreamWriter(webRequest.GetRequestStream()))
        {
            requestWriter.Write("");
        }
    }

    HttpWebResponse resp = (HttpWebResponse)webRequest.GetResponse();
    using (Stream resStream = resp.GetResponseStream())
    {
        using (StreamReader reader = new StreamReader(resStream))
        {
            response = reader.ReadToEnd();
        }
    }

    return response;
 }

In our main function we are getting Json objects from API by making request to Google and passing address in request URL. Having Json objects for each address we deserialize it to our GeocodeResponse class. In this step we can check response if it is valid or contains only one location for one provided address.

 public static double GetDistance(string address1, string address2, DistanceUnit unit)
 {
    //make jason requests to google api
    string json1 = WebRequestJson(
        string.Format("https://maps.googleapis.com/maps/api/geocode/json?address={0}&sensor=false", address1)
        );
    string json2 = WebRequestJson(
        string.Format("https://maps.googleapis.com/maps/api/geocode/json?address={0}&sensor=false", address2)
        );

    //deserialize json to GeocodeResponse object
    var loc1 = FromJSON<GeocodeResponse>(json1);
    var loc2 = FromJSON<GeocodeResponse>(json2);

    //check is response is ok
    if (loc1.Status != "OK" || loc2.Status != "OK") { return -1; }

    //check if only one location found for each address
    //if (loc1.Results.Count > 1 || loc2.Results.Count > 1) { return -2; }

    //copy coordinate values
    var pos1 = new Coordinate()
    {
        Latitude = loc1.Results.First().Geometry.Location.Lat,
        Longitude = loc1.Results.First().Geometry.Location.Lng
    };
    var pos2 = new Coordinate()
    {
        Latitude = loc2.Results.First().Geometry.Location.Lat,
        Longitude = loc2.Results.First().Geometry.Location.Lng
    };

    //return distance in unit
    return CalculateDistance(pos1, pos2, unit);
}

When we have the final coordinates (latitude and longitude) for each address, we can now calculate the distance in the specified unit. We take the earth’s radius into account- the rest it’s just the pure mathematics.

  public static double CalculateDistance(Coordinate pos1, Coordinate pos2, DistanceUnit unit)
    {
        var R = 6371;//default in km

        switch (unit)
        {
            case DistanceUnit.Miles:
                R = 3960; break;
            case DistanceUnit.Kilometers:
                R = 6371; break;
            case DistanceUnit.Meters:
                R = 6371000; break;
        }

        //get location difference and convert to radians
        var dLat = DegreeToRadian(pos2.Latitude - pos1.Latitude);
        var dLon = DegreeToRadian(pos2.Longitude - pos1.Longitude);

        //calculate distance
        var a = Math.Sin(dLat / 2) * Math.Sin(dLat / 2) +
            Math.Cos(DegreeToRadian(pos1.Latitude)) *
            Math.Cos(DegreeToRadian(pos2.Latitude)) *
            Math.Sin(dLon / 2) * Math.Sin(dLon / 2);

        var c = 2 * Math.Asin(Math.Min(1, Math.Sqrt(a)));

        var d = R * c;//convert to unit

        return d;
    }

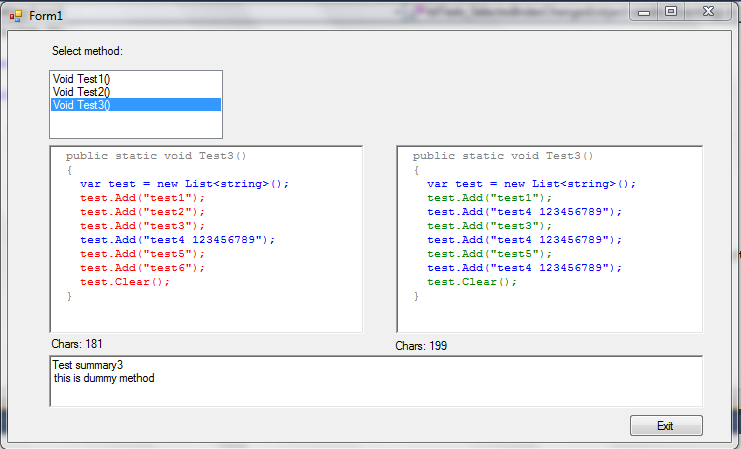
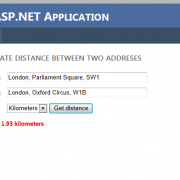
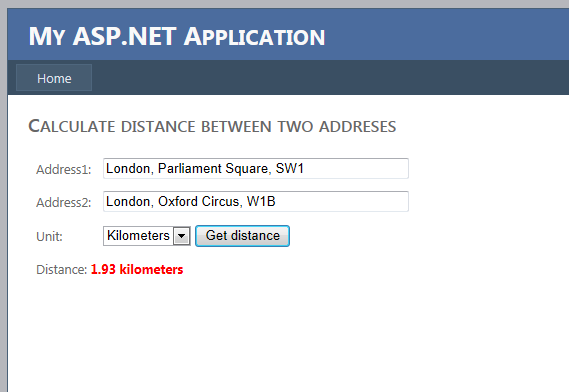
When we have all implementation done, we can finally test our application. I have included complete working application for your tests.

Geolocation

1 Star2 Stars3 Stars4 Stars5 Stars (No Ratings Yet)
Loading...Loading...

OpenXML Word templates processing

Office Open XML it’s the Microsoft’s zipped-xml based standard for processing Office documents. It allows to create, amend and process MS office files using e.g. .Net platform. In this article I will show you how to replace Word template with text and images using C# based application.

After creating new project we need to add two main references: DocumentFormat.OpenXml from DocumentFormat.OpenXml.dll and WindowsBase (.Net reference). Next, we need to prepare template with placeholders that our application will replace. For texts we will insert placeholder values in the the unique format that we can find parsing the document e.g. [#Project-Name#].

For the images we need to insert image placeholders (other images) and just remember their original names (e.g. myPicture2.jpg). This names needs to be provided in the parameter objects so we can find the placeholders by image name when parsing document.

word-template-300x184

The next step is to create parameters structure that we will use when processing the document. You may want to create your own parameters depending or your requirements.

  public class WordParameter
    {
        public string Name { get; set; }
        public string Text { get; set; }
        public FileInfo Image { get; set; }
    }

We will use them as follows when initiating the objects

    var templ = new WordTemplate();
    //add parameters
    templ.WordParameters.Add(new WordParameter() { Name = "[#Project-Name#]", Text = "Test project 123" });
    templ.WordParameters.Add(new WordParameter() { Name = "[#Features (string[])#]", Text = "Lorem Ipsum is simply dummy text of the printing \n Lorem Ipsum is simply dummy text of the printing \n Lorem Ipsum is simply dummy text of the printing..." });

    //original image names to be replaced with the new ones
    templ.WordParameters.Add(new WordParameter() { Name = "1.jpg", Image = new FileInfo(WordTemplate.GetRootPath() + @"\Images\1.jpg") });
    templ.WordParameters.Add(new WordParameter() { Name = "2.jpg", Image = new FileInfo(WordTemplate.GetRootPath() + @"\Images\2.jpg") });
    templ.WordParameters.Add(new WordParameter() { Name = "3.jpg", Image = new FileInfo(WordTemplate.GetRootPath() + @"\Images\3.jpg") });
    templ.WordParameters.Add(new WordParameter() { Name = "4.jpg", Image = new FileInfo(WordTemplate.GetRootPath() + @"\Images\4.jpg") });
    templ.WordParameters.Add(new WordParameter() { Name = "5.jpg", Image = new FileInfo(WordTemplate.GetRootPath() + @"\Images\5.jpg") });

    templ.ParseTemplate(); //create document from template

Having done that we can create our main function that parses the template and fills our placeholders with texts and images. Please see the inline comments within the function below.

 public void ParseTemplate()
 {
    using (var templateFile = File.Open(templatePath, FileMode.Open, FileAccess.Read)) //read our template
    {
        using (var stream = new MemoryStream())
        {
            templateFile.CopyTo(stream); //copy template

            using (var wordDoc = WordprocessingDocument.Open(stream, true)) //open word document
            {
                foreach (var paragraph in wordDoc.MainDocumentPart.Document.Descendants<Paragraph>().ToList()) //loop through all paragraphs 
                {
                    ReplaceImages(wordDoc, paragraph); //replace images

                    ReplaceText(paragraph); //replace text
                }

                wordDoc.MainDocumentPart.Document.Save(); //save document changes we've made
            }
            stream.Seek(0, SeekOrigin.Begin);//scroll to stream start point

            //save file or overwrite it
            var outPath = WordTemplate.GetRootPath() + @"\Output\DocumentOutput.docx";

            using (var fileStream = File.Create(outPath))
            {
                stream.CopyTo(fileStream);
            }
        }
    }
 }

Function that replaces the images. It gets all Blip objects from the paragraph and changes it’s embed ID that points to the image.

The cool thing about it is fact that you can give your own styles and transformation to the image template and it will be preserved and applied to the new image 🙂

Please see the inline comments.

 void ReplaceImages(WordprocessingDocument wordDoc, Paragraph paragraph)
 {
    // get all images in paragraph
    var imagesToReplace = paragraph.Descendants<A.Blip>().ToList();

    if (imagesToReplace.Any())
    {
        var index = 0;//image index within paragraph

        //find all original image names in paragraph
        var paragraphImageNames = paragraph.Descendants<DocumentFormat.OpenXml.Drawing.Pictures.NonVisualDrawingProperties>().ToList();

        //check all images in the paragraph and replace them if it matches our parameter
        foreach (var imagePlaceHolder in paragraphImageNames)
        {
            //check if we have image parameter that matches paragraph image
            foreach (var param in WordParameters)
            {
                //replace it if found by original image name
                if (param.Image != null && param.Image.Name.ToLower() == imagePlaceHolder.Name.Value.ToLower())
                {
                    var imagePart = wordDoc.MainDocumentPart.AddImagePart(ImagePartType.Jpeg); //add image to document
                    using (FileStream imgStream = new FileStream(param.Image.FullName, FileMode.Open))
                    {
                        imagePart.FeedData(imgStream); //feed it with data
                    }

                    var relID = wordDoc.MainDocumentPart.GetIdOfPart(imagePart); // get relationship ID

                    imagesToReplace.Skip(index).First().Embed = relID; //assign new relID, skip if this is another image in one paragraph
                }
            }
            index += 1;
        }
    }
}

When replacing the texts we check if paragraph contains the text that matches our parameter. If yes, then we check if to include one or multiple lines of text.
Next we create new parameter by copying the old parameter’s OuterXML (this preserves the styles). We also need to replace text that is stored in our parameter.

 void ReplaceText(Paragraph paragraph)
 {
    var parent = paragraph.Parent; //get parent element - to be used when removing placeholder
    var dataParam = new WordParameter();

    if (ContainsParam(paragraph, ref dataParam)) //check if paragraph is on our parameter list
    {
        //insert text list
        if (dataParam.Name.Contains("string[]")) //check if param is a list
        {
            var arrayText = dataParam.Text.Split(Environment.NewLine.ToCharArray()); //in our case we split it into lines

            if (arrayText is IEnumerable) //enumerate if we can
            {
                foreach (var itemData in arrayText)
                {
                    Paragraph bullet = CloneParaGraphWithStyles(paragraph, dataParam.Name, itemData);// create new param - preserve styles
                    parent.InsertBefore(bullet, paragraph); //insert new element
                }
            }
            paragraph.Remove();//delete placeholder
        }
        else
        {
            //insert text line
            var param = CloneParaGraphWithStyles(paragraph, dataParam.Name, dataParam.Text); // create new param - preserve styles
            parent.InsertBefore(param, paragraph);//insert new element

            paragraph.Remove();//delete placeholder
        }
    }
}

Creating the new paragraph object preserving the styles

 public static Paragraph CloneParaGraphWithStyles(Paragraph sourceParagraph, string paramKey, string text)
 {
    var xmlSource = sourceParagraph.OuterXml;

    xmlSource = xmlSource.Replace(paramKey.Trim(), text.Trim());

    return new Paragraph(xmlSource);
 }

Please note that when replacing images, the image placeholder names must be found in the document. Images that don’t match the parameter name, wont be replaced.

Having done that we can finally test our application. I have included complete working application for your tests.
WordTemplates

1 Star2 Stars3 Stars4 Stars5 Stars (No Ratings Yet)
Loading...Loading...

Adaptive Payments with PayPal

When building B2C systems the common scenario is to share the profits among the portal and the business users eg. when renting a house through you website the user pays total amount for the house, lets say 100 USD to the property owner. From that amount the owner will pay share commission to the portal’s website usually a small %.

In order to automate this process we can use PayPal Adaptive payments (chained transaction). The main difference between PayPal chain transaction and parallel transaction is that with the chained transaction the user sees only the total amount that he owns to the house owner. With the parallel transactions the user pays total amount but he sees the list of 2 receivers; the house owner and the portal owner share details.

Although there is a good documentation available on the Paypal website I found it very hard to get a working example of the payment implementation. That’s why I decided to post it here.

Lets start with downloading PayPal SDK. It contains all classes we need to make payment request. I have also included project and SDK at the bottom of this article.

When making a payment request we basically need to create paykey and redirect user to the payment page by passing that key as a parameter.
This simply creates initial payment record on PayPal account. The payment then may be finished or cancelled by the user. We get the paykey after getting response from PayPal with the status “CREATED”.

  if (ap.isSuccess.ToUpper() != "FAILURE")
  {
      if (PResponse.paymentExecStatus == "CREATED")
      {
          return PResponse.payKey;
      }
   }

In the init request we need to include basic parameters such as portal and property owner PayPal accounts, api credentials (sandbox account for testing)

    var OrderID = Guid.NewGuid().ToString();

    var portalPayPalEmail = ConfigurationManager.AppSettings["PORTAL_PAYPAL_EMAIL"];
    payRequest.ipnNotificationUrl = ConfigurationManager.AppSettings["PAYPAL_NOTIFICATION_URL"] + "?custom=" + OrderID; // to be processed later in PayPal-Call-back.ashx handler

    payRequest.cancelUrl = Request.Url.ToString();
    payRequest.returnUrl = Request.Url.ToString();
    payRequest.memo = OrderID;
    payRequest.trackingId = OrderID;

    payRequest.clientDetails = new ClientDetailsType();
    payRequest.clientDetails = ClientInfoUtil.getMyAppDetails();  //helper - gets values from web.config
    payRequest.actionType = "PAY"; // or CREATE
    payRequest.currencyCode = "USD";//set currency to user settings
    payRequest.requestEnvelope = new RequestEnvelope();
    payRequest.requestEnvelope = ClientInfoUtil.getMyAppRequestEnvelope(); //helper - gets values from web.config

This is how the config file should look like (please fill in with your data)

 <appSettings>
    <!-- PayPal configuration settings START-->
    <add key="deviceId" value="testID123"/>
    <add key="ipAddress" value="127.0.0.1"/>
    <add key="TrustAll" value="true"/>
    <add key="ENDPOINT" value="https://svcs.sandbox.paypal.com/"/>
    <add key="PAYPAL_URL" value="https://www.sandbox.paypal.com/"/>
    <add key="PAYPAL_REDIRECT_URL" value="https://www.sandbox.paypal.com/webscr?cmd=_ap-payment&amp;paykey="/>
    <add key="PAYPAL_NOTIFICATION_URL" value="https://your-website-url/PayPal-Call-back.ashx"/>
    <add key="APPLICATION-ID" value="APP-80W284485P5195333"/>
    <add key="API_REQUESTFORMAT" value="SOAP11"/>
    <add key="API_RESPONSEFORMAT" value="SOAP11"/>
    <add key="API_AUTHENTICATION_MODE" value="3TOKEN"/>
    <add key="PORTAL_PAYPAL_EMAIL" value="portal-paypal-email"/>
    <add key="API_USERNAME" value="api-username"/>
    <add key="API_PASSWORD" value="api-password"/>
    <add key="API_SIGNATURE" value="api-signature eg.AFcWxV21C7fd0v3bYYYRCpSSRl31AI0QDNGia62b0stzcLxkJCYRE9JE"/>
    <!-- PayPal configuration settings END-->
  </appSettings>

Next we need to define who will pay the PayPal commission, it can be one of the receivers or sender or all can be paying equally

 payRequest.feesPayer = "EACHRECEIVER"; //SENDER,PRIMARYRECEIVER,SECONDARYONLY

Next step is to create receiver list. It can include up to 6 accounts. In our case we have only portal user and the property owner. The total amount of 100 USD will be split to 80 USD for the property owner and 20 USD for portal (minus PayPal commission taken from both receivers)

    payRequest.receiverList = new Receiver[2];
    //pay the user
    payRequest.receiverList[0] = new Receiver();
    payRequest.receiverList[0].amount = 100;
    payRequest.receiverList[0].primary = IsChainedTransaction;// set to true to switch to chained transaction
    payRequest.receiverList[0].primarySpecified = IsChainedTransaction;// set to true to switch to chained transaction
    payRequest.receiverList[0].paymentType = "SERVICE";
    payRequest.receiverList[0].email = "portal-user-paypal-email";//set user paypal email

    //pay portal share
    payRequest.receiverList[1] = new Receiver();
    payRequest.receiverList[1].amount = 20;
    payRequest.receiverList[1].primary = false;
    payRequest.receiverList[1].primarySpecified = false;
    payRequest.receiverList[1].paymentType = "SERVICE";
    payRequest.receiverList[1].email = portalPayPalEmail;

At the end we need to supply credentials and send payment request.

 AdapativePayments ap = new AdapativePayments();
 ap.APIProfile = ClientInfoUtil.CreateProfile(); //helper - gets values from web.config

 PayResponse PResponse = ap.pay(payRequest);

The last step is to check if payment was successful and process the order in our application. In the web.config we defined PAYPAL_NOTIFICATION_URL as handler page PayPal-Call-back.ashx. So in the handler when we receive an callback we simply validate it by sending back request to PayPal. When the request is validated we can proceed with our order.

 public void ProcessRequest(HttpContext context)
 {
    Request = context.Request;

	//Request["custom"] contains our orderID
    if (IsRequestFromPaypal() && Request["custom"] != null)
    {
        var orderID = Request["custom"];
            
        //check the payment_status is Completed
        //check that orderID has not been previously processed
        //check that receiver_email is your Primary PayPal email
        //check that payment_amount/payment_currency are correct
        //process payment
    }
  }

   //validate request by sending it back to PayPal
   bool IsRequestFromPaypal()
   {
        var validationRequestContent = Request.Form + "&cmd=_notify-validate";
        var validationUrl = System.Configuration.ConfigurationManager.AppSettings["PAYPAL_URL"].TrimEnd('/') + "/cgi-bin/webscr";

        // Create a Web Request:
        var validationRequest = (System.Net.HttpWebRequest)System.Net.WebRequest.Create(validationUrl);
        validationRequest.ContentLength = validationRequestContent.Length;
        validationRequest.ContentType = "application/x-www-form-urlencoded";
        validationRequest.Method = "POST";

        using (var writer = new StreamWriter(validationRequest.GetRequestStream(), System.Text.Encoding.ASCII))
        {
            writer.Write(validationRequestContent);
        }

        // Now send the request and get the response:
        using (var response = validationRequest.GetResponse())
        {
            using (var reader = new StreamReader(response.GetResponseStream()))
            {
                var paypalResponse = reader.ReadToEnd();
                return paypalResponse == "VERIFIED";
            }
        }
    }

I have included working example below so you can use it in your testing. Just fill it in with your data. You also need to be logged in to your sandbox account when testing it.
AdaptivePayments

1 Star2 Stars3 Stars4 Stars5 Stars (No Ratings Yet)
Loading...Loading...

Custom code validator using RichTextBox

Knowing how to format text using RichTextBox control lets you build wide range of tools such as code comparers, validators, chat applications etc. In this article I will show you how to build simple code checker/ validator.

code-checker

We start with creating new win form application and class library that we will read our test methods from. We will then compare these functions to our pattern methods.

Lets create some dummy methods now.

 public class TestClass
 {
        /// <summary>
        /// Test summary1
        /// this is dummy method
        /// </summary>
        public static void Test1()
        {
            throw new NotImplementedException();
        }

        /// <summary>
        /// Test summary2
        /// this is dummy method
        /// </summary>
        public static void Test2()
        {
            var test = new List<string>();
            test.Add("test1");
            test.Clear();
        }

        /// <summary>
        /// Test summary3
        /// this is dummy method
        /// </summary>
        public static void Test3()
        {
            var test = new List<string>();
            test.Add("test1");
            test.Add("test2");
            test.Add("test3");
            test.Add("test4 123456789");
            test.Add("test5");
            test.Add("test6");
            test.Clear();
        }
    }

Next, we will read this methods using reflection and then we bind it to the listbox control.

  var testTypes = typeof(TestClass).Assembly.GetTypes()
                   .Where(t => t.Name.StartsWith("Test")).OrderBy(t => t.Name).ToList();

  var testMethods = testTypes.First().GetMethods().Where(m => m.IsPublic && m.IsStatic).ToArray();

   lstTests.Items.AddRange(testMethods.ToArray());
   lstTests.SelectedIndex = 0;

When reading the summary tags we will use function that will parse text in .cs file in a search of summary tags.

  internal static string GetComment(string file, string methodName)
   {
            var commentContent = string.Empty;
            var buffer = string.Empty;

            foreach (var line in File.ReadAllLines(file))
            {
                buffer += line;

                if (line.ToLower().Contains(methodName.ToLower()))
                {
                    var summaryPositionStart = buffer.LastIndexOf("<summary>", StringComparison.OrdinalIgnoreCase);
                    var summaryPositionEnd = buffer.LastIndexOf("</summary>", StringComparison.OrdinalIgnoreCase);
                    if (buffer.Length <= summaryPositionStart || summaryPositionEnd - summaryPositionStart <= 0) { return ""; }

                    return PrepareSummaryString(buffer.Substring(summaryPositionStart, summaryPositionEnd - summaryPositionStart));
                }
            }

      return "";
   }

The final step is to format RichTextBox line by line giving it appropriate color depending on our requirements.

  public static void InsertColorText(string inString, RichTextBox textbox, Color methodColor)
   {
            textbox.Text = "";
            inString = inString.TrimEnd(' ', '\r', '\n');

            var lines = inString.Split('\n');
            var font = new Font("Courier New", 8f, FontStyle.Regular);

            for (var i = 0; i < lines.Length; i++)
            {
                textbox.SelectionFont = font;
                textbox.SelectionColor = methodColor;

                if (i < 2 || i + 1 >= lines.Length)
                {
                    textbox.SelectionColor = Color.Gray;
                    textbox.SelectedText = TrimLeft(lines[i], 2);
                    continue;
                }

                if (lines[i].Contains("throw new NotImplementedException();"))
                {
                    textbox.SelectionColor = Color.Red;
                    textbox.SelectedText = TrimLeft(lines[i], 4);
                    continue;
                }

                //calculate color for the current line
                if (lines[i].Trim().Length > 20)
                {
                    textbox.SelectionColor = Color.Blue;
                    textbox.SelectedText = TrimLeft(lines[i], 4);
                    continue;
                }

                textbox.SelectedText = TrimLeft(lines[i], 4);
            }
            textbox.SelectedText = "\n";
        }
    }

Whatever you want to build, this example shows you basic RichTextBox formatting implementation you can use in your solution. I have included working example below for your testing.
RichTextBox-Formatting

1 Star2 Stars3 Stars4 Stars5 Stars (No Ratings Yet)
Loading...Loading...

Custom Tree View Control

When using default asp.net Tree View control there is always been a problem to get the proper styling at the node level. Example of that is trying to set an node font weight to bold.

The simplest solution is to create custom tree view node that inherits from default TreeNode class.

  public class CustomTreeNode : TreeNode
  {
  }

When overriding RenderPreText method in that class we can change default rendering of the tree node text the way we want. We do it by adding text attributes using htmltextwriter. Below is example of that.

 protected override void RenderPreText(HtmlTextWriter writer)
 {
      writer.AddAttribute(HtmlTextWriterAttribute.Class, CssClass);
      writer.RenderBeginTag(HtmlTextWriterTag.Span);
      base.RenderPreText(writer);
  }

Here is complete working example of the custom tree view node.

 public class CustomTreeNode : TreeNode
    {
        public CustomTreeNode() : base() { }
        public CustomTreeNode(TreeView owner, bool isRoot) : base(owner, isRoot) { }

        private string _cssClass;
        public string CssClass
        {
            get { return _cssClass; }
            set { _cssClass = value; }
        }

        protected override void RenderPreText(HtmlTextWriter writer)
        {
            writer.AddAttribute(HtmlTextWriterAttribute.Class, CssClass);
            writer.RenderBeginTag(HtmlTextWriterTag.Span);
            base.RenderPreText(writer);
        }

        protected override void RenderPostText(HtmlTextWriter writer)
        {
            writer.RenderEndTag();
            base.RenderPostText(writer);
        }
    }

    public class CustomTreeView : TreeView
    {
        protected override TreeNode CreateNode()
        {
            return new CustomTreeNode(this, false);
        }
    }

Example of use:

      var tn = new CustomTreeNode();
      tn.Text = "test";
      tn.Value = "1";
      tn.CssClass = "normalNode/boldNode";          
      treeView.Nodes.Add(tn);

    //and the css
    .normalNode
    {
	font-weight:normal;
    }
    
    .boldNode
    {
	font-weight:bold;
    }

I hope this article helped you to understand how we can change default control rendering.

custom-tree-node

1 Star2 Stars3 Stars4 Stars5 Stars (No Ratings Yet)
Loading...Loading...

Skype Chat History Export using C# and Interop

Ever wanted to export Skype chat history to text or xml files? There is an solution for that as it seems that there is no such a option in new Skype version.

It is possible thanks to Skype Interop object which allows us to interact and extend the application functionality. In order to start we need to install that object on our machine (installation file is included at the bottom of this article) and add reference to it in our visual studio project.

skype-refence2


Next we need to instantiate the interop object and get the current logged in user. We also need to ensure that the Skype application is running, if not we need to start it up.

SKYPE4COMLib.Skype oSkype = new SKYPE4COMLib.Skype();
if (!oSkype.Client.IsRunning) oSkype.Client.Start(true, true);

var owner = oSkype.CurrentUser.FullName + " (" + oSkype.CurrentUser.Handle + ")";</pre>
Next we need to simply loop through all chats
1
foreach (SKYPE4COMLib.Chat oChat in oSkype.Chats)
{

and all chat messages for each member on our contact list

foreach (SKYPE4COMLib.ChatMessage oMessage in oChat.Messages)
{

In this place you can customize it; save it to database, xml files, do an action depending on the chat content etc.

foreach (SKYPE4COMLib.Chat oChat in oSkype.Chats)
{
    try
    {
        var name = oChat.Name;
        var description = oChat.Description;
        var members = new SortedList();
        foreach (SKYPE4COMLib.User oUser in oChat.Members)
        {
            members.Add(oUser.FullName + " (" + oUser.Handle + ")", null);
        }

        var filename = "\\chat";
        foreach (var m in members.Keys)
        {
            filename += " " + m;
        }
        filename = filename.Replace(owner, "").Replace("  ", " ");
        if (filename.Length > 100) filename = filename.Substring(0, 100);
        filename = filename.Trim() + ".txt";

        Console.WriteLine();
        Console.WriteLine("Chat File = " + filename);
        Console.WriteLine("With " + oChat.Messages.Count.ToString() + " Message(s)");

        filename = basePath + filename;

        var iMessageCount = oChat.Messages.Count;
        iCounter = 0;
        var messages = new StringBuilder(21000);
        foreach (SKYPE4COMLib.ChatMessage oMessage in oChat.Messages)
        {
            iCounter++;
            messages.Append(oMessage.Timestamp + "\t" + oMessage.FromDisplayName + "\t" + oMessage.Body + "\r\n");
            if (iCounter % 25 == 0) Console.Write(".");
            if (messages.Length > 20000)
            {
                System.IO.File.AppendAllText(filename, messages.ToString());
                messages = new StringBuilder(21000);
                GC.Collect();
            }
            if (iMessageCount - iCounter > 1000)
                if ((iMessageCount - iCounter) % 1000 == 0)
                {
                    Console.WriteLine("");
                    Console.Write((iMessageCount - iCounter).ToString() + " ");
                }
        }
        System.IO.File.AppendAllText(filename, messages.ToString());
        Console.WriteLine(" OK");
    }
    catch (Exception ex)
    {
        Console.WriteLine();
        Console.WriteLine("Error " + ex.Message);
        Console.WriteLine();
    }
}

The first time your application contacts Skype using Interop object, an Skype security message is displayed allowing to reject or access the Skype data.

skype-message


POST UPDATE!
If you are running x64 bit PC then you need to do following:

1. Register Skype interop using below command
C:\Windows\System32\regasm.exe "C:\Program Files (x86)\Common Files\Skype\Skype4COM.dll"

2. In Visual Studio you need to change target platform to x86

skype_x64

This works for me when running Skype version: 6.11.0.102

Enjoy!
SkypeChatHistoryExport

1 Star2 Stars3 Stars4 Stars5 Stars (No Ratings Yet)
Loading...Loading...

Extension methods in C#

Extension methods enable you to add your own methods to already existing system types without deriving from those types. Extension methods are always static but they are called as a instance methods on the extended types. We can extend types like string, double, DateTime etc. as well as LINQ queries which already are extensions of IEnumerable type.

Extended types can be used as a helper methods that you can compile and use in all your projects.

Lets start with the simple string extensions. First example simply checks if string has a value. The second one strips html tags from the string.

    /// <summary>
    /// Determines whether this instance of string is not null or empty.
    /// </summary>
    public static bool HasValue(this string text)
    {
        return !string.IsNullOrEmpty(text);
    }

    /// <summary>
    /// Strips html tags from the string
    /// </summary>
    public static string HtmlStrip(this string input)
    {
        input = Regex.Replace(input, "<style>(.|\n)*?</style>", string.Empty);
        input = Regex.Replace(input, @"<xml>(.|\n)*?</xml>", string.Empty);
        return Regex.Replace(input, @"<(.|\n)*?>", string.Empty);
    }   

Similar is with the double extensions

    /// <summary>
    /// Rounds the value to last 10s
    /// </summary>
    public static double RoundOff(this double i)
    {
        return ((double)Math.Round(i / 10.0)) * 10;
    } 

The sample below is very useful when displaying dates. It displays friendly string with the time left to an event, it extends DateTime type.

 public static string ToDateLeftString(this DateTime input)
    {
        var oSpan = DateTime.Now.Subtract(input);
        var TotalMinutes = oSpan.TotalMinutes;
        var Suffix = " ago";

        if (TotalMinutes < 0.0)
        {
            TotalMinutes = Math.Abs(TotalMinutes);
            Suffix = " from now";
        }

        var aValue = new SortedList<double, Func<string>>();
        aValue.Add(0.75, () => "less than a minute");
        aValue.Add(1.5, () => "about a minute");
        aValue.Add(45, () => string.Format("{0} minutes", Math.Round(TotalMinutes)));
        aValue.Add(90, () => "about an hour");
        aValue.Add(1440, () => string.Format("about {0} hours", Math.Round(Math.Abs(oSpan.TotalHours)))); // 60 * 24
        aValue.Add(2880, () => "a day"); // 60 * 48
        aValue.Add(43200, () => string.Format("{0} days", Math.Floor(Math.Abs(oSpan.TotalDays)))); // 60 * 24 * 30
        aValue.Add(86400, () => "about a month"); // 60 * 24 * 60
        aValue.Add(525600, () => string.Format("{0} months", Math.Floor(Math.Abs(oSpan.TotalDays / 30)))); // 60 * 24 * 365 
        aValue.Add(1051200, () => "about a year"); // 60 * 24 * 365 * 2
        aValue.Add(double.MaxValue, () => string.Format("{0} years", Math.Floor(Math.Abs(oSpan.TotalDays / 365))));

        return aValue.First(n => TotalMinutes < n.Key).Value.Invoke() + Suffix;
    } 

The last example extends the IEnumerable type so we are actually adding a new LINQ function.

    /// <summary>
    /// Selects the item with maximum of the specified value.
    /// </summary>
    public static T WithMax<T, TKey>(this IEnumerable<T> list, Func<T, TKey> keySelector)
    {
        return list.OrderByDescending(i => keySelector(i)).FirstOrDefault();
    } 

When testing above methods you will get following results

  static void Main(string[] args)
    {
        //DateTime extended method
        var myDate = DateTime.Now.AddDays(7);
        var dateLeft = myDate.ToDateLeftString(); //result: "6 days from now"

        //System.String extended method
        var myNoHtmlString = "<br><b>test</b>".HtmlStrip(); //result: "test"

        //or 
        var hasStringValue = "test string".HasValue(); //result: true

        //System.Double extension
        double myTo10sRoundedValue = (66.3).RoundOff(); //result: 70

        //Linq extensions
        List<int> list = new List<int>() { 1, 2, 3 }; 
        var max = list.WithMax(i => i); //result: 3
    }

I have included sample project below so you can do some testing yourself.
ExtensionMethods

1 Star2 Stars3 Stars4 Stars5 Stars (No Ratings Yet)
Loading...Loading...