Automating Microsoft Team Foundation (TFS) check-ins

Have you ever wanted to automate code check-ins to TSF e.g. at the end of the day or at the custom interval you define? That’s easy to do using TFS remote API provided by Microsoft.

In our exercise we are going to use following packages to make the solution working:

<packages>
 <package id="Microsoft.AspNet.WebApi.Client" version="5.2.2" targetFramework="net452" />
 <package id="Microsoft.AspNet.WebApi.Core" version="5.2.2" targetFramework="net452" />
 <package id="Microsoft.IdentityModel.Clients.ActiveDirectory" version="2.16.204221202" targetFramework="net452" />
 <package id="Microsoft.TeamFoundationServer.Client" version="14.95.3" targetFramework="net452" />
 <package id="Microsoft.TeamFoundationServer.ExtendedClient" version="14.95.3" targetFramework="net452" />
 <package id="Microsoft.VisualStudio.Services.Client" version="14.95.3" targetFramework="net452" />
 <package id="Microsoft.VisualStudio.Services.InteractiveClient" version="14.95.3" targetFramework="net452" />
 <package id="Microsoft.WindowsAzure.ConfigurationManager" version="1.7.0.0" targetFramework="net452" />
 <package id="Newtonsoft.Json" version="6.0.8" targetFramework="net452" />
 <package id="System.IdentityModel.Tokens.Jwt" version="4.0.0" targetFramework="net452" />
 <package id="WindowsAzure.ServiceBus" version="3.3.1" targetFramework="net452" />
</packages>

As a authorization mechanism, we will use token which can be generated on your Visual Studio Online account.
Tokens are more secure and flexible than using standard user/pass credentials as we can safely share it and allow it to expire after a predefined period of time.

so, in our app.config we will have following settings:

 <add key="TfsURL" value="https://your_name.visualstudio.com/DefaultCollection/"/>
 <add key="workspaceName" value="AUTOMATED_CHECKINS"/>
 <add key="tfsServerFolderPath" value="$/remote_folder"/>
 <add key="localWorkingPath" value="D:\MyCodefolder"/>
 <add key="tfsUser" value="not-used"/>
 <add key="tfsPass" value="-your token--"/>
 <add key="tfsDomain" value=""/>

Our main function will look as following (see inline comments):

static void TFSCheckIn(string comment = "")
{
  var TfsURL = new Uri(ConfigurationManager.AppSettings["TfsURL"]);

  //use it for standard user/pass authentication
  //var credential = new NetworkCredential(ConfigurationManager.AppSettings["tfsUser"], ConfigurationManager.AppSettings["tfsPass"], ConfigurationManager.AppSettings["tfsDomain"]);
  //var collection = new TfsTeamProjectCollection(TfsURL, credential);
  //collection.EnsureAuthenticated();

  //token based authentication
  var simpleWebToken = new SimpleWebToken(ConfigurationManager.AppSettings["tfsPass"]);
  var networkCredential = new NetworkCredential(ConfigurationManager.AppSettings["tfsUser"], ConfigurationManager.AppSettings["tfsPass"]);
  
  var basicCredential = new BasicAuthCredential(networkCredential);
  var tfsCredentials = new TfsClientCredentials(basicCredential);
  tfsCredentials.AllowInteractive = false;
  var collection = new TfsTeamProjectCollection(TfsURL, tfsCredentials);
  collection.EnsureAuthenticated();

  var versionControl = (VersionControlServer)collection.GetService(typeof(VersionControlServer));

  Workspace WS = null;
  try
  {
    //Get the current workspace
    WS = versionControl.GetWorkspace(ConfigurationManager.AppSettings["workspaceName"], versionControl.AuthorizedUser);
  }
  catch (Exception)
  { }

  //create workspace if not yet created
  if (WS == null)
  {
     WS = versionControl.CreateWorkspace(ConfigurationManager.AppSettings["workspaceName"], versionControl.AuthorizedUser);
  }

  //map local folder if not already mapped
  if (!WS.IsLocalPathMapped(ConfigurationManager.AppSettings["localWorkingPath"]))
  {
    //Mapping TFS Server and code generated
    WS.Map(ConfigurationManager.AppSettings["tfsServerFolderPath"], ConfigurationManager.AppSettings["localWorkingPath"]);
  }
 
  //download remote changes (check-out)
  WS.Get();

 //auto-resolve conflicts
 Conflict[] conflicts = WS.QueryConflicts(new string[] { ConfigurationManager.AppSettings["tfsServerFolderPath"] }, true);
  
  foreach (Conflict conflict in conflicts)
  {
    if (WS.MergeContent(conflict, false))
    {
     conflict.Resolution = Resolution.AcceptTheirs;
     WS.ResolveConflict(conflict);
    }

   Console.WriteLine("conflict: " + conflict.FileName);
 }

 //Add all files just created to pending change
 int NumberOfChange = WS.PendAdd(ConfigurationManager.AppSettings["localWorkingPath"], true);

 //Get the list of pending changes
 PendingChange[] pendings = WS.GetPendingChanges(ConfigurationManager.AppSettings["tfsServerFolderPath"], RecursionType.Full);

  if (pendings.Any())
  {
    //Auto check in code to Server
     WS.CheckIn(pendings, "Auto check-in code (#changes: " + pendings.Count() + "). " + comment);
  }
 }

Need  custom solution tailored to your business needs? Contact us today!

1 Star2 Stars3 Stars4 Stars5 Stars (1 votes, average: 5.00 out of 5)
Loading...Loading...

Auto publishing reports to Tableau Server

Tableau it’s a great tool for data visualization, however if you are using it a lot, you may want to automate some stuff. One of them is publishing/updating reports to Tableau Server. This is when Tableau Utility Command comes in handy, you can install it on your development server and use in the power-shell script. One of the solutions is to use CI server for auto deployments, you only need to give the git/svn access for users changing the reports or adding new ones.

tableau

Following script can be run as build step in TeamCity to detect workbooks that have been changed recently and publish them automatically to Tableau server. Parent folder of each workbook will be used as project name when publishing. In order to run it, just pass in email notification list and server password – of course you need to configure the params (server url, smtp etc.).

param (
[string]$cmddir = "C:\Program Files\Tableau\Tableau Server\8.2\extras\Command Line Utility", #location where tabcmd has been installed
[string]$server = "https://tableau:81", #this is url of the Tableau server 
[string]$currentDir = (split-path -parent $MyInvocation.MyCommand.Definition) +"\", #current script location
[string]$notificationEmailList = "test1@test.com,test2@test.com", #send email notifications if successful
[string]$admin = "user", #admin account for the server
[string]$pass = "" #to be passed in as param
)
 
function SendEmail($emailTo,$title,$body)
{ 
   $smtp=new-object Net.Mail.SmtpClient("my_smtp_server"); $smtp.Send("sentAs@mydomain.com", $emailTo, $title, $body);
}
 
$global:temp_ = "";
 
#login to Tableau
cd  $cmddir
.\tabcmd login -s $server -u $admin -p $pass
 
 get-childitem -Path $currentDir –recurse |  where-object { 
    $_.LastWriteTime -gt (get-date).AddMinutes(-10) -and $_.FullName.EndsWith(".twb")
  } | 
  Foreach-Object {
 
       [string]$projectName = [System.IO.DirectoryInfo]$_.Directory.Name;
        $global:temp_ += [string][System.IO.Path]::GetFileName($_.FullName) + " | ";
 
       #publish or overwrite workbook on the server
       .\tabcmd publish $_.FullName -r $projectName  -o  
  } 
 
 
#more commands
#.\tabcmd publish "workbook.twbx" -r "project name" -n "Workbook Name" --db-user "" --db-password "" -o
 
 
#log out to release the session
.\tabcmd logout
 
if(-not $global:temp_ -eq "")
{
   SendEmail $notificationEmailList "Tableau report published" "Following report(s) has just been successfully published to Tableau Server: $global:temp_"
}

enjoy!

1 Star2 Stars3 Stars4 Stars5 Stars (No Ratings Yet)
Loading...Loading...

Integrating automated Selenium tests with TeamCity

Automated tests are crucial these days to achieve high quality software products as they are being prone to errors especially during agile process where changes can occur at any stage causing our solution to stop functioning properly. Apart from standard testing using TDD, Mocking etc. there is always a need to perform interface tests simulating an user using our website. The ideal solution in that case are automated Selenium tests.


Selenium tests give us possibility to create user case scenarios that we can test either on our dev applications or live websites deployed to the clients. This will give us a chance to test all cases after the build will happen either on demand or when we deploy live version of our product.

Selenium tests can be created by the developer or business analyst or testers as this not requires programming skills. In order to start creating tests we need to download Selenium IDE plug-in for Firefox: https://docs.seleniumhq.org/download/

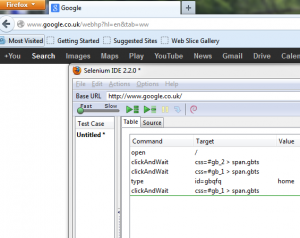
Creating tests is similar to recording macros in Excel, all we need to do is to record our actions that we want to test, image below shows the example:


selenium-ide

Please note that you need to install Firefox version 21.0 the newer version is not working with selenium (Firefox bug).

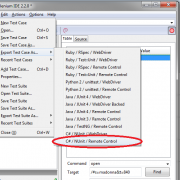
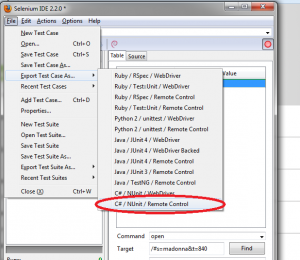
After our test is created, we need to export it to .cs C# file as pictured below:

selenium-export

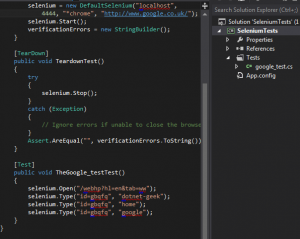
The next step is to create small library project application. We will use this project to compile our test files exported from the Selenium IDE. After we have the project created, we simply need to copy our exported .cs file to our project and compile dll.

selenium-project-files

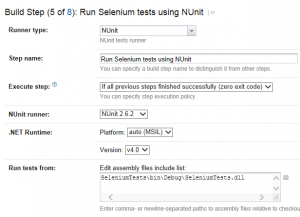
If we want to integrate Selenium tests with the TeamCity server, we can do it by including previously created project into our development project files. After that, we can configure TeamCity build step to run our Selenium tests on every triggered build. To configure build step, we need to choose NUnit runner type (or other test framework of your choice)

buildstep

If we have configured everything correctly, the test will run on every application change. Of course Selenium tests must be run at the end, when project is compiled and deployed on the server (if this is our local dev environment).

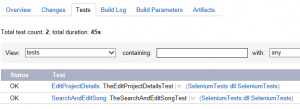
When tests finish, we can check the status in TeamCity admin panel or configure email notification or use TeamCity Tray Notifier to track the results.

test-results

The final thing that needs to be set-up is the Selenium server. You can run the Selenium server locally by turning it on when needed and then running NUnit application to check the test locally. In our case we want the Selenium to be running on the server as a Windows Service.

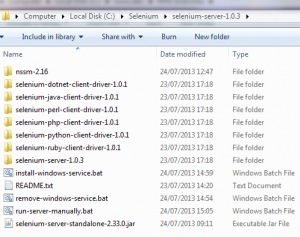
After downloading Selenium RC https://docs.seleniumhq.org/projects/remote-control/ we unpack the files to following location C:\Selenium\selenium-server-1.0.3 You not necessarily need all that files as it also includes web drivers for other languages. Anyway, our folder structure should look similar to following:

selenium-files

We also need to download nssm-2.16 (“Non-Sucking Service Manager”), we will use it to install Windows Service running our Selenium server. When we run run-server-manually.bat, the Selenium server will be launched, it will stop after you close console window – this will help when testing on your local machine.
The script looks like this:

 java -jar selenium-server-standalone-2.33.0.jar -port 4444

I have also created 2 scripts: install-windows-service.bat and remove-windows-service.bat that install and remove Windows Service on the target server. The logic is as follows:

//install Windows Service
C:\Selenium\selenium-server-1.0.3\nssm-2.16\win64\nssm.exe install Selenium-Server "C:\Program Files (x86)\Java\jre7\bin\java.exe" "-jar C:\Selenium\selenium-server-1.0.3\selenium-server-standalone-2.33.0.jar"

//Uninstall Windows Service
C:\Selenium\selenium-server-1.0.3\nssm-2.16\win64\nssm.exe remove Selenium-Server

After installing Windows Service, please make sure it is running by going to Control panel > Administrative Tools > Services. You also need to remember to check java path as it differs for x64 systems.
That’s it. I have included configuration files that may help you. Hope you will be successful with your configuration 🙂

Selenium-VisualStudioApp

1 Star2 Stars3 Stars4 Stars5 Stars (1 votes, average: 5.00 out of 5)
Loading...Loading...

SQL Server Database Index optimization – maintenance plan

Properly optimized table indexes are crucial in database performance tuning. This is especially true when the database is growing overtime causing indexes to be fragmented. The more an index is fragmented, the longer time is needed for database reads.

When should the indexes be rebuilt? Microsoft recommends to reorganize indexes when fragmentation level is between 5% and 30%. When fragmentation is above 30% then the index should be rebuilt.

The best way of ensuring low fragmentation levels is to setup maintenance plan for the database that will be triggered periodically (preferably at night). The script below can be used in scheduled job. You can use @PrintInformationOnly param to print the index information first, for all database tables. When you set it to 0, the actual rebuild or reorganize process will start. I have also added @ExcludeTableList to exclude some tables that should be skipped (for example are too big or not used).

DECLARE	@return_value int

EXEC	@return_value = [dbo].[IndexOptimize]
		@databaseName = N'myDatabase',
		@IndexFragmentationMin = 5,
		@IndexFragmentationRebuildMin = 30,
		@PrintInformationOnly = 1

SELECT	'Return Value' = @return_value

The actual script starts here. You may want to adjust FILLFACTOR params separately for each tables as this should be configured depending on data update frequency. By setting MAXDOP= 1 param, we disable parallel threads during rebuild process, so the server CPU will not go to high.

I have successfully tested this script on database of size about 150 GB. Be aware that initial index rebuild may take a few hours, depending on fragmentation levels.

 
CREATE PROCEDURE [dbo].[IndexOptimize] 
@databaseName varchar(200) = 'MyTable',
@IndexFragmentationMin int = 5,
@IndexFragmentationRebuildMin int = 30,
@skipLargeTables bit = 0,
@ExcludeTableList nvarchar(max) = 'MyBigTable1,MyBigTable2',
@PrintInformationOnly bit = 0
AS
BEGIN

BEGIN TRY
	declare @dbid int = 0;
	set @dbid = (select [dbid] from [Master].dbo.[sysdatabases] where name = @databaseName);
    ------------------
	DECLARE @Schema VARCHAR(200);  
	DECLARE @Table NVARCHAR(200);  
	DECLARE @Index VARCHAR(200);  
	DECLARE @avg_fragmentation_in_percent int; 
	DECLARE @page_count int; 

	DECLARE db_cursor CURSOR FOR  
		SELECT 
		dbschemas.[name] as 'Schema', 
		dbtables.[name] as 'Table', 
		dbindexes.[name] as 'Index',
		indexstats.avg_fragmentation_in_percent,
		indexstats.page_count
		FROM sys.dm_db_index_physical_stats (@dbid, NULL, NULL, NULL, NULL) AS indexstats
		INNER JOIN sys.tables dbtables on dbtables.[object_id] = indexstats.[object_id]
		INNER JOIN sys.schemas dbschemas on dbtables.[schema_id] = dbschemas.[schema_id]
		INNER JOIN sys.indexes AS dbindexes ON dbindexes.[object_id] = indexstats.[object_id]
		AND indexstats.index_id = dbindexes.index_id
		WHERE dbindexes.[name] is not null and indexstats.database_id = @dbid  
		ORDER BY indexstats.avg_fragmentation_in_percent desc

	OPEN db_cursor   
	FETCH NEXT FROM db_cursor INTO @Schema, @Table, @Index, @avg_fragmentation_in_percent, @page_count 

	WHILE @@FETCH_STATUS = 0   
	BEGIN  
	   if(@skipLargeTables = 1 and CHARINDEX(@Table, @ExcludeTableList) > 0)
	   begin
		 print 'skipped index (' + CONVERT(varchar(10),@avg_fragmentation_in_percent) + '%) ' + @Index + ' for table ' + @Table + ', page count ' + CONVERT(varchar(10),@page_count)
	   end
	   else
	   begin
			if(@avg_fragmentation_in_percent <= @IndexFragmentationRebuildMin and @avg_fragmentation_in_percent > @IndexFragmentationMin and LEN(@Index) > 3)
			begin
			   print 'reorganizing index (' + CONVERT(varchar(10),@avg_fragmentation_in_percent) + '%) ' + @Index + ' for table ' + @Table + ', page count ' + CONVERT(varchar(10),@page_count)
			  
			   if(@PrintInformationOnly = 0)
			   begin
			      exec('ALTER INDEX ' + @Index + ' ON dbo.' + @Table + ' REORGANIZE;');
			   end
			end
		    
			if(@avg_fragmentation_in_percent > @IndexFragmentationRebuildMin and LEN(@Index) > 3)
			begin
			   print 'rebuilding index (' + CONVERT(varchar(10),@avg_fragmentation_in_percent) + '%) ' + @Index + ' for table ' + @Table + ', page count ' + CONVERT(varchar(10),@page_count)
			  
			   if(@PrintInformationOnly = 0)
			   begin
			      exec('ALTER INDEX ' + @Index + ' ON dbo.' + @Table + ' REBUILD WITH (MAXDOP=1,FILLFACTOR = 90)');
			   end
			end
		end
			
		FETCH NEXT FROM db_cursor INTO @Schema, @Table, @Index, @avg_fragmentation_in_percent, @page_count  
	END   

	CLOSE db_cursor   
	DEALLOCATE db_cursor
	
	END TRY 
BEGIN CATCH	
	DECLARE @ErrorMessage NVARCHAR(4000);
	DECLARE @ErrorSeverity INT;
	DECLARE @ErrorState INT;
	SELECT @ErrorMessage = 'Message: '+ ERROR_MESSAGE() + CHAR(13) + CHAR(10) + 
						   'Procedure: ' + CAST(ERROR_PROCEDURE() AS VARCHAR(MAX)) + CHAR(13) + CHAR(10) +  
						   'Line: ' + CAST(ERROR_LINE() AS VARCHAR(MAX)) + CHAR(13) + CHAR(10) +  
						   'Number: ' + CAST(ERROR_NUMBER() AS VARCHAR(MAX)),  @ErrorSeverity = ERROR_SEVERITY(), @ErrorState = ERROR_STATE();	

	RAISERROR (@ErrorMessage, @ErrorSeverity, @ErrorState);
	RETURN 0
END CATCH

END

Microsoft-SQL-Server

1 Star2 Stars3 Stars4 Stars5 Stars (1 votes, average: 4.00 out of 5)
Loading...Loading...

Deleting old files by using schedule task and PowerShell

If you are administrator or programmer, you probably were in situation that you wanted to free up some server space by deleting old unused files. Following script may be quite useful if you want to get rid of old files of the certain type – also if they are packed into .zip packages.

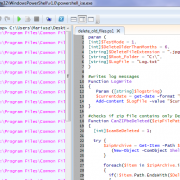
Script checks for all predefined file types with the creation date older than 6 months (can be configured). If an old file is detected then it is being deleted and that information is being stored to the local log.txt file. The old .zip files will also be deleted (containing only the files we want to delete).

The recommended way of using it is to create windows schedule task that runs periodically, so the server space usage is always optimized.

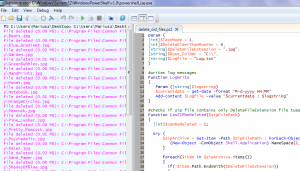
delete_old_files

 param (
[int]$TestMode = 1,
[int]$DeleteOlderThanMonths = 6,
[string]$DeleteFileExtension = ".jpg",
[string]$Root_Folder = "C:\",
[string]$Logfile = "Log.txt"
)

#writes log messages
Function LogWrite
{
   Param ([string]$logstring)
   $currentdate = get-date -format "M-d-yyyy HH:MM"
   Add-content $Logfile -value "$currentdate | $logstring"
}

#checks if zip file contains only DeleteFileExtension file type
Function CanZIPbeDeleted($zipFilePath)
{
  [int]$canBeDeleted = 1;

  try { 
      $zipArchive = Get-Item -Path $zipFilePath | ForEach-Object { 
         (New-Object -ComObject Shell.Application).NameSpace($_.FullName)
      }
  
      foreach($item in $zipArchive.items())
      {
        if(!$item.Path.EndsWith($DeleteFileExtension))
        {
           $canBeDeleted = 0
           $msg = "$zipFilePath cannot be deleted as it contains non $DeleteFileExtension file"
           LogWrite $msg
           Write-Host $msg -foreground Green 
           return 0
        }
     }   
   } 
   catch { 
       $msg = "Unexpected Error. Error details: $_.Exception.Message"
       LogWrite $msg
       Write-Host $msg -foreground Red 
       return 0
   } 
 
    return $canBeDeleted;
}

#deletes the file
Function DeleteFile($filePathToDelete)
{
  try
  { 
     if($TestMode -eq 0)
     {
       Remove-Item $filePathToDelete
     }
     
     $size = (Get-Item -Path $filePathToDelete | Select-Object Name, @{Name="Size";Expression={[string]::Format("{0:0.00} MB", $_.Length / 1MB)}}).Size
     $msg = "File deleted ($size): $filePathToDelete"
     LogWrite $msg 
     Write-Host $msg -foreground "magenta"  
  } 
  catch { 
     $msg = "Unexpected Error. Error details: $_.Exception.Message"
     LogWrite $msg 
     Write-Host $msg -foreground Red 
   }    
}

 
 get-childitem -Path $Root_Folder –recurse |  
 where-object { 
    $_.CreationTime -lt (get-date).addMonths(-$DeleteOlderThanMonths) -and ($_.FullName.EndsWith($DeleteFileExtension) -or $_.FullName.EndsWith(".zip"))
  } | 
 Foreach-Object {
 
    if ($_.FullName.EndsWith(".zip"))
    {
       $canDeleteZip = CanZIPbeDeleted $_.FullName
       if($canDeleteZip -eq 1)
       {
          DeleteFile $_.FullName
       }
    }
    else
    {
       DeleteFile $_.FullName
    }
 } 

Enjoy!
delete_old_files

1 Star2 Stars3 Stars4 Stars5 Stars (1 votes, average: 4.00 out of 5)
Loading...Loading...

SVN log parsing using PowerShell

This script can be useful when gathering SVN release changes that occurred since the last release. It connects to SVN server, gets logs from within date range (last build and date now). Logs are then filtered, cleaned (removed if no comments were added). Next, email message is sent based on the retrieved data. To be able to run the script, you need to configure it by setting-up your own svn server url, credentials, also please make sure you have enabled running ps scripts on your server.

Enjoy!

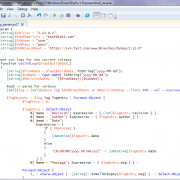
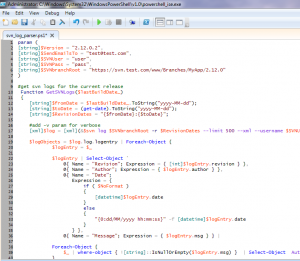
svn_log_parser

 param (
[string]$Version = "2.12.0.2",
[string]$SendEmailsTo = "test@test.com",
[string]$SVNUser = "user",
[string]$SVNPass = "pass",
[string]$SVNbranchRoot = "https://svn.test.com/www/Branches/MyApp/2.12.0"
)

#get svn logs for the current release
 Function GetSVNLogs($lastBuildDate_)
 {
    [string]$fromDate = $lastBuildDate_.ToString("yyyy-MM-dd");
    [string]$toDate = (get-date).ToString("yyyy-MM-dd");
    [string]$RevisionDates = "{$fromDate}:{$toDate}"; 

    #add -v param for verbose
    1$log = 1(&$svn log $SVNbranchRoot -r $RevisionDates --limit 500 --xml --username $SVNUser --password $SVNPass);

    $logObjects = $log.log.logentry | Foreach-Object {
            $logEntry = $_

            $logEntry | Select-Object `
                @{ Name = "Revision"; Expression = { [int]$logEntry.revision } },
                @{ Name = "Author"; Expression = { $logEntry.author } },
                @{ Name = "Date"; 
                   Expression = {
                       if ( $NoFormat )
                       {
                           [datetime]$logEntry.date
                       }
                       else
                       {
                           "{0:dd/MM/yyyy hh:mm:ss}" -f [datetime]$logEntry.date
                       }
                   } },
                @{ Name = "Message"; Expression = { $logEntry.msg } } | 

            Foreach-Object {        
                $_ | where-object { ![string]::IsNullOrEmpty($logEntry.msg) }  | Select-Object  Author, Date, Message              
            }
      }

    return $logObjects
 }

#send email function
 Function SendEmail($SendEmailsTo_, $EmailSubject_, $changes_)
 {
   $emailFrom = "automation@test.com" 
   $smtpserver="smtp.test.com" 
   $smtp=new-object Net.Mail.SmtpClient($smtpServer) 

   foreach ($email in $SendEmailsTo_.split(';'))
   {   
      $smtp.Send($emailFrom, $email, $EmailSubject_, $changes_)
   }
 }

#get svn logs since the last release
$SVNChanges = GetSVNLogs $lastBuildDate

$changes += "`r`n`r`n";
$changes += "SVN changes sice last release`r`n";
$changes += $SVNChanges | Format-Table -AutoSize | Out-String;
$changes += "`r`n-------------------------------------------------------------------`r`n";
$changes += "This is automated email, please do reply directly!";

#send email 
$EmailSubject = "Release $Version changes";

SendEmail $SendEmailsTo $EmailSubject $changes;

1 Star2 Stars3 Stars4 Stars5 Stars (No Ratings Yet)
Loading...Loading...

Using Power-Shell in automated tasks (batch script alternative)

Power Shell it’s the Microsoft’s Automation framework sitting on top of .Net (System.Management.Automation) that lets us perform advanced automated tasks. It can help not only the administrators but also the programmers to save a lot of time by automating repeatable processes. The script’s syntax is quite intuitive and easy to learn so it allows users already writing e.g. batch scripts to grasp it very fast.

If we have for example an old batch file that executes sql scripts stored in the folder as follows:

 @ECHO OFF
 echo script folder: %1
 echo server: %2
 echo database: %3
 echo database user: %4
 echo ----------------

setlocal enabledelayedexpansion
cd /d %1

for %%d in (*.sql) do (
   set filecontent=
   for /f "delims=" %%a in (%%d) do (set "filecontent=!filecontent!%%a")
   set "temp=!filecontent!"
   set "filecontent=!temp:#PARAM#=%4!"
   echo executing %%d
   echo ----------
   sqlcmd -S%2 -E -Q"!filecontent!" -d%3 
)
pause

then the above script can be easily replaced with Power-Shell. Using PS gives us the same flexibility of scripting languages and at the same time allows us to interact with .Net framework when required.

Before we can start executing PS scripts on our computer, we need to enable execution which is disabled by default. We can do it using following cmdlets:

 //enable executing 
 Set-ExecutionPolicy RemoteSigned

 //get back to default settings
 Set-ExecutionPolicy Default

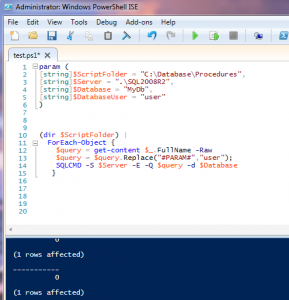
After we’ve created test.ps1 file, we can start implementation. In order to make testing easier we can define default params inside the script using param(…) constructor. Please note that by using [string] keyword we actually creating strongly typed objects. Defined parameters will be overwritten by the user’s passed-in params.

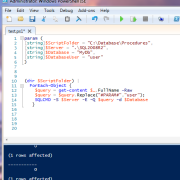
ps-script

The first command (dir $ScriptFolder) just lists all files within the directory, then ForEach-Object function iterates through all files getting their content into $query variable. Next the $query text is being replaced with our parameter if we have any. The final task is just to execute SQLCMD command passing in query and database connection settings.

param (
[string]$ScriptFolder = "Database\Procedures",
[string]$Server = ".\SQL2008R2",
[string]$Database = "MyDb",
[string]$DatabaseUser = "user"
)


(dir $ScriptFolder) | 
  ForEach-Object { 
    $query = get-content $_.FullName -Raw
    $query = $query.Replace("#PARAM#","user");
    SQLCMD -S $Server -E -Q $query -d $Database
   }

In order to run our Power-Shell script we need just execute following line:

 //command line
 powershell -noexit C:\test.ps1 -ScriptFolder "C:\Database\Procedures" -Server ".\SQL2008R2" -Database "MyDB" -DatabaseUser "user"

Good luck with your Power-Shell scripting 🙂

1 Star2 Stars3 Stars4 Stars5 Stars (No Ratings Yet)
Loading...Loading...

Deploying website files to multiple folders with exclusions

When automating deployments it is sometimes needed to create copy of your website/folder in different locations with some excluded files e.g. configuration files or temp folders.

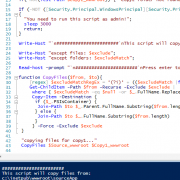
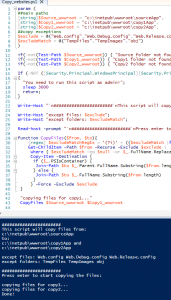
The script below will help you to achieve that. It can be triggered automatically on your post-deployment action (possibly in your CI server) or executed manually. Script just copies all files from source folder into multiple locations, except for the files and sub-folders you specify. Files with the same names will be overridden in target locations.

Copy_websites

param (
##main paths
[string]$Source_wwwroot = "c:\inetpub\wwwroot\sourceApp",
[string]$Copy1_wwwroot = "c:\inetpub\wwwroot\copy1App",
[string]$Copy2_wwwroot = "c:\inetpub\wwwroot\copy2App",
##copy exceptions
$exclude = @("Web.config","Web.Debug.config","Web.Release.config"),
$excludeMatch = @("TempFiles","TempImages","obj")
)

if(-not(Test-Path $Source_wwwroot)) { "Source folder not found!"; return;}
if(-not(Test-Path $Copy1_wwwroot)) { "Copy1 folder not found!"; return;}
if(-not(Test-Path $Copy2_wwwroot)) { "Copy2 folder not found!"; return;}

If (-NOT ([Security.Principal.WindowsPrincipal][Security.Principal.WindowsIdentity]::GetCurrent()).IsInRole([Security.Principal.WindowsBuiltInRole] "Administrator"))
{ 
  "You need to run this script as admin!";
  sleep 3000
  return;
}

Write-Host "`n#######################`nThis script will copy files from: `n$Source_wwwroot `nto: `n$Copy1_wwwroot and`n$Copy2_wwwroot `n";

Write-Host "except files: $exclude";
Write-Host "except folders: $excludeMatch";

Read-host -prompt "`n#######################`nPress enter to start copying the files"

function CopyFiles($from, $to){
    [regex] $excludeMatchRegEx = ‘(?i)‘ + (($excludeMatch |foreach {[regex]::escape($_)}) –join “|”) + ‘’
    Get-ChildItem -Path $from -Recurse -Exclude $exclude | 
     where { $excludeMatch -eq $null -or $_.FullName.Replace($from, "") -notmatch $excludeMatchRegEx} |
     Copy-Item -Destination {
      if ($_.PSIsContainer) {
       Join-Path $to $_.Parent.FullName.Substring($from.length)
      } else {
       Join-Path $to $_.FullName.Substring($from.length)
      }
     } -Force -Exclude $exclude
 }

 "copying files for copy1..."
 CopyFiles $Source_wwwroot $Copy1_wwwroot

 "copying files for copy2..."
 CopyFiles $Source_wwwroot $Copy2_wwwroot

"Done!";
sleep 10000

Enjoy!
Copy_websites

1 Star2 Stars3 Stars4 Stars5 Stars (No Ratings Yet)
Loading...Loading...

Adding links and styled text to Power-Point presentation

Formatting paragraphs in OpenXML documents is playing crucial part in proper implementation as the very common requirement is to change PowerPoint files programmatically during the business workflow processes.
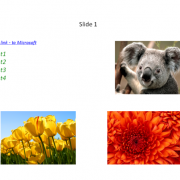
I have recently received lot of queries about how to insert formatted text and links into the presentation. Hence, in this article I will show you how to do it.

In the past I have written article about auto generating Power-Point documents from the template file, in this part I will extend the functionality I have implemented before.

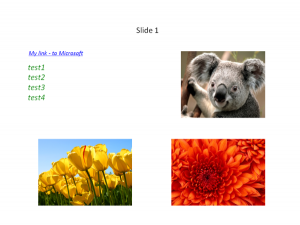
power-point-links

Let’s start with defining placeholder paragraphs we will use to insert our formatted texts and links:

 var templ = new PowerPointTemplate();
 templ.PowerPointParameters.Add(new PowerPointParameter() { Name = "[#Paragraph1#]", Text = "Slide 1" });
 templ.PowerPointParameters.Add(new PowerPointParameter() { Name = "[#Paragraph2#]", Text = "Slide 2" });
 templ.PowerPointParameters.Add(new PowerPointParameter() { Name = "[#List1(string[])#]", Text = "test1 n test2 n test3 n test4" });
 templ.PowerPointParameters.Add(new PowerPointParameter() { Name = "[#List2(string[])#]", Text = "test1 n test2 n test3 n test4" });

 templ.PowerPointParameters.Add(new PowerPointParameter() { Name = "[#Link1(#link#)#]", Text = "My link - to Microsoft; https://microsoft.com" });
 templ.PowerPointParameters.Add(new PowerPointParameter() { Name = "[#Link2(#link#)#]", Text = "My link - to Google; https://google.com" });

As you can see, we will handle text lists and single links defined in our template. Of course the names and params will depend on your requirements.

I will skip describing how the process works as this can be read in my previous article. I will go straight to the styled paragraph creation.

Function below returns new paragraph with the styles we have defined in parameters. The RunProperties class is created, then we are assigning the styles – please note that the color needs to be converted to HEX before adding it to run properties. Next we need to define the text-box object containing paragraph’s text. At the end we simply need to append run properties and text to the run and finally append run to the paragraph object.

If you need multiple colors within one paragraph, simply create multiple texts, runs and run properties and configure it separately before assigning it to the paragraph object.

 public Paragraph CreateStyledParagraph(string text, System.Drawing.Color color, bool isBold, bool isItalic, int fontSize = 2000)
 {
    var runProperties = new RunProperties(); //set basic styles for paragraph
    runProperties.Bold = isBold;
    runProperties.Italic = isItalic;
    runProperties.FontSize = fontSize;
    runProperties.Dirty = false;

    var hexColor = color.R.ToString("X2") + color.G.ToString("X2") + color.B.ToString("X2");//convert color to hex
    var solidFill = new SolidFill();
    var rgbColorModelHex = new RgbColorModelHex() { Val = hexColor };

    solidFill.Append(rgbColorModelHex);
    runProperties.Append(solidFill);

    //use this to assign the font family
    runProperties.Append(new LatinFont() { Typeface = "Arial Black" });

    var textBody = new Drawing.Text();
    textBody.Text = text; //assign text

    var run = new Drawing.Run();
    var newParagraph = new Paragraph();

    run.Append(runProperties);//append styles
    run.Append(textBody);//append text
    newParagraph.Append(run);//append run to paragraph

    return newParagraph;
}

Creating links is a little bit different. In order to do it we first need to create HyperlinkRelationship in the slide, the HyperlinkOnClick class contained within the run will then map to it on user click event. Please note that link color is not supported.

 public Paragraph CreateStyledLinkParagraph(SlidePart slidePart, string url, string text, bool isBold, bool isItalic, int fontSize = 2000)
 {
    //note: HyperlinkOnClick does not support link color

    var relationshipId = "rIdlink" + Guid.NewGuid().ToString();//create unique id
    slidePart.AddHyperlinkRelationship(new System.Uri(url, System.UriKind.Absolute), true, relationshipId);//assign hyperlink to the current slide we process

    var runProperties = new RunProperties(
         new LatinFont() { Typeface = "Bodoni MT Black"},
         new HyperlinkOnClick() { Id = relationshipId }); //set basic styles and assign relationshipId
    runProperties.Bold = isBold;
    runProperties.Italic = isItalic;
    runProperties.FontSize = fontSize;
    runProperties.Dirty = false;

    var textBody = new Drawing.Text();
    textBody.Text = text; //assign text

    var run = new Drawing.Run();
    var newParagraph = new Paragraph();

    run.Append(runProperties);//append styles
    run.Append(textBody);//append text
    newParagraph.Append(run);//append run to paragraph

    return newParagraph;
 }

The final replacement is being done in ReplaceText function. See in-line comments:

 void ReplaceText(Paragraph paragraph, SlidePart currentSlide)
 {
    var parent = paragraph.Parent; //get parent element - to be used when removing placeholder
    var dataParam = new PowerPointParameter();

    if (ContainsParam(paragraph, ref dataParam)) //check if paragraph is on our parameter list
    {
        //insert text list
        if (dataParam.Name.Contains("string[]")) //check if param is a list
        {
            var arrayText = dataParam.Text.Split(Environment.NewLine.ToCharArray()); //in our case we split it into lines

            if (arrayText is IEnumerable) //enumerate if we can
            {
                foreach (var itemData in arrayText)
                {
                    //var newParagraph = CloneParaGraphWithStyles(paragraph, dataParam.Name, itemData);// create new param - preserve styles
                    var newParagraph = CreateStyledParagraph(itemData.Trim(), System.Drawing.Color.Green, false, true, 2000);

                    parent.InsertBefore(newParagraph, paragraph); //insert new element
                }
            }
            paragraph.Remove();//delete placeholder
        }
        else if (dataParam.Name.Contains("#link#")) //check if param is a link
        {
            var linkText = dataParam.Text.Split(';')[0].Trim();
            var linkUrl = dataParam.Text.Split(';')[1].Trim();

            var newParagraph = CreateStyledLinkParagraph(currentSlide, linkUrl, linkText, false, true, 1500);
            parent.InsertBefore(newParagraph, paragraph); //insert new element

            paragraph.Remove();//delete placeholder
        }
        else
        {
            //insert text line
            var param = CloneParaGraphWithStyles(paragraph, dataParam.Name, dataParam.Text); // create new param - preserve styles
            parent.InsertBefore(param, paragraph);//insert new element

            paragraph.Remove();//delete placeholder
        }
    }
 }

I have included fully working solution below so you can easily convert it to your needs. I hope this information was useful for you 🙂

PowerPoint-styled-TextLinks

1 Star2 Stars3 Stars4 Stars5 Stars (No Ratings Yet)
Loading...Loading...

PowerShell unattended execution with auto-retry and SMS alerts

Running automated processes seems to be an very easy task. However, this may become a little bit more complicated for running critical unattended operations. Imagine the situation when you have to run critical, automated process at night while your business relies on successful completion of it.

For example, if you are running ETL process at night that loads the data to be available for the users next morning. You want to be warned if something is wrong as you won’t have enough time to load it next morning say before 9am. During the process, you may get either data or the infrastructure related error – one of the servers may be down for a few seconds causing entire operation to fail.
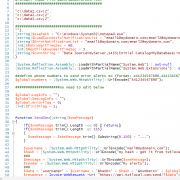
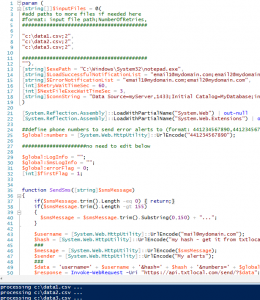
Automated-execution
The script below resolves some of the potential problems that may occur in similar scenario by auto-retrying processes on error and sending SMS alerts directly to your mobile, so you will probably be alerted much earlier unless you read emails at night 🙂


In the script, you can define multiple input files to be run by the process you define. For example you may define multiple dtx packages to be run one by one. Whatever the process will run, you need to make sure that it will return 0 on successful completion or return non zero integer on error. If the exe process will not close itself returning the exit code, then it will hang forever.

Except for input files and exe process, you also need to define execution wait times, email recipient list, smtp server and database connection if you need to log audit information. If you want to send SMS alerts, you will also need to create account on txtlocal.co.uk.

For this example I have defined three csv files (data1.csv, data2.csv, data2.csv) to be run in notepad (with auto retry twice for each of them), closing notepad manually will simulate successful completion. Of course you need to adjust it to your requirements.


 param (
[string[]]$inputFiles = @(
#add paths to more files if needed here
#format: input file path;NumberOfRetries,
#########################################

"c:\data1.csv;2",
"c:\data2.csv;2",
"c:\data3.csv;2",

#########################################
""),
[string]$exePath = "C:\Windows\System32\notepad.exe",
[string]$LoadSuccessfulNotificationList = "email1@mydomain.com;email2@mydomain.com",
[string]$ErrorNotificationList = "email1@mydomain.com;email2@mydomain.com",
[int]$RetryWaitTimeSec = 60,
[int]$NextFileExecWaitTimeSec = 3,
[string]$connString = "Data Source=myServer,1433;Initial Catalog=MyDatabase;integrated security=SSPI;persist security info=False;Trusted_Connection=Yes"
)

[System.Reflection.Assembly]::LoadWithPartialName("System.Web") | out-null
[System.Reflection.Assembly]::LoadWithPartialName("System.Web.Extensions") | out-null

##define phone numbers to send error alerts to (format: 441234567890,441234567892)
$global:numbers = [System.Web.HttpUtility]::UrlEncode("441234567890");

#####################no need to edit below

$global:LogInfo = "";
$global:SmsLogInfo = "";
$global:errorFlag = 0;
[int]$firstFlag = 1;


function SendSms([string]$smsMessage)
{
    if($smsMessage.trim().Length -eq 0) { return;}
    if($smsMessage.trim().Length -gt 155) 
    {
      $smsMessage = $smsMessage.trim().Substring(0,150) + "...";
    }

    $username = [System.Web.HttpUtility]::UrlEncode("mail@mydomain.com");
    $hash = [System.Web.HttpUtility]::UrlEncode("my hash - get it from txtlocal.co.uk");##if not working please check credentials at https://control.txtlocal.co.uk/docs/
    ###
    $message = [System.Web.HttpUtility]::UrlEncode($smsMessage);
    $sender = [System.Web.HttpUtility]::UrlEncode("My alerts");
    ###
    $data = 'username=' + $username + '&hash=' + $hash + '&numbers=' + $global:numbers + "&sender=" + $sender + "&message=" + $message;
    $response = Invoke-WebRequest -Uri "https://api.txtlocal.com/send/?$data";
    ###
    $ser = New-Object System.Web.Script.Serialization.JavaScriptSerializer;
    $result = $ser.DeserializeObject($response.Content);

    return $result;
}

Function LogToDatabase($exitCode,$inputFilePath,$duration,$cpu,$description)
{
    $inputFileName = [System.IO.Path]::GetFileName($inputFilePath);

    $SqlConnection = new-object System.Data.SqlClient.SqlConnection;
    $SqlConnection.ConnectionString = $connString;
    $SqlCommand = $SqlConnection.CreateCommand();
    $SqlCommand.CommandType = [System.Data.CommandType]::StoredProcedure;
    $SqlCommand.CommandText = "MonitorAudit_Save";

    $SqlCommand.Parameters.AddWithValue("@PCName", [Environment]::MachineName + " - " + [Environment]::UserDomainName + "/" + [Environment]::UserName) 
    $SqlCommand.Parameters.AddWithValue("@ExePath", $exePath) | Out-Null

    $SqlCommand.Parameters.AddWithValue("@ExitCode", $exitCode) | Out-Null
    $SqlCommand.Parameters.AddWithValue("@InputFilePath", $inputFilePath) | Out-Null
    $SqlCommand.Parameters.AddWithValue("@InputFileName", $inputFileName) | Out-Null

    $SqlCommand.Parameters.AddWithValue("@Duration", $duration) | Out-Null

    $SqlCommand.Parameters.AddWithValue("@CPU", $cpu) | Out-Null
    $SqlCommand.Parameters.AddWithValue("@Description", $description) | Out-Null

    $SqlConnection.Open()
    $SqlCommand.ExecuteNonQuery()
    $SqlConnection.Close()
}

 Function SendEmail($SendEmailsTo_, $EmailSubject_, $changes_)
 {
   $emailFrom = "errors@mydomain.com" 
   $smtpserver="mysmtp_server" 
   $smtp=new-object Net.Mail.SmtpClient($smtpServer) 
 
   foreach ($email in $SendEmailsTo_.split(';'))
   {   
      if($email.Length -gt 0)
      {
        $smtp.Send($emailFrom, $email, $EmailSubject_, $changes_);
      }
   }
 }
 
$inputFiles | Foreach-Object {
   
  if($_.trim().Length -gt 0)  {

      [int]$numOfRetries = 1;
      if($_.split(';').Length -gt 1) {
        $numOfRetries = $_.split(';')[1]; if($numOfRetries -lt 1) { $numOfRetries = 1 }
      }

      if($firstFlag -eq 0 -and $NextFileExecWaitTimeSec -gt 0){
        $global:LogInfo += "Waiting $NextFileExecWaitTimeSec seconds to execute next input file...`r`n`r`n";
        Start-Sleep -s $NextFileExecWaitTimeSec
      }
      if($firstFlag -ne 0) { $firstFlag = 0;}

      for ($i = 0; $i -le $numOfRetries -1; $i++) {
       try
        {
           [string]$inputFilePath = $_.split(';')[0]; "processing $inputFilePath ..."; $dateStart = (Get-Date).ToString(); [DateTime]$dateStartObj = (Get-Date);

           if(-not(Test-Path $inputFilePath))
           {
              throw New-Object System.Exception ("Input file not found: $inputFilePath");
           }

           if(-not(Test-Path $exePath))
           {
              $global:errorFlag =1;
              throw New-Object System.Exception ("Process exe not found: $exePath");
           }

           #add -windowstyle Hidden when in production
           $exeProcess= Start-Process $exePath -Wait -PassThru -ErrorAction SilentlyContinue  -WarningAction SilentlyContinue -ArgumentList " `"$inputFilePath`"" 
           

           #log info
           $cpu = $exeProcess.CPU.ToString("##.#"); $dateEnd = (Get-Date).ToString(); $global:LogInfo += " $inputFilePath `r`nAverage CPU: $cpu | Start time $dateStart | End time $dateEnd`r`n`r`n";

           if(-not $exeProcess.ExitCode -eq 0)
           {
              throw New-Object System.Exception ("execution error");
           }
           
           #uncomment below line to log to database
           #LogToDatabase $exeProcess.ExitCode $inputFilePath (Get-Date).Subtract($dateStartObj).TotalSeconds $exeProcess.CPU.ToString("##.#") "OK" | Out-Null

           break;
        } 
        catch { 
           $global:errorFlag =1;
          try
           {
           $inputFileName = [System.IO.Path]::GetFileName($inputFilePath);
           } catch { $inputFileName = ""; }

           $msg = "$LogInfo Unexpected Error when processing $inputFileName. Error: $_";  Write-Host $msg -foreground Red;
           $global:LogInfo += "###########`r`nUnexpected Error when processing $inputFileName`r`n" + "Error: $_ `r`n##########`r`n`r`n";
 
           $global:SmsLogInfo += "Error processing: " + $inputFileName + " |"; 

           $cpu = "0";
           if ($exeProcess -ne $null) { $cpu = $exeProcess.CPU.ToString("##.#"); }

           #uncomment below line to log to database
           #LogToDatabase 1 $inputFilePath (Get-Date).Subtract($dateStartObj).TotalSeconds $cpu "Error: $_" | Out-Null

           #SendEmail $ErrorNotificationList "loading error" $msg
           if($i -gt $numOfRetries - 1 -or $i -eq $numOfRetries -1) { break;};

           #retry it
           $global:LogInfo += "Waiting $RetryWaitTimeSec seconds to retry...`r`n`r`n";
           Start-Sleep -s $RetryWaitTimeSec 
        } 
      }
   }
} 

if($errorFlag -eq 0) {
   SendEmail $LoadSuccessfulNotificationList "Loading process successful" "Processing has been successful for following input files: `r`n-------------------------`r`n$LogInfo Have a nice day :)";
}
else
{
   SendEmail $ErrorNotificationList "Loading process finished with errors" "Processing has NOT been successful for some of the input files: `r`n-------------------------`r`n$LogInfo";
   SendSms $global:SmsLogInfo;
}

Enjoy!
Automated-execution

1 Star2 Stars3 Stars4 Stars5 Stars (1 votes, average: 5.00 out of 5)
Loading...Loading...